
Crispy Baked Chicken Cutlets Recipe: Golden & Juicy Every Time
These crispy baked chicken cutlets bring restaurant-quality magic right to your kitchen table.
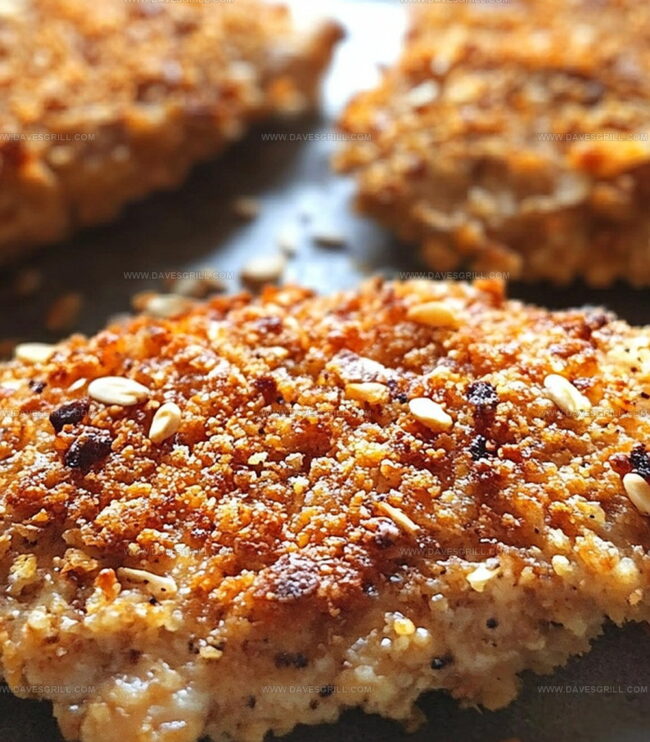
Tender meat with a perfectly golden exterior becomes the star of tonight’s dinner.
Weeknight cooking doesn’t have to feel complicated or boring.
Simple ingredients transform an ordinary protein into something special that everyone will love.
Coating techniques make all the difference between bland and brilliant results.
Lean proteins meet crunchy textures in this foolproof method that guarantees delicious outcomes.
You’ll want to bookmark this recipe for countless future meals.
Why Baked Chicken Cutlets Are Crisp And Easy

Everything Needed For Baked Chicken Cutlets
Main Protein:Breading Ingredients:Binding and Seasoning Ingredients:Cooking Accessories:How To Bake Chicken Cutlets With A Crunch
Step 1: Warm Up the Oven
Crank the oven to a toasty 400F (200C). Grab a baking sheet and line it with parchment paper or aluminum foil. Give it a quick spritz of cooking spray to prevent sticking.
Step 2: Create a Breading Playground
Set up three shallow dishes for a chicken coating adventure:Step 3: Dress Up the Chicken
Take each chicken cutlet on a flavor journey:Press the breadcrumbs gently to create a perfect, crispy armor.
Step 4: Prepare for Baking
Arrange the breaded chicken cutlets on the prepared baking sheet. Give the tops a light mist of cooking spray to help them turn golden and crisp.
Step 5: Bake to Perfection
Slide the baking sheet into the hot oven. Bake for 20-25 minutes, giving the cutlets a flip midway through. They’re ready when they’re a beautiful golden brown and reach an internal temperature of 165F (74C).
Serve hot and enjoy your crispy, juicy chicken cutlets!
Tips For Better Baked Chicken Cutlets
How To Store Baked Chicken Cutlets Smartly
Great Sides For Baked Chicken Cutlets
Ways To Mix Up Baked Chicken Cutlets
Baked Chicken Cutlets Questions Answered
The breading stations ensure each cutlet gets a perfect, crispy coating. Flour helps the egg stick, eggs create a binding layer, and breadcrumbs provide that delicious crunch you love.
Absolutely! Panko breadcrumbs work great for extra crispiness, and you can mix in Italian-style or seasoned breadcrumbs for more flavor. Just keep the same basic breading technique.
Always check the internal temperature with a meat thermometer. When it hits 165F (74C), your chicken is safe to eat and perfectly juicy. No more dry chicken!
While not mandatory, cooking spray helps the breadcrumbs turn golden and crispy. If you skip it, your cutlets might look pale and less appetizing. A light spray makes a big difference in texture and appearance.
Print
Baked Chicken Cutlets Recipe
- Total Time: 40 minutes
- Yield: 4 1x
Description
Golden and crispy baked chicken cutlets bring Italian-inspired comfort straight to dinner tables. Crunchy panko breadcrumbs and savory herbs create an irresistible coating you’ll crave again and again.
Ingredients
Meat:
- 4 boneless, skinless chicken breasts (pounded to ½-inch/1.27 cm thick)
Dry Ingredients:
- 1 cup (120 grams) all-purpose flour
- 1 ½ cups (135 grams) breadcrumbs (plain or Italian-style)
- ½ cup (50 grams) grated Parmesan cheese
- 1 teaspoon garlic powder
- 1 teaspoon onion powder
- 1 teaspoon dried Italian seasoning
- ½ teaspoon salt
- ½ teaspoon black pepper
Wet Ingredients:
- 2 large eggs
- 1 tablespoon water
- Cooking spray or olive oil spray
Instructions
- Meticulously prepare your culinary workspace by heating the oven to a precise 400F (200C), ensuring optimal cooking conditions.
- Create a strategic breading assembly line using three separate shallow containers: one dedicated to flour, another for an egg and water emulsion, and the final station combining seasoned breadcrumbs with grated Parmesan.
- Transform each chicken cutlet into a crispy masterpiece by methodically coating it first in flour, ensuring a delicate powdery layer that will help subsequent layers adhere perfectly.
- Immerse the flour-dusted cutlet into the egg mixture, allowing excess liquid to drip away, creating a smooth, adhesive surface for the final breading stage.
- Generously encase the chicken in the seasoned breadcrumb mixture, applying gentle pressure to guarantee a uniform, crunchy exterior that will crisp beautifully during baking.
- Arrange the breaded cutlets on a parchment-lined baking sheet, leaving sufficient space between each piece to promote even heat circulation and optimal browning.
- Enhance the potential for a golden crust by lightly misting the cutlets with cooking spray, which will promote a crisp, appetizing finish.
- Position the baking sheet in the preheated oven and allow the cutlets to transform, monitoring their progress and rotating halfway through the cooking process.
- Verify doneness by confirming the internal temperature reaches 165F (74C), ensuring both safety and succulent texture, which typically requires 20-25 minutes of baking time.
Notes
- Opt for thin, evenly-sized chicken cutlets to ensure consistent cooking and crispy breading throughout.
- Gently press breadcrumbs onto the chicken to create a thicker, more adherent coating that won’t fall off during baking.
- Pat chicken dry with paper towels before breading to help the flour and breadcrumbs stick better and achieve a crispier texture.
- For a gluten-free version, swap wheat flour with almond flour or cornstarch, and use gluten-free breadcrumbs or crushed rice cereal.
- Prep Time: 15 minutes
- Cook Time: 25 minutes
- Category: Dinner, Lunch
- Method: Baking
- Cuisine: American
Nutrition
- Serving Size: 4
- Calories: 380
- Sugar: 1 g
- Sodium: 500 mg
- Fat: 10 g
- Saturated Fat: 3 g
- Unsaturated Fat: 4 g
- Trans Fat: 0 g
- Carbohydrates: 36 g
- Fiber: 2 g
- Protein: 34 g
- Cholesterol: 120 mg
Dave Mitchell
Founder & Chief Recipe Developer
Expertise
Education
Asheville-Buncombe Technical Community College
Associate of Applied Science in Culinary Arts
Focus: Comprehensive training in culinary techniques, kitchen management, and menu planning, with a special emphasis on grilling and outdoor cooking.
Dave Mitchell is the heart behind Daves Grill, a cook, writer, and lover of all things grilled. He studied Culinary Arts at Asheville-Buncombe Technical Community College and spent years cooking, testing, and sharing recipes that actually work.
Dave started Daves Grill to keep things simple: one great recipe at a time. His food is bold, easy to follow, and made for real people with regular kitchens. From juicy steaks to quick sides, Dave’s recipes bring the heat without the hassle.