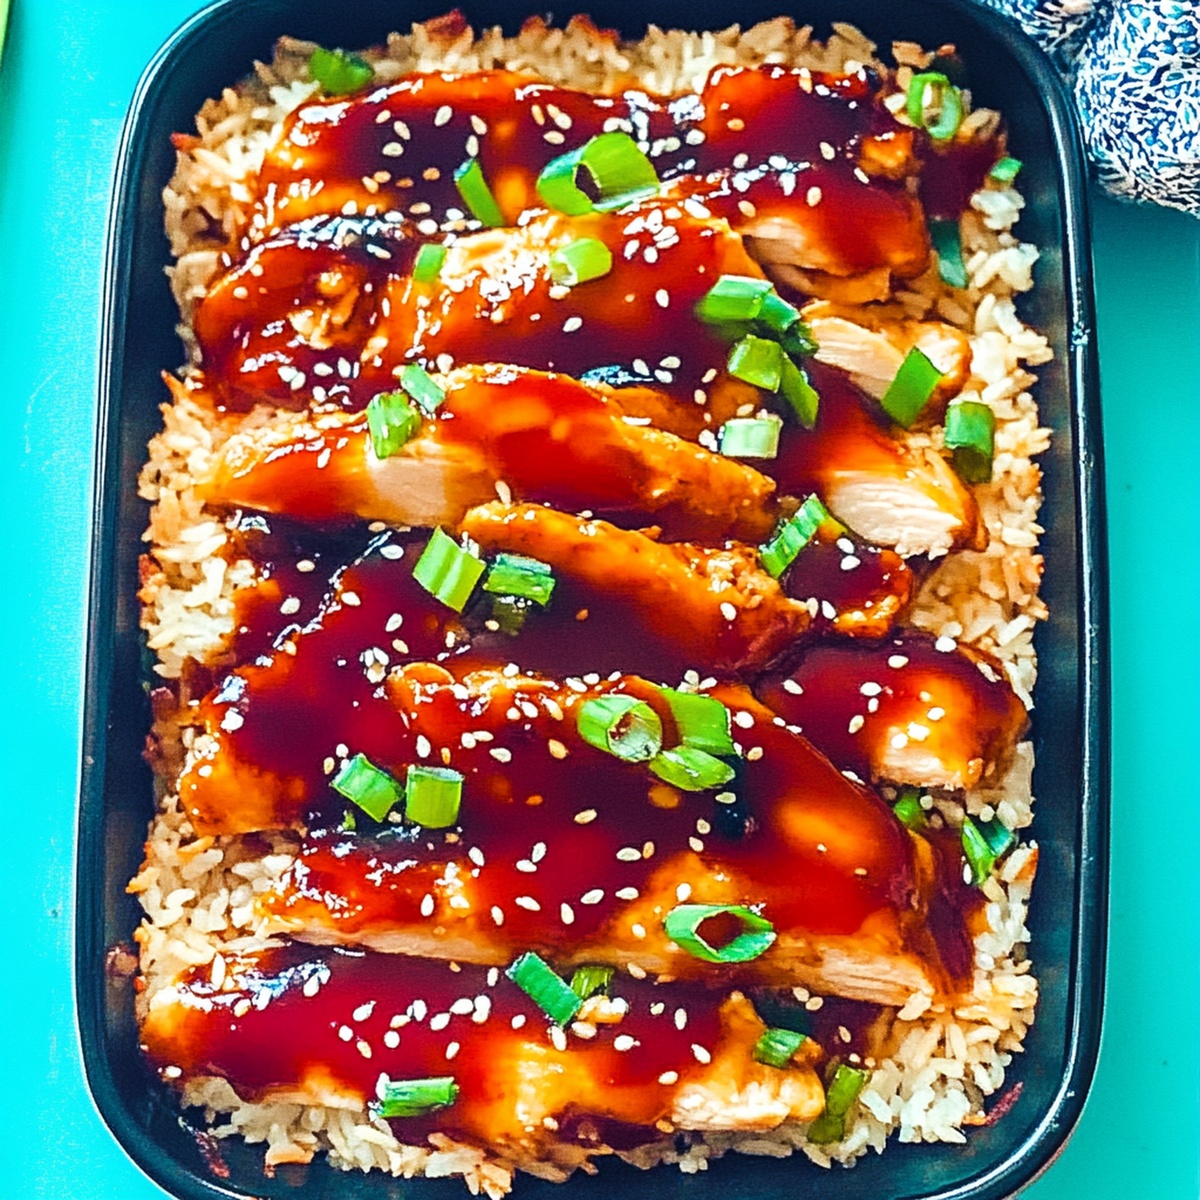
Irresistible Baked Teriyaki Chicken and Rice Recipe for Dinner
Teriyaki chicken with its delightful Asian-inspired blend creates magic on dinner plates.
The robust flavors dance through each succulent bite, promising a memorable meal.
Weeknight cooking demands simple yet exceptional dishes that satisfy deeply.
Tender chicken pieces marinated in a rich, glossy sauce bring comfort to your table.
Home chefs appreciate recipes that deliver maximum taste with minimal effort.
Vibrant ingredients combine effortlessly, turning an ordinary evening into a culinary celebration.
This recipe guarantees a delicious journey that will impress everyone gathered around your dining space.
Why Baked Teriyaki Chicken And Rice Works
What Goes In Baked Teriyaki Chicken And Rice
Protein:Sauce Components:Base and Vegetables:Additional Ingredients:How To Make Baked Teriyaki Chicken And Rice
Step 1: Prepare the Oven
Heat the oven to 375°F (190°C). Lightly coat a 9×13-inch baking dish with cooking spray or butter to prevent sticking.
Step 2: Create Tangy Teriyaki Sauce
In a small saucepan, combine the following ingredients:Bring the mixture to a gentle simmer over medium heat.
Step 3: Thicken the Sauce
In a separate small bowl, whisk together:Pour the cornstarch mixture into the simmering sauce. Continue cooking, stirring constantly, until the sauce becomes glossy and thick. Remove from heat and set aside.
Step 4: Layer the Rice Foundation
Spread uncooked rice evenly across the bottom of the prepared baking dish, creating a uniform base for the casserole.
Step 5: Add Vegetable Layer
Sprinkle frozen mixed vegetables over the rice. Season with:Pour chicken broth over the rice and vegetables to help cook the rice.
Step 6: Position the Chicken
Carefully arrange chicken pieces on top of the rice and vegetable mixture. Pour about three-quarters of the teriyaki sauce over the chicken, ensuring good coverage.
Step 7: Bake to Perfection
Cover the baking dish tightly with aluminum foil. Bake for 45-50 minutes, or until:Step 8: Create Golden Crispy Top
Remove the foil and switch the oven to broil. Broil for 2-3 minutes to create a beautiful golden-brown surface on the chicken.
Step 9: Final Touch and Serve
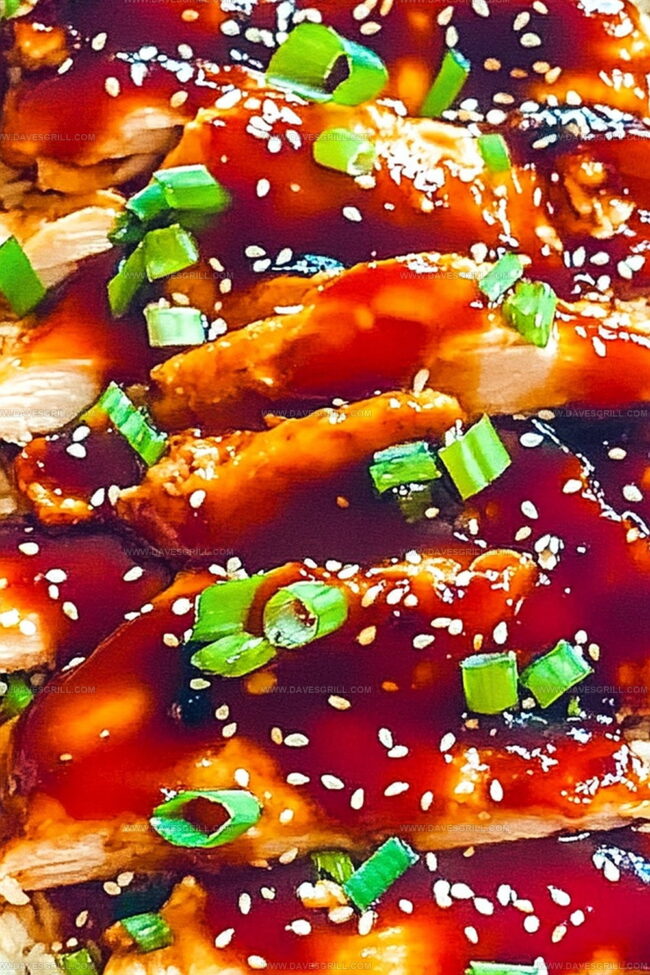
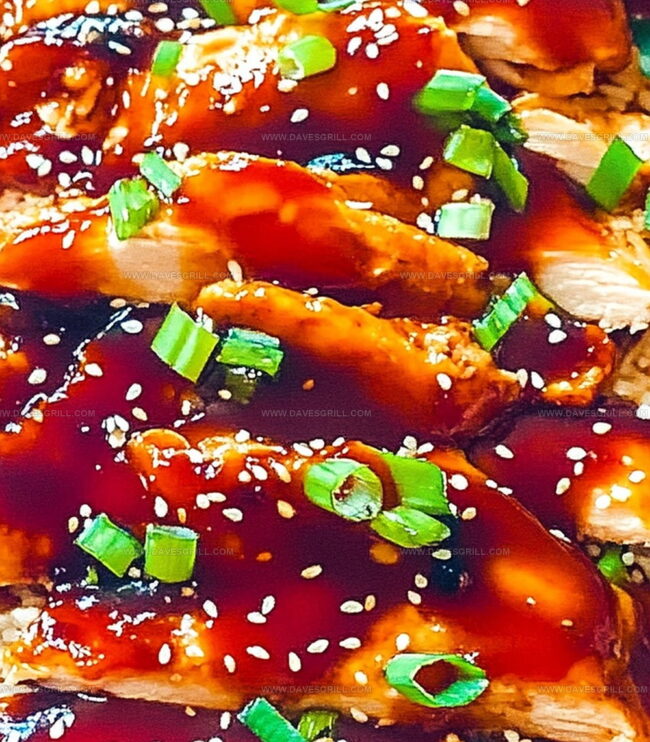
Drizzle the remaining teriyaki sauce over the casserole. Garnish with:Serve hot and enjoy your delicious meal!
Tips To Improve Baked Teriyaki Chicken And Rice
How To Keep Baked Teriyaki Chicken And Rice Fresh
What Tastes Good With Baked Teriyaki Chicken And Rice
Easy Changes For Baked Teriyaki Chicken And Rice
Baked Teriyaki Chicken And Rice Q&A
The homemade teriyaki sauce is a perfect blend of soy sauce, honey, rice vinegar, sesame oil, garlic, and ginger, creating a rich, authentic flavor that’s far better than store-bought versions.
While the recipe works best with white rice, you can substitute with brown rice, but you’ll need to adjust the cooking liquid and time accordingly to ensure the rice cooks properly.
Absolutely! This one-pan chicken and rice bake is perfect for meal prepping. It holds up well in the refrigerator and can be easily reheated for quick lunches or dinners during the week.
The combination of covering the dish with foil and using the teriyaki sauce helps keep the chicken moist. Just be sure to check the internal temperature reaches 165F to ensure it’s fully cooked without overcooking.
Print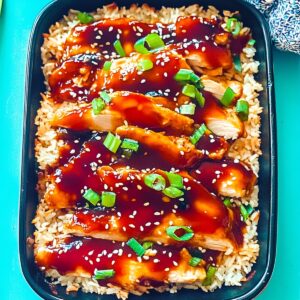
Baked Teriyaki Chicken And Rice Recipe
- Total Time: 1 hour 5 minutes
- Yield: 4 1x
Description
Sizzling teriyaki chicken and rice bring Japanese-inspired comfort to dinner tables with bold, umami-rich flavors. This simple yet elegant one-pan meal offers home cooks a quick gateway to delicious international cuisine you’ll crave again and again.
Ingredients
Protein:
- 1.5 pounds (680 grams) boneless, skinless chicken thighs or breasts
Sauce and Seasonings:
- 0.5 cup (120 milliliters) low-sodium soy sauce
- 0.25 cup (60 milliliters) honey or brown sugar
- 2 tablespoons (30 milliliters) rice vinegar
- 2 tablespoons (30 milliliters) water
- 1 tablespoon (15 milliliters) cornstarch
- 2 teaspoons (10 milliliters) sesame oil
- 2 cloves garlic, minced
- 1 teaspoon (5 milliliters) fresh ginger, grated
- 0.5 teaspoon (2.5 milliliters) salt
- 0.25 teaspoon (1.25 milliliters) black pepper
Base and Vegetables:
- 1 cup (240 milliliters) long-grain white rice, uncooked
- 2 cups (480 milliliters) low-sodium chicken broth
- 1 cup (240 milliliters) frozen peas and carrots
Garnish (Optional):
- 2 green onions, sliced
- Sesame seeds
Instructions
- Prepare a 9×13-inch baking dish by lightly coating with cooking spray and set the oven temperature to 375F (190C).
- Create the teriyaki sauce by combining soy sauce, honey, rice vinegar, sesame oil, minced garlic, and grated ginger in a saucepan. Heat until the mixture begins to simmer.
- Whisk water and cornstarch together, then incorporate into the simmering sauce. Continue cooking until the sauce thickens and becomes glossy, approximately 12 minutes. Remove from heat and set aside.
- Distribute uncooked rice evenly across the bottom of the prepared baking dish, ensuring a uniform layer.
- Scatter frozen vegetables over the rice, then carefully pour chicken broth around the surface. Season with a light sprinkle of salt and pepper.
- Gently place chicken pieces atop the rice and vegetable mixture, making sure they are evenly distributed.
- Pour approximately three-quarters of the prepared teriyaki sauce over the chicken and rice, reserving the remaining sauce for later serving.
- Securely cover the baking dish with aluminum foil, creating a tight seal to trap moisture during cooking.
- Bake in the preheated oven for 45-50 minutes, monitoring until the rice becomes tender and the chicken reaches an internal temperature of 165F.
- Optional: Remove the foil and broil for 2-3 minutes to achieve a golden-brown chicken surface.
- Before serving, drizzle the reserved teriyaki sauce over the dish and garnish with chopped green onions and sesame seeds.
Notes
- Customize the teriyaki sauce by adjusting honey or brown sugar levels for a sweeter or less sweet profile.
- Swap chicken breasts with thighs for more moisture and richer flavor, perfect for those preferring juicier meat.
- Use low-sodium soy sauce and reduced-sodium chicken broth to control salt intake for health-conscious eaters.
- For gluten-free version, replace regular soy sauce with tamari and ensure cornstarch is certified gluten-free.
- Prep Time: 15 minutes
- Cook Time: 50 minutes
- Category: Dinner
- Method: Baking
- Cuisine: Japanese
Nutrition
- Serving Size: 4
- Calories: 400
- Sugar: 10 g
- Sodium: 600 mg
- Fat: 8 g
- Saturated Fat: 1.5 g
- Unsaturated Fat: 6 g
- Trans Fat: 0 g
- Carbohydrates: 50 g
- Fiber: 2 g
- Protein: 30 g
- Cholesterol: 90 mg
Dave Mitchell
Founder & Chief Recipe Developer
Expertise
Education
Asheville-Buncombe Technical Community College
Associate of Applied Science in Culinary Arts
Focus: Comprehensive training in culinary techniques, kitchen management, and menu planning, with a special emphasis on grilling and outdoor cooking.
Dave Mitchell is the heart behind Daves Grill, a cook, writer, and lover of all things grilled. He studied Culinary Arts at Asheville-Buncombe Technical Community College and spent years cooking, testing, and sharing recipes that actually work.
Dave started Daves Grill to keep things simple: one great recipe at a time. His food is bold, easy to follow, and made for real people with regular kitchens. From juicy steaks to quick sides, Dave’s recipes bring the heat without the hassle.