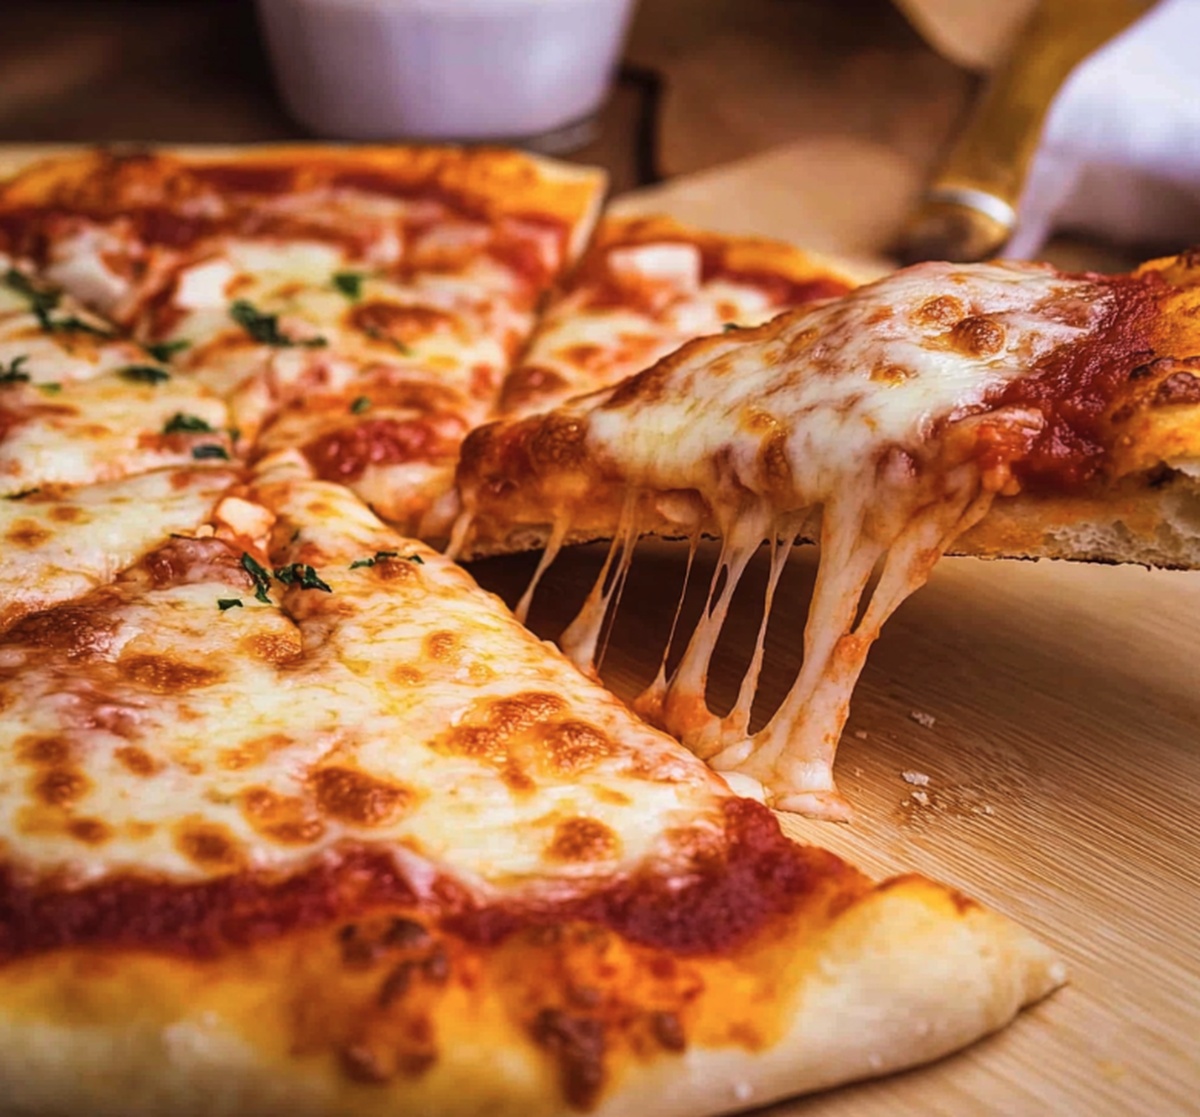
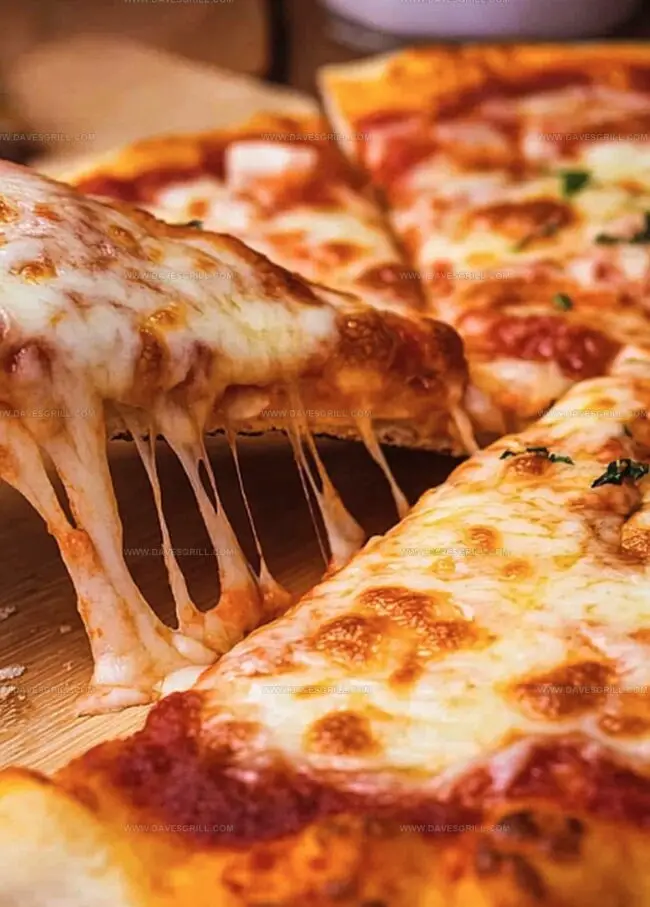
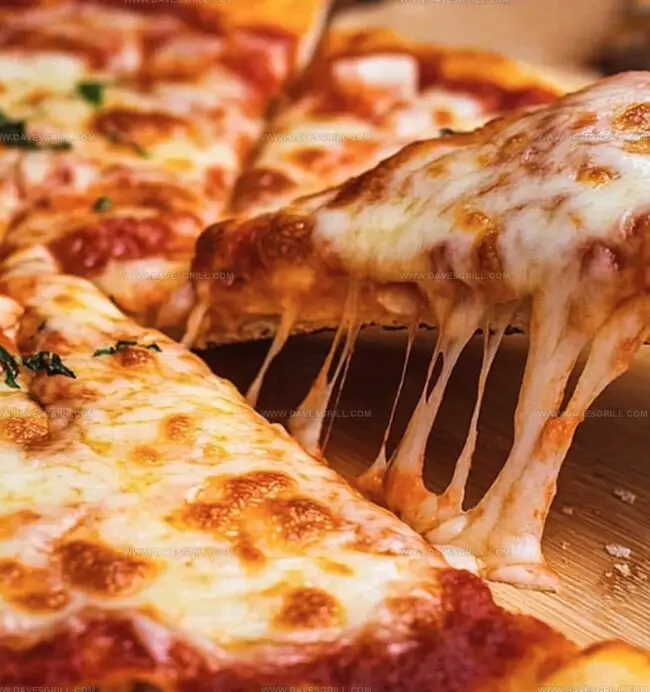
Pizza nights just got a whole new dimension with this incredible blackstone pizza creation that will revolutionize your outdoor cooking experience.
Crisp edges and melted cheese await you on the sizzling griddle surface.
Metallic heat conducts perfectly across the smooth cooking platform, ensuring every slice emerges with restaurant-quality results.
Professional chefs and home cooks alike understand the magic of precise temperature control.
The robust blackstone griddle provides unparalleled versatility for crafting delectable pizzas with minimal effort.
Each ingredient sears beautifully, developing deep flavor profiles that traditional ovens cannot match.
You will absolutely love how quickly this method produces a stunning pizza that looks and tastes professional.
Grab your favorite toppings and let’s make pizza magic happen right in your backyard.
What Makes Blackstone Pizza A Favorite
Quick Griddle Magic: Transform your pizza-making experience with the Blackstone, turning a simple meal into a fast, exciting culinary adventure that takes just minutes from start to finish.
Customize Your Flavor Playground: Create personalized pizzas with endless topping combinations, letting everyone at the table design their dream slice without complicated preparation or special skills.
No-Fuss Outdoor Cooking: Enjoy restaurant-quality pizza in your backyard or campsite, using a versatile griddle that delivers crispy crusts and perfectly melted cheese with minimal cleanup and maximum convenience.
Beginner-Friendly Technique: Master pizza-making with an approachable method that requires basic ingredients and simple steps, making it perfect for home cooks of all experience levels who want delicious results without professional training.
Blackstone Pizza Ingredient Breakdown
Pizza Base:
Pizza Dough: Foundational layer for the pizza, soft and pliable for easy stretching.
Flour: Helps prevent sticking when stretching the dough, provides smooth surface.
Cooking Oils and Fats:
Olive Oil: Lightly coats Blackstone griddle for preventing sticking and adding subtle flavor.
Cheese and Toppings:
Mozzarella Cheese: Classic melty cheese that provides creamy texture and traditional pizza taste.
Parmesan Cheese: Adds sharp, salty finish to the pizza, sprinkled on top for extra flavor.
Fresh Basil: Optional garnish that brings fresh herbal notes to the pizza.
Sauce and Seasonings:
Pizza Sauce: Provides moisture and classic tomato base for the pizza.
Italian Seasoning: Blend of dried herbs that adds aromatic complexity to the dish.
Chili Flakes: Optional spicy topping for those who enjoy heat.
Blackstone Pizza Cooking Instructions
Step 1: Prepare the Cooking Surface
Fire up your Blackstone griddle to a gentle medium-low warmth. Glide a thin layer of cooking oil across the surface, creating a smooth, non-stick canvas for your pizza masterpiece.
Step 2: Craft the Perfect Pizza Base
Dust your workspace with a light sprinkle of flour. Gently coax the pizza dough into a beautiful circular or rectangular shape. Use your hands to stretch and shape, creating a thin, even canvas that promises a crispy delight.
Step 3: Kiss the Griddle
Carefully transfer your dough onto the sizzling griddle. Watch with excitement as the bottom begins to transform, developing golden-brown spots and delightful bubbles. This should take about 2-3 minutes.
Step 4: Flip and Dress Your Pizza
With a swift motion, flip the partially cooked crust. Immediately lavish the cooked side with a vibrant layer of sauce. Then add your toppings:
Shredded mozzarella cheese
Your favorite pizza toppings
Fresh herbs
Sliced vegetables
Cooked meats
Step 5: Create a Melty Cheese Dome
Lower the heat to a gentle whisper. Create a cozy environment by covering the pizza with a large dome lid or metal bowl. Let the magic happen for 4-6 minutes, allowing the cheese to transform into a luscious, melted blanket.
Step 6: Final Flourish and Serve
Sprinkle with:
Grated Parmesan
Italian seasoning
Fresh basil leaves
Optional chili flakes
Slice your creation into wedges and serve immediately. Enjoy the crispy, cheesy masterpiece hot off the Blackstone griddle!
Tips That Help With Blackstone Pizza
Prep Surface Perfectly: Clean and lightly oil the Blackstone griddle to prevent sticking and create a smooth cooking surface for your pizza dough.
Dough Stretching Secret: Use room temperature dough and gently stretch it by hand to avoid tearing, ensuring an even, thin crust with a rustic homemade feel.
Temperature Control Trick: Maintain medium-low heat to achieve a crispy bottom and perfectly melted cheese without burning the crust or toppings.
Topping Balance Technique: Apply a thin layer of sauce and sprinkle cheese evenly, leaving a small border for a crispy edge and preventing soggy pizza.
Customize with Confidence: Experiment with different cheese blends, seasonal toppings, or dietary alternatives like gluten-free dough or vegan cheese for personalized pizza enjoyment.
How To Store Blackstone Pizza Properly
Refrigerate leftover pizza slices in an airtight container for up to 3-4 days.
Wrap individual slices in aluminum foil to prevent moisture and maintain crispness.
Reheat pizza on a skillet or griddle for the best texture, avoiding microwave which can make the crust soggy.
Alternatively, place cold slices in a preheated oven at 375°F for 5-7 minutes to restore original crunchiness.
Avoid stacking slices directly on top of each other when storing to prevent condensation and potential sogginess.
For longer storage, freeze pizza slices in a freezer-safe container for up to 2 months, separating layers with parchment paper to prevent sticking.
What To Eat With Blackstone Pizza
Savor Wine Companions: Pair this crispy Blackstone pizza with a light, acidic red like Chianti or a zesty Pinot Noir to cut through the rich cheese and complement the tomato sauce.
Elevate with Refreshing Drinks: Enjoy a cold craft beer such as a hoppy IPA or a crisp pilsner that balances the pizza’s robust flavors and cleanses the palate between bites.
Complement with Fresh Sides: Serve alongside a bright arugula salad with lemon vinaigrette or a simple caprese salad to add freshness and balance the pizza’s hearty profile.
Enhance with Herbal Garnishes: Top with fresh basil leaves or sprinkle with oregano to boost the pizza’s aromatic qualities and add a layer of garden-fresh flavor.
Blackstone Pizza Recipe Ideas
Spicy Pepperoni Paradise: Add sliced pepperoni, jalapeños, and red pepper flakes for a fiery kick that transforms the classic pizza into a zesty meal.
Mediterranean Veggie Mix: Top with crumbled feta, sliced olives, artichoke hearts, and fresh spinach to create a Mediterranean-inspired griddle pizza bursting with Mediterranean flavors.
Barbecue Chicken Crunch: Replace traditional sauce with tangy barbecue sauce, add shredded chicken, red onions, and sprinkle with cilantro for a smoky, savory experience.
Breakfast Pizza Fusion: Crack eggs directly onto the pizza, add crispy bacon bits, diced ham, and a sprinkle of cheddar cheese for a morning-inspired griddle pizza that breaks traditional breakfast boundaries.
Blackstone Pizza Questions Answered
What makes a Blackstone pizza different from a traditional oven pizza?
Blackstone griddle pizzas cook faster and get an incredibly crispy bottom crust with direct heat contact, creating a restaurant-style result right at home with more control over the cooking process.
Do I need special equipment to make this pizza?
You’ll want a Blackstone griddle, a metal dome lid or large metal bowl to help melt the cheese, and basic pizza ingredients. A pizza spatula can help with flipping, but a regular spatula works too.
Can I use premade pizza dough for this recipe?
Absolutely! Store-bought pizza dough works perfectly. Just ensure it’s at room temperature and lightly floured before stretching to prevent sticking on the griddle.
How do I prevent the pizza dough from sticking to the Blackstone surface?
Lightly oil the griddle surface before placing the dough, and make sure your dough is stretched on a floured surface. A well-seasoned griddle also helps prevent sticking.
Asheville-Buncombe Technical Community College Associate of Applied Science in Culinary Arts Focus: Comprehensive training in culinary techniques, kitchen management, and menu planning, with a special emphasis on grilling and outdoor cooking.
Dave Mitchell is the heart behind Daves Grill, a cook, writer, and lover of all things grilled. He studied Culinary Arts at Asheville-Buncombe Technical Community College and spent years cooking, testing, and sharing recipes that actually work.
Dave started Daves Grill to keep things simple: one great recipe at a time. His food is bold, easy to follow, and made for real people with regular kitchens. From juicy steaks to quick sides, Dave’s recipes bring the heat without the hassle.
Dave Mitchell
Founder & Chief Recipe Developer
Expertise
Education
Asheville-Buncombe Technical Community College
Associate of Applied Science in Culinary Arts
Focus: Comprehensive training in culinary techniques, kitchen management, and menu planning, with a special emphasis on grilling and outdoor cooking.
Dave Mitchell is the heart behind Daves Grill, a cook, writer, and lover of all things grilled. He studied Culinary Arts at Asheville-Buncombe Technical Community College and spent years cooking, testing, and sharing recipes that actually work.
Dave started Daves Grill to keep things simple: one great recipe at a time. His food is bold, easy to follow, and made for real people with regular kitchens. From juicy steaks to quick sides, Dave’s recipes bring the heat without the hassle.