
Heavenly Cheesy Pepperoni Pizza Bombs Recipe for Pizza Night
Bite-sized cheesy pepperoni pizza bombs will revolutionize your snack game in mere minutes.
These compact flavor explosions pack serious punch with minimal effort.
My kitchen experiments always lead to unexpected delights like these irresistible little morsels.
Small packages often deliver maximum satisfaction, especially when melted cheese and spicy pepperoni are involved.
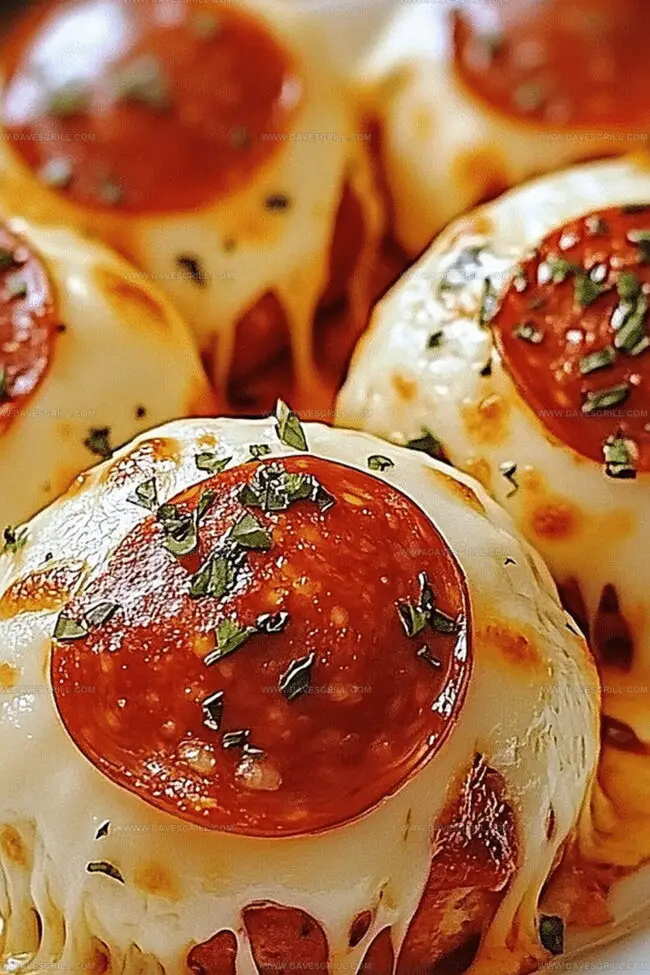
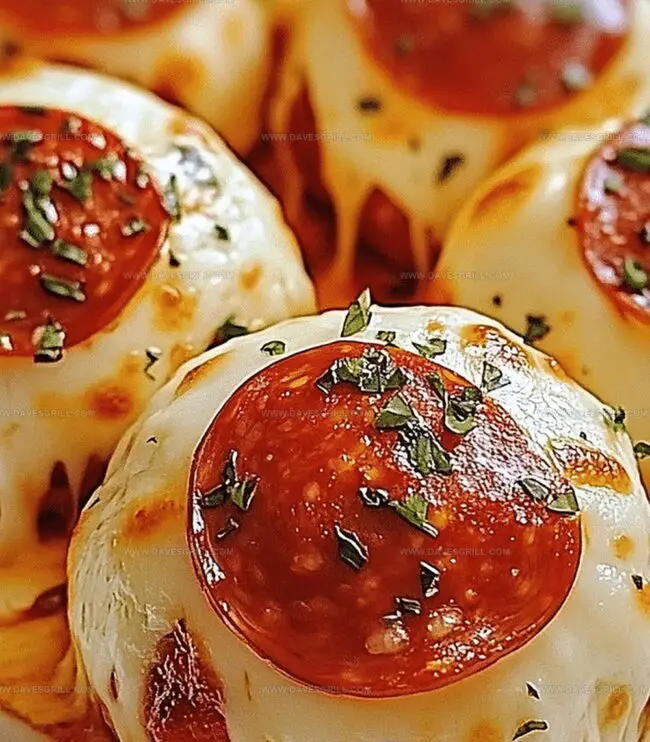
Each crispy exterior gives way to a molten center that feels like a delicious surprise.
Crisp, golden edges promise a satisfying crunch that makes everyone’s taste buds dance.
Whip these up and watch people scramble for seconds before the plate even reaches the table.
Why Pepperoni Pizza Bombs Are a Party Hit
All You Need to Make Pizza Bombs at Home
Main Ingredients:
Dough Ingredients:- Refrigerated Biscuits: Soft, flaky base that creates a quick and easy wrapper for the pizza bombs. Pre-made dough saves time and ensures consistent texture.
Cheese Ingredients:- Mozzarella Cheese, Parmesan Cheese: Creamy, melty filling that provides rich flavor and gooey texture. Shredded or stick cheese work well.
Meat Ingredients:- Pepperoni Slices: Classic pizza topping that adds spicy, savory flavor and traditional pizza experience.
Sauce and Seasoning Ingredients:
Sauce Ingredients:- Marinara Sauce: Tangy tomato base that adds classic pizza flavor and moisture to the filling.
Seasoning Ingredients:- Garlic Powder, Italian Seasoning: Aromatic blend that enhances overall pizza flavor profile. Herbs and spices provide depth and authenticity.
Finishing Ingredients:
Topping Ingredients:- Butter, Basil or Parsley: Melted butter creates golden, crispy exterior. Fresh herbs add brightness and visual appeal.
How to Wrap and Bake Pizza Bombs
Step 1: Warm Up the Oven
Crank the oven to 375F (190C). Grab a baking sheet and line it with parchment paper or give it a quick spray of cooking oil.
Step 2: Divide the Dough
Take your biscuit package and split each biscuit in half. You’ll end up with 16 tasty little pieces ready for filling.
Step 3: Stuff with Deliciousness
For each dough piece:Step 4: Close Up the Flavor Pockets
Carefully wrap the edges of each dough piece around the filling. Pinch the sides together firmly to create a sealed ball. Double-check there are no openings where cheese might escape. Place each bomb with the sealed side facing down on the baking sheet.
Step 5: Add Flavor Boost
Mix melted butter with:Brush this magical mixture over the top of each pizza bomb. Dust with Parmesan cheese for an extra flavor kick.
Step 6: Bake to Golden Perfection
Slide the baking sheet into the oven. Cook for 12-15 minutes until the bombs turn a gorgeous golden brown and the cheese inside is melted and gooey.
Step 7: Serve and Enjoy
Pull the pizza bombs out of the oven and let them cool slightly. Sprinkle with fresh chopped basil or parsley if you’re feeling fancy. Serve with extra marinara sauce for dipping and watch everyone’s eyes light up!
Tips for Outside, Melty Inside
Storage and Reheat Tricks for Pizza Bombs
Great Sides to Serve With Pizza Bombs
Tasty Pizza Bomb Variations to Try
Print
Cheesy Pepperoni Pizza Bombs Recipe
- Total Time: 25 minutes
- Yield: 8 1x
Description
Signature cheesy pepperoni pizza bombs deliver explosive flavor in compact, handheld bites perfect for snacking or party appetizers. Crispy dough pockets packed with melted cheese and zesty pepperoni promise an irresistible culinary experience you won’t be able to resist.
Ingredients
Main Ingredients:
- 1 can (16 ounces/454 grams) refrigerated biscuit dough (8 biscuits)
- 1 cup shredded mozzarella cheese (or cheese sticks cut into small pieces)
- 24 slices pepperoni (about 3 slices per bomb)
Sauce and Seasoning:
- ½ cup marinara or pizza sauce, plus more for dipping
- 2 tablespoons grated Parmesan cheese
Finishing Ingredients:
- 2 tablespoons butter, melted
- 1 teaspoon garlic powder
- 1 teaspoon Italian seasoning
- Fresh basil or parsley, chopped (for garnish, optional)
Instructions
- Prepare the workspace by setting the oven temperature to 375F (190C) and lining a baking sheet with parchment paper or applying a light grease coating.
- Divide the biscuit dough into 16 equal portions by carefully separating and halving each biscuit piece.
- Gently flatten each dough section using fingertips, creating a small circular base for filling.
- Create flavor layers by placing a dollop of marinara sauce at the center of each dough circle, then strategically arrange pepperoni slices and sprinkle mozzarella cheese.
- Transform each filled dough piece into a compact bundle by carefully folding and pinching the edges, ensuring a complete seal that prevents cheese from escaping during baking.
- Position the sealed pizza bombs seam-side down on the prepared baking sheet, maintaining equal spacing between each bundle.
- Craft a savory coating by combining melted butter with garlic powder and Italian seasoning, then generously brush the mixture over each bomb’s surface.
- Enhance the flavor profile by sprinkling Parmesan cheese across the top of each pizza bomb.
- Slide the baking sheet into the preheated oven and bake for 12-15 minutes until the bombs achieve a golden-brown exterior and the cheese melts internally.
- After removing from the oven, allow the pizza bombs to cool briefly, then optionally garnish with fresh chopped basil or parsley.
- Serve immediately alongside additional marinara or pizza sauce for dipping, creating an interactive and delicious eating experience.
Notes
- Seal bombs meticulously by pinching edges tightly to prevent cheese leakage during baking, ensuring a perfect pocket of melted goodness.
- Experiment with alternative fillings like vegetarian pepperoni, BBQ chicken, or buffalo chicken to accommodate different dietary preferences and taste buds.
- Use pre-shredded mozzarella cheese or cut cheese sticks for consistent melting and easier preparation, saving time in the kitchen.
- Freeze unbaked pizza bombs for quick future meals by placing them on a baking sheet, freezing until solid, then transferring to a freezer bag for convenient storage up to 3 months.
- Prep Time: 10 minutes
- Cook Time: 15 minutes
- Category: Snacks, Appetizer, Dinner
- Method: Baking
- Cuisine: Italian
Nutrition
- Serving Size: 8
- Calories: 250
- Sugar: 2 g
- Sodium: 600 mg
- Fat: 14 g
- Saturated Fat: 7 g
- Unsaturated Fat: 5 g
- Trans Fat: 0 g
- Carbohydrates: 24 g
- Fiber: 1 g
- Protein: 10 g
- Cholesterol: 30 mg
Dave Mitchell
Founder & Chief Recipe Developer
Expertise
Education
Asheville-Buncombe Technical Community College
Associate of Applied Science in Culinary Arts
Focus: Comprehensive training in culinary techniques, kitchen management, and menu planning, with a special emphasis on grilling and outdoor cooking.
Dave Mitchell is the heart behind Daves Grill, a cook, writer, and lover of all things grilled. He studied Culinary Arts at Asheville-Buncombe Technical Community College and spent years cooking, testing, and sharing recipes that actually work.
Dave started Daves Grill to keep things simple: one great recipe at a time. His food is bold, easy to follow, and made for real people with regular kitchens. From juicy steaks to quick sides, Dave’s recipes bring the heat without the hassle.