Irresistibly Crunchy Cheesy Taco Sticks Recipe Everyone Loves
Crispy and melted cheese transforms ordinary taco sticks into a mouthwatering snack that packs incredible flavor.
Our kitchen experiment turned into a delightful surprise when we first crafted these irresistible bites.
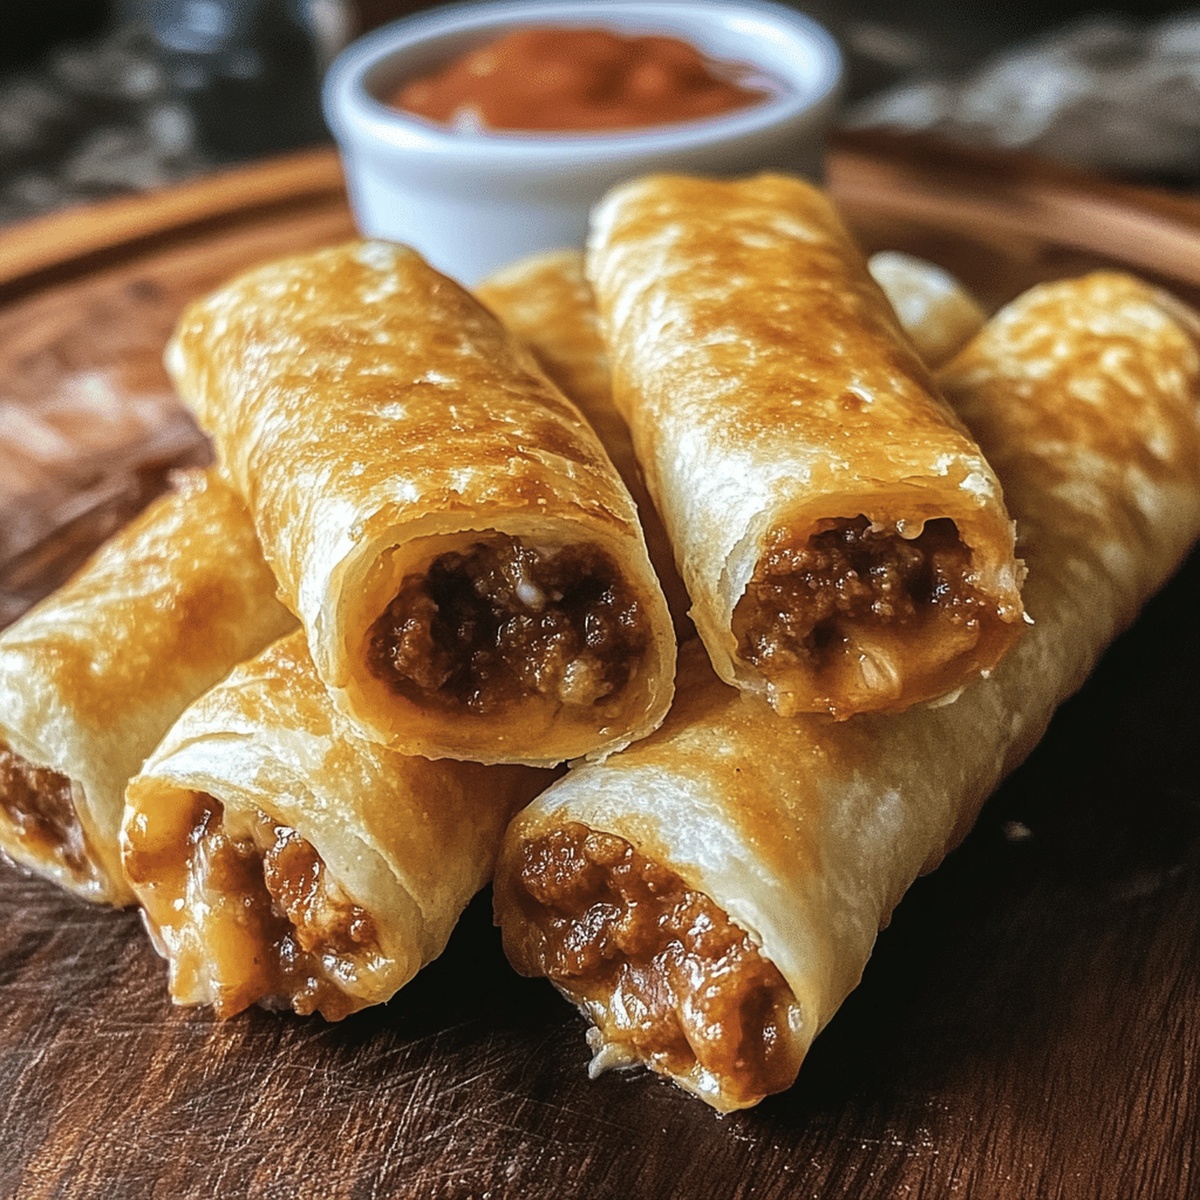
Warm tortillas wrapped around seasoned meat create a perfect handheld treat everyone will devour.
Simple ingredients come together quickly, making this recipe ideal for spontaneous gatherings or lazy weekend munching.
Spices dance through each bite, complementing the gooey cheese and tender filling.
We bet you’ll want to make a double batch because these will disappear faster than you can plate them.
The combination of crunchy exterior and soft interior guarantees these sticks will become your new favorite appetizer.
Reasons to Love Cheesy Taco Sticks
Ingredients Breakdown for Cheesy Taco Sticks
Main Ingredients:Seasoning and Spices:Finishing and Optional Ingredients:How to Make Cheesy Taco Sticks from Scratch
Step 1: Prepare Oven and Baking Surface
Crank up your oven to a toasty 375°F (190°C). Grab a baking sheet and either line it with parchment paper or give it a light coating of cooking spray to prevent sticking.
Step 2: Mix Flavor-Packed Filling
In a mixing bowl, combine:Mix everything until the ingredients are thoroughly blended and the flavors dance together.
Step 3: Roll Out Dough
Take your pizza dough and roll it out on a clean surface into a large rectangular shape. Aim for a thin, even layer that will make perfect crispy sticks.
Step 4: Layer Tasty Ingredients
Spread the prepared beef mixture evenly across the rolled-out dough, leaving a small border around the edges to help seal the sticks.
Step 5: Shape Cheesy Taco Sticks
Carefully roll the dough from the long side, creating a tight log. Use a sharp knife to slice the log into individual sticks, about 1-2 inches wide.
Step 6: Prepare for Baking
Arrange the taco sticks on the prepared baking sheet, leaving a little space between each stick to ensure crispy edges.
Step 7: Add Final Touches
Brush the tops of the sticks with an egg wash or olive oil to create a golden, glossy finish. Sprinkle some extra cheese on top for extra indulgence.
Step 8: Bake to Perfection
Slide the baking sheet into the preheated oven and bake for 15-20 minutes, or until the sticks turn a beautiful golden brown and the cheese is melted and bubbly.
Step 9: Serve and Enjoy
Remove from the oven and let cool for a few minutes. Serve hot with your favorite dipping sauce like salsa, sour cream, or guacamole.
Helpful Notes for Cheesy Taco Sticks Success
Keeping Cheesy Taco Sticks Fresh Longer
Great Matches for Cheesy Taco Sticks
New Twists for Cheesy Taco Sticks
Print
Cheesy Taco Sticks Recipe
- Total Time: 30 minutes
- Yield: 8 1x
Description
Mouthwatering cheesy taco sticks deliver a flavor explosion straight from Mexican street cuisine. Crispy, golden exterior gives way to melted cheese and savory seasoned meat, promising a delightful snack you’ll crave again and again.
Ingredients
Meats and Proteins:
- 1 pound (450 grams) ground beef
Dough and Base:
- 1 tube (13.8 ounces) refrigerated pizza dough
- 8 mozzarella string cheese sticks
Seasonings and Extras:
- 1 packet (1 ounce) taco seasoning mix (or homemade)
- ¼ cup water
- ¼ cup shredded cheddar cheese (optional)
- 2 tablespoons butter, melted
- ½ teaspoon garlic powder
- ½ teaspoon dried parsley (optional)
Dipping Sauces:
- Salsa
- Guacamole
- Sour cream
Instructions
- Crank the oven to a robust 375F (190C), ensuring a consistent heat environment for optimal baking results.
- Prepare the baking surface by laying down parchment paper or applying a light coating of grease to prevent sticking.
- Unroll the crescent roll dough across a clean, flat work surface, creating a seamless rectangular foundation.
- Meticulously spread the ground beef mixture evenly across the dough’s surface, maintaining a uniform layer.
- Sprinkle shredded cheese generously over the seasoned meat, creating a rich, melty landscape.
- Carefully roll the dough into a tight, compact cylinder, sealing the edges to contain the savory filling.
- Using a sharp knife, slice the rolled dough into individual segments, creating uniform taco sticks.
- Arrange the cut segments onto the prepared baking sheet, ensuring slight separation between each piece.
- Dust the top of each taco stick with additional cheese for an extra crispy, golden-brown exterior.
- Slide the baking sheet into the preheated oven and bake for 12-15 minutes, watching for a golden-brown transformation.
- Remove from the oven and let the taco sticks rest momentarily, allowing the filling to set and flavors to meld.
- Serve immediately, accompanied by salsa, sour cream, or your preferred dipping sauce for a complete culinary experience.
Notes
- Opt for low-fat cheese to reduce calorie content while maintaining delicious flavor.
- Experiment with alternative ground meats like turkey or plant-based crumbles for dietary flexibility.
- Use gluten-free tortillas to make this recipe suitable for those with gluten sensitivities.
- Create a lighter version by baking instead of frying, which cuts down on excess oil and calories.
- Prep Time: 15 minutes
- Cook Time: 15 minutes
- Category: Snacks, Appetizer, Lunch
- Method: Baking
- Cuisine: Mexican
Nutrition
- Serving Size: 8
- Calories: 305
- Sugar: 1 g
- Sodium: 680 mg
- Fat: 18 g
- Saturated Fat: 9 g
- Unsaturated Fat: 7 g
- Trans Fat: 0 g
- Carbohydrates: 23 g
- Fiber: 1 g
- Protein: 15 g
- Cholesterol: 50 mg
Dave Mitchell
Founder & Chief Recipe Developer
Expertise
Education
Asheville-Buncombe Technical Community College
Associate of Applied Science in Culinary Arts
Focus: Comprehensive training in culinary techniques, kitchen management, and menu planning, with a special emphasis on grilling and outdoor cooking.
Dave Mitchell is the heart behind Daves Grill, a cook, writer, and lover of all things grilled. He studied Culinary Arts at Asheville-Buncombe Technical Community College and spent years cooking, testing, and sharing recipes that actually work.
Dave started Daves Grill to keep things simple: one great recipe at a time. His food is bold, easy to follow, and made for real people with regular kitchens. From juicy steaks to quick sides, Dave’s recipes bring the heat without the hassle.