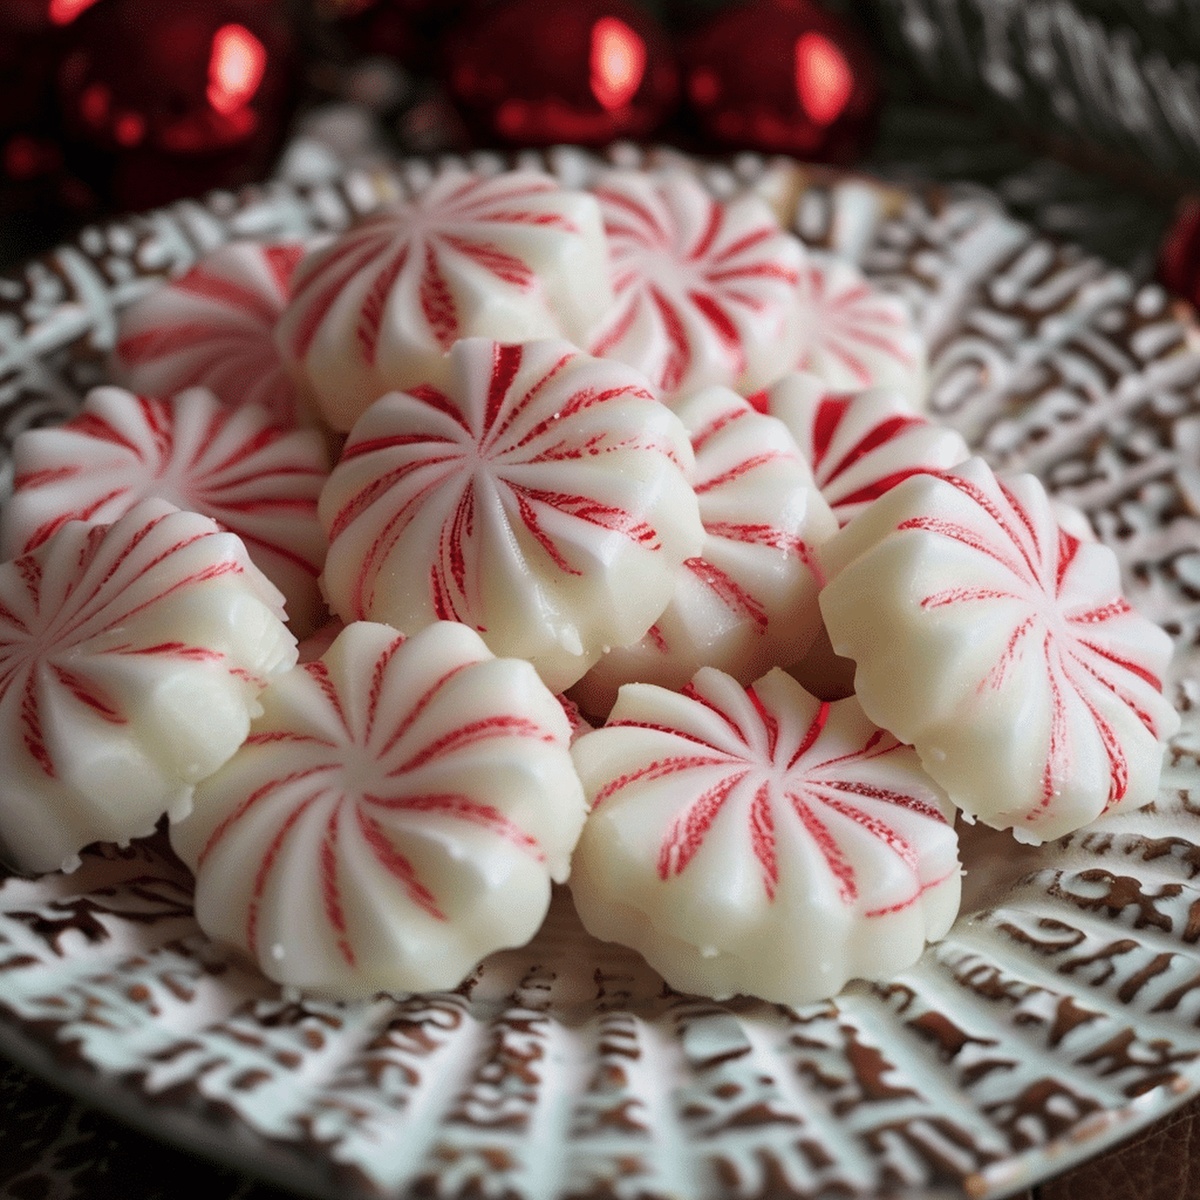
Jolly Christmas Peppermints Recipe: Sweet Holiday Magic
Festive baking with these christmas peppermints brings joy to every kitchen corner.
Sweet aromas will dance through your home as candy canes crush into delightful pieces.
Mint-chocolate lovers understand the magic behind these delectable treats.
Winter celebrations feel incomplete without something sparkly and sugar-coated.
Crisp peppermint flavors promise delightful moments of seasonal happiness.
Memories of childhood holidays inspire these simple yet elegant confections.
Gather ingredients and let magic begin with each delicate creation.
What Makes Christmas Peppermints Extra Special
What You’ll Need to Make Christmas Peppermints
Main Ingredients:
Cream Cheese: Soft base for creating a smooth and creamy peppermint candy texture. Full-fat cream cheese works best for a rich consistency.
Powdered Sugar: Provides sweetness and helps form the dough structure. Sifted powdered sugar ensures smooth mixing.
Flavoring and Coloring:
Peppermint Extract: Delivers classic cool and refreshing mint flavor. Pure extract gives the most authentic taste.
Red Food Coloring, Green Food Coloring: Creates festive holiday color variations. Gel food coloring provides more vibrant colors with less liquid.
Finishing Ingredients:
Granulated Sugar: Adds exterior crunch and sweet coating. White granulated sugar provides a classic finish.
Parchment Paper: Non-stick surface for drying and storing candies. Silicone baking mats can be used as an alternative.
How to Put Together Christmas Peppermints at Home
Step 1: Whip Up the Base
Beat cream cheese until silky smooth in a spacious mixing bowl. Gradually fold in powdered sugar, stirring until a tender dough emerges. Splash in peppermint extract and blend thoroughly.
Step 2: Create Colorful Portions
Separate the dough into three identical sections. Keep one section pristine white. Massage red coloring into one portion and green into another until colors distribute evenly.
Step 3: Shape Delectable Treats
Roll out a clean working surface and dust lightly with powdered sugar. Transform each dough section into petite spheres, approximately half an inch wide. Gently press each ball with a fork, creating classic peppermint indentations.
Step 4: Add Sparkling Sugar Coating
Tumble each peppermint through granulated sugar, ensuring complete and uniform coverage.
Step 5: Allow Candies to Settle
Position candies on parchment-lined baking sheet. Let them air dry for two to three hours until they firm up completely.
Step 6: Store and Enjoy
Transfer peppermints to an airtight container. Keep at room temperature for one week or refrigerate up to two weeks for extended freshness.
Smart Tips for Perfecting Christmas Peppermints
How to Store and Serve Christmas Peppermints Later
What to Enjoy With Christmas Peppermints
Ways to Add a Twist to Christmas Peppermints
Print
Christmas Peppermints Recipe
- Total Time: 3 hours 20 minutes
- Yield: 30 1x
Description
Festive Christmas Peppermints dance with holiday cheer, blending sweet nostalgia and delightful peppermint flavors. Crisp candy treats will bring joyful memories and spark winter celebration spirits for family gatherings.
Ingredients
Main Ingredients:
- 4 cups (500 grams) powdered sugar
- 4 ounces (115 grams) cream cheese, softened
Flavoring:
- ½ teaspoon peppermint extract
Decoration and Coating:
- Red food coloring
- Green food coloring
- Granulated sugar
Instructions
- Prepare the creamy base by whipping softened cream cheese until silky and uniform in a spacious mixing vessel.
- Gradually incorporate powdered sugar, stirring consistently until a malleable, cohesive dough emerges with a smooth texture.
- Enhance the mixture with peppermint extract, blending thoroughly to distribute the refreshing flavor throughout the dough.
- Partition the dough into three identical segments, ensuring equal distribution for consistent coloration.
- Designate one portion as the pristine white segment, while transforming the remaining two using vibrant red and verdant green food colorings.
- Thoroughly knead each colored segment, working the pigment meticulously to achieve a uniform, saturated hue without streaking.
- Lightly dust your workspace with powdered sugar to prevent adhesion and potential texture disruption.
- Craft diminutive spheres approximately half an inch in diameter from each colored dough portion, maintaining consistent sizing.
- Gently flatten each sphere using fork tines, creating a classic, traditional peppermint impression with delicate ridges.
- Enrobe each compressed candy in granulated sugar, ensuring complete and even coverage for a sparkling, crystalline exterior.
- Arrange the sugared confections on a parchment-lined baking sheet, allowing natural air drying for two to three hours until they achieve a firm, stable consistency.
- Preserve the completed peppermints in a sealed container, maintaining optimal freshness at room temperature for one week or refrigerated for up to two weeks.
Notes
- Check cream cheese temperature by letting it sit at room temperature for 30-45 minutes before mixing, ensuring smooth and lump-free dough.
- Use gel food coloring for more vibrant colors without altering dough consistency, creating festive Christmas peppermints.
- Prevent sticky dough by chilling mixture for 15-20 minutes before shaping, making rolling and handling easier.
- Customize flavors by substituting peppermint extract with vanilla, almond, or orange extract for unique holiday treats that suit different taste preferences.
- Prep Time: 20 minutes
- Cook Time: 2-3 hours
- Category: Snacks, Desserts
- Method: Blending
- Cuisine: American
Nutrition
- Serving Size: 30
- Calories: 75
- Sugar: 16g
- Sodium: 30mg
- Fat: 2g
- Saturated Fat: 1g
- Unsaturated Fat: 1g
- Trans Fat: 0g
- Carbohydrates: 17g
- Fiber: 0g
- Protein: 1g
- Cholesterol: 5mg
Dave Mitchell
Founder & Chief Recipe Developer
Expertise
Education
Asheville-Buncombe Technical Community College
Associate of Applied Science in Culinary Arts
Focus: Comprehensive training in culinary techniques, kitchen management, and menu planning, with a special emphasis on grilling and outdoor cooking.
Dave Mitchell is the heart behind Daves Grill, a cook, writer, and lover of all things grilled. He studied Culinary Arts at Asheville-Buncombe Technical Community College and spent years cooking, testing, and sharing recipes that actually work.
Dave started Daves Grill to keep things simple: one great recipe at a time. His food is bold, easy to follow, and made for real people with regular kitchens. From juicy steaks to quick sides, Dave’s recipes bring the heat without the hassle.