Crunchy Cottage Cheese Chips Recipe: The Snack Game-Changer
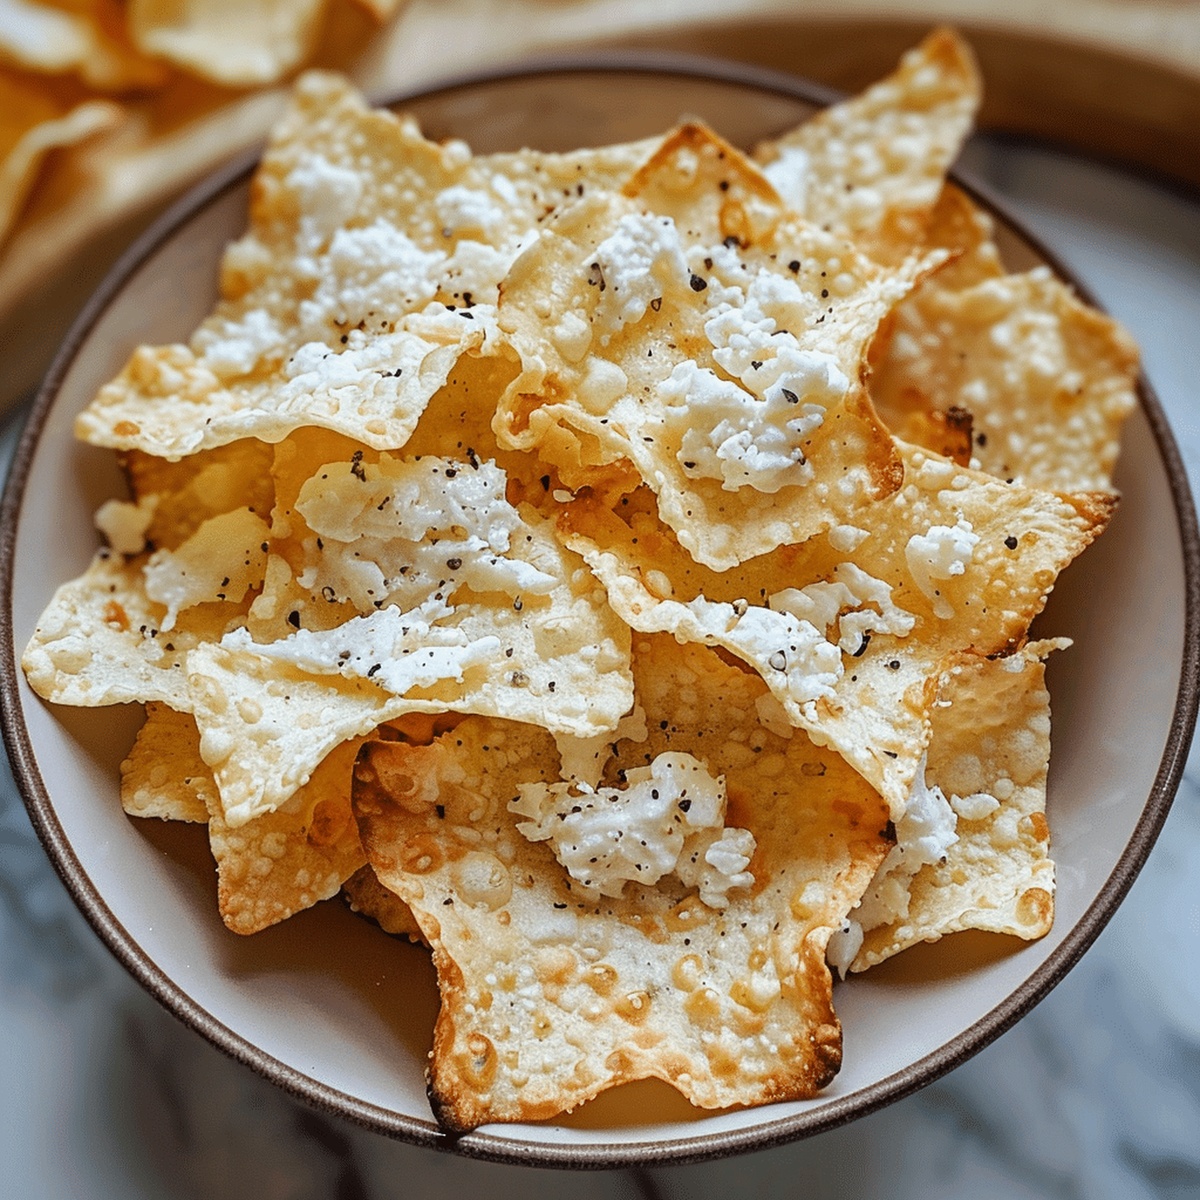
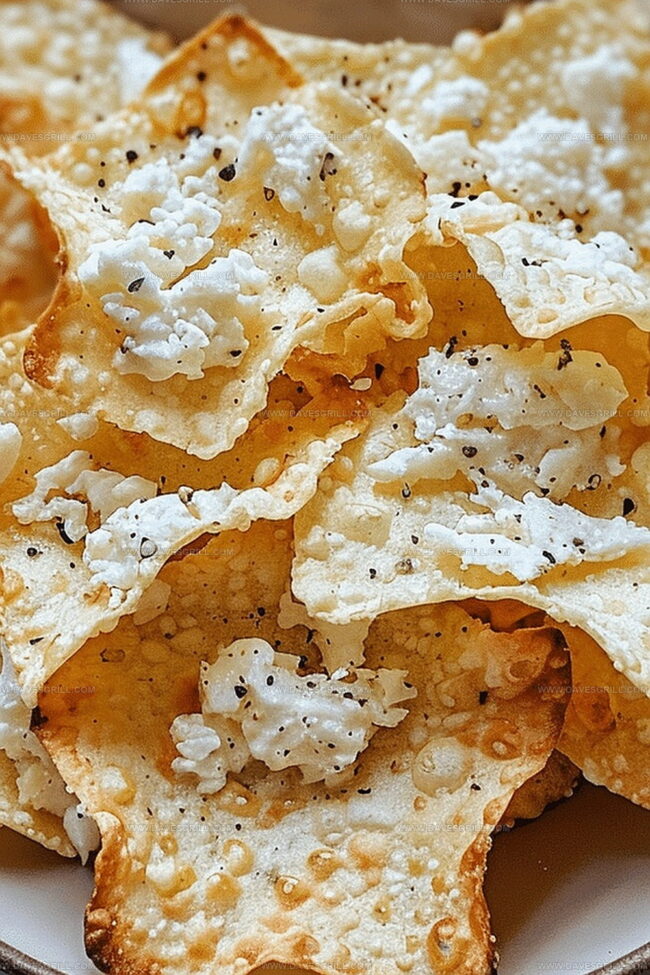
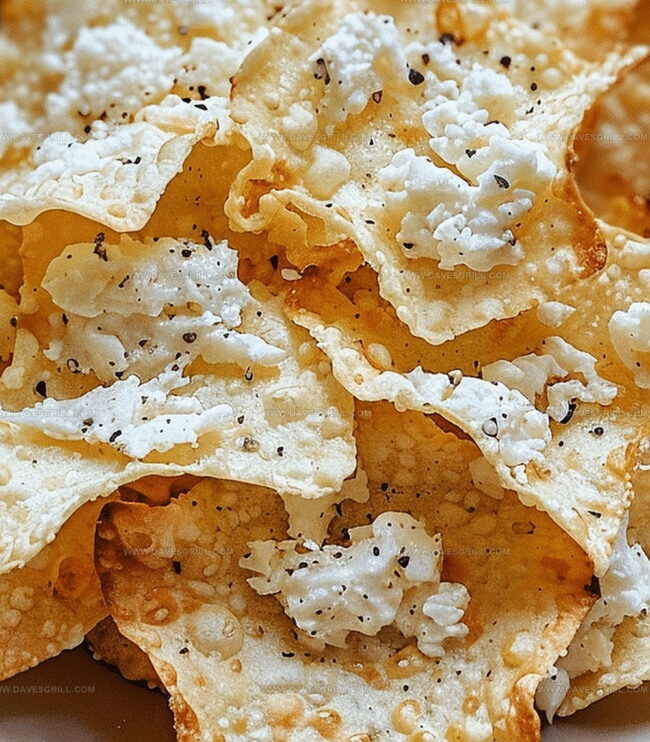
Snacking just got a delightful makeover with these crispy cottage cheese chips that promise a burst of flavor and crunch.
The incredible cottage cheese chips bring a healthy twist to your favorite munchies.
Light, airy, and packed with protein, these chips redefine guilt-free snacking.
Each bite delivers a satisfying crispness that will keep you reaching for more.
The simple preparation makes this recipe accessible to home cooks of all skill levels.
You’ll be amazed at how a few ingredients can transform into such a delectable treat.
These chips are perfect for afternoon hunger pangs or as a smart appetizer that will impress everyone at your next gathering.
Quick Recipe Overview
Cottage Cheese Chips Ingredient Lineup
For Base Ingredients:For Seasoning Ingredients:For Preparation Support:Tools That Make Cottage Chips Crunch Just Right
Make Those Chips Happen, One Step at a Time
Crank your oven to 350F and grab a baking sheet. Spray a light coating of olive oil on parchment paper to keep everything from sticking.
Squeeze out extra moisture from cottage cheese. Toss in some garlic powder, onion powder, salt, and pepper for a flavor punch. Stir everything together until well combined.
Grab a spoon and drop small cheese dollops onto the baking sheet. Space them out generously. Use the back of the spoon to gently press each mound into thin, uniform circles.
Slide the tray into the oven. Roast for 20-25 minutes until edges turn golden and crispy. For maximum crunch, flip chips midway through cooking.
Let chips rest on the baking sheet for 10-15 minutes. They’ll firm up and become extra crispy. Munch right away or save for later snacking.
Crispy Tips for Cottage Cheese Chips
Best Ways to Share or Plate Your Chips
Store Your Cottage Cheese Chips Like a Pro
FAQs
Cottage cheese chips are a nutritious alternative with higher protein content, lower carbs, and fewer calories compared to traditional potato chips. They offer a healthier snacking option with added nutritional benefits.
Low-fat, full-fat, or even lactose-free cottage cheese work well. Just ensure you drain excess liquid thoroughly to achieve the desired crispy texture. Whole milk cottage cheese tends to provide the best crunch.
You’ll need a baking sheet, parchment paper, a spoon for portioning, and an oven. A silicone mat can also be used instead of parchment paper if you prefer.
Look for golden edges and a crispy appearance. They should be firm and slightly raised, with no wet or soft center. The chips will continue to crisp up slightly while cooling.
Print
Crispy Cottage Cheese Chips Recipe
- Total Time: 30 minutes
- Yield: 5 1x
Description
Homemade cottage cheese chips offer a protein-packed snack that elevates classic potato crisps with creamy Mediterranean flair. Crisp edges and tangy flavor make these chips a delightful alternative you can enjoy guilt-free between meals.
Ingredients
- 1 cup (240 ml / 8 fl oz) small curd cottage cheese, well-drained
- ¼ tsp garlic powder
- ¼ tsp onion powder
- Salt, to taste
- Black pepper, to taste
- Olive oil spray (optional, for added crispness)
Instructions
- Preheat and Prepare: Heat oven to 350F (175C). Line baking sheet with parchment paper and lightly spray with olive oil for a non-stick surface.
- Season and Mix: Drain cottage cheese thoroughly. Blend with garlic powder, onion powder, salt, and pepper in a mixing bowl to create a well-seasoned mixture.
- Shape and Spread: Drop small portions of seasoned cottage cheese onto prepared baking sheet, spacing them apart. Gently flatten each dollop to approximately 0.2 inches thick, ensuring uniform shape and size.
- Bake and Crisp: Place baking sheet in preheated oven. Bake for 20-25 minutes, rotating chips midway to promote even golden browning and achieve a crispy texture.
- Cool and Serve: Remove chips from oven and allow to rest on baking sheet for 10-15 minutes. This resting period helps chips solidify and develop optimal crunchiness. Serve warm or store for later enjoyment.
Notes
- Moisture Management: Thoroughly drain cottage cheese to prevent soggy chips, using a fine-mesh strainer or cheesecloth to remove excess liquid for crispy results.
- Seasoning Secrets: Experiment with different spice blends like smoked paprika, nutritional yeast, or dried herbs to customize flavor profiles and keep the chips interesting.
- Thickness Trick: Use the back of a spoon or silicone spatula to spread mixture uniformly, ensuring consistent thickness prevents uneven cooking and texture variations.
- Storage Strategy: Cool chips completely before storing in an airtight container to maintain crispness, consuming within 3-4 days for optimal taste and texture.
- Prep Time: 10 minutes
- Cook Time: 20 minutes
- Category: Snacks
- Method: Baking
- Cuisine: American
Nutrition
- Serving Size: 5
- Calories: 60
- Sugar: 3 g
- Sodium: 200 mg
- Fat: 2 g
- Saturated Fat: 0.5 g
- Unsaturated Fat: 1.5 g
- Trans Fat: 0 g
- Carbohydrates: 4 g
- Fiber: 0 g
- Protein: 10 g
- Cholesterol: 15 mg
Emily Lawson
Content Creator & Culinary Specialist
Expertise
Education
Oregon Culinary Institute
Diploma in Culinary Arts
Focus: Emphasis on farm-to-table cooking, sustainable practices, and the fusion of global flavors with traditional grilling methods.
Emily Lawson is the content creator at Daves Grill, turning tasty ideas into clear, easy recipes. Based in Portland, she trained at the Oregon Culinary Institute and loves cooking with fresh, seasonal ingredients, especially grilled veggies and global flavors.
Emily mixes food writing with hands-on cooking to bring you recipes that feel fun, not stressful. Her goal is to make every dish simple, flavorful, and worth coming back to. Together, she and Dave serve up real food, one recipe at a time.