Crunchy Cheesy Delights: Crispy Fried Cheese Bites Recipe
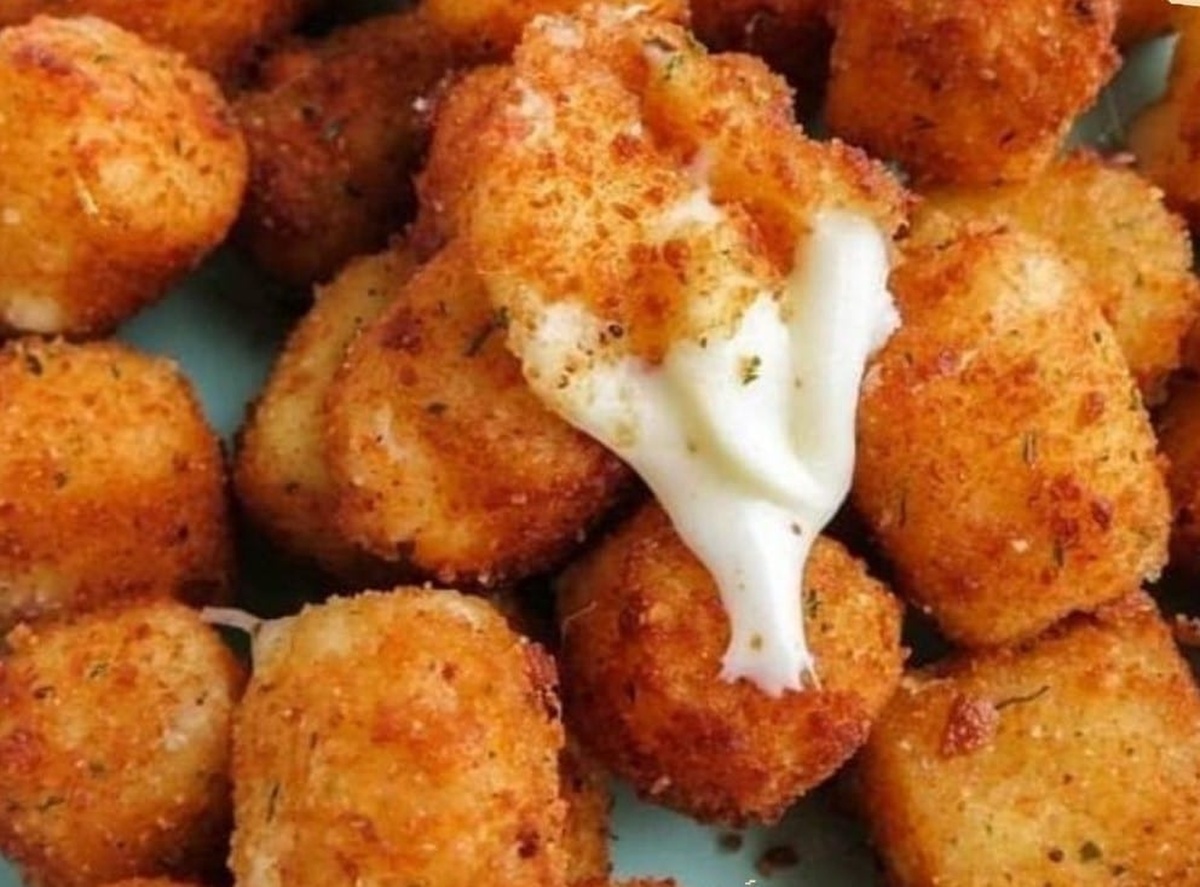
Cheese lovers crave these irresistible crispy fried cheese bites that promise a golden, crunchy exterior with a melty, gooey center.
The simple recipe combines pantry staples with sharp cheddar for an addictive snack that disappears faster than you can plate them.
Each bite delivers a satisfying crunch that gives way to warm, stretchy cheese guaranteed to wow appetizer enthusiasts.
Seasoned breadcrumbs add a delightful texture and subtle flavor enhancement to these delectable morsels.
Perfectly browned and served piping hot, these cheese bites make an excellent party appetizer or casual game-day treat.
Zero culinary expertise is required to master this crowd-pleasing recipe that transforms basic ingredients into something extraordinary.
Prepare to be the hero of your next gathering with these irresistible cheese bites that will have everyone asking for seconds.
Quick Recipe Overview

Fried Cheese Bite Ingredient List
For Cheese Base:For Coating Layer:For Seasoning Boost:Tools for Making These Crunchy Cheese Snacks
How to Fry Cheese Bites with Melty Centers

Grab your cheese block and transform it into tempting little cubes that’ll make everyone’s mouth water. Aim for roughly bite-sized chunks that’ll be perfect for munching.
Mix up aal breading blend with crunchy breadcrumbs and a sprinkle of zesty seasonings. Whip those eggs into a smooth mixture that’ll help the coating stick like a charm.
Roll each cheese cube through your seasoned coating, giving it a luxurious breading bath. Dunk first in flour, then eggs, and finally into the seasoned breadcrumbs. Press gently to ensure every inch gets covered in crispy goodness.
Heat up your oil until it’s sizzling hot. Carefully drop those coated cheese cubes into the bubbling oil, letting them turn a gorgeous golden brown. Fry in small batches to keep them crisp and prevent overcrowding.
Scoop out your cheese bites onto paper towels to catch extra oil. Let them cool just a moment, then serve while they’re hot and crispy. Watch everyone dive in and enjoy these irresistible cheesy treats!
Tips to Keep the Coating Golden and Crisp
Serve as a Starter or Game Day Snack
Store in the Fridge and Reheat in Oven
FAQs
Yes, you can experiment with various cheeses like cheddar, mozzarella, or gouda. Just ensure the cheese has a good melting quality and can hold its shape when fried.
Make sure to coat the cheese cubes thoroughly with flour, eggs, and breadcrumbs. A double coating helps create a seal that prevents cheese from melting out during frying.
Heat the oil to 350-375°F (175-190°C). If the oil is too cool, the cheese will melt before the coating gets crispy; if too hot, the outside will burn before the inside is warm.
You can prepare the breaded cheese cubes in advance and refrigerate them for up to 24 hours before frying. This can help the coating stick better and make cooking easier.
Print
Crispy Fried Cheese Bites Recipe
- Total Time: 25 minutes
- Yield: 5 1x
Description
Crispy homemade fried cheese bites deliver golden-brown perfection from Mediterranean kitchens. Melted cheese wrapped in seasoned breading creates quick party snacks readers can savor with friends.
Ingredients
- 8 oz (225 g) block of cheese (mozzarella, cheddar, or your favorite)
- 2 large eggs (beaten)
- 1 cup all-purpose flour
- 1 cup breadcrumbs (Panko or regular)
- ¼ tsp garlic powder (optional)
- ¼ tsp paprika (optional)
- Salt (to taste)
- Pepper (to taste)
- Oil (vegetable, canola, or peanut oil)
Instructions
- Cube Preparation: Transform cheese block into uniform, bite-sized cubes ensuring consistent one-inch dimensions for even cooking.
- Breading Station Setup: Arrange three shallow vessels – first with flour, second with whisked eggs, third with seasoned breadcrumbs incorporating garlic powder, paprika, salt, and pepper.
- Initial Coating: Methodically coat cheese cubes in flour, creating an adherent base layer that facilitates subsequent coating stages, then thoroughly dip into beaten eggs for complete coverage.
- Crispy Exterior Application: Meticulously roll egg-coated morsels in seasoned breadcrumbs, pressing firmly to generate a comprehensive, golden-brown crust. Optional: Repeat egg and breadcrumb coating for enhanced crunchiness.
- Oil Preparation: Heat deep fryer or heavy-bottomed pan to 350-375 degrees fahrenheit, establishing optimal frying environment with precise temperature control.
- Frying Process: Gently submerge breaded cheese cubes in hot oil, maintaining strategic spacing to preserve temperature integrity and prevent soggy texture. Fry until golden-brown, approximately 2-3 minutes.
- Finishing Touch: Extract cheese bites using slotted spoon, transferring to absorbent paper towels for excess oil drainage, preserving their delectable crispness and ensuring optimal texture.
Notes
- Check Cheese Consistency: Select firm, low-moisture cheese like mozzarella or cheddar that maintains structural integrity during frying and prevents excessive melting.
- Manage Oil Temperature: Maintain consistent 350-375°F oil temperature to ensure crispy exterior without burning breading or inadequately melting cheese interior.
- Prevent Cheese Leakage: Freeze cheese cubes for 15 minutes before breading to minimize potential melting and cheese escape during frying process.
- Enhance Coating Technique: Double-coat cheese bites for extra crunchiness, pressing breadcrumbs firmly to create a thick, secure protective layer that seals cheese effectively.
- Prep Time: 10 minutes
- Cook Time: 15 minutes
- Category: Appetizer, Snacks
- Method: Frying
- Cuisine: American
Nutrition
- Serving Size: 5
- Calories: 300
- Sugar: 1 g
- Sodium: 400 mg
- Fat: 18 g
- Saturated Fat: 9 g
- Unsaturated Fat: 8 g
- Trans Fat: 0 g
- Carbohydrates: 25 g
- Fiber: 1 g
- Protein: 12 g
- Cholesterol: 100 mg
Emily Lawson
Content Creator & Culinary Specialist
Expertise
Education
Oregon Culinary Institute
Diploma in Culinary Arts
Focus: Emphasis on farm-to-table cooking, sustainable practices, and the fusion of global flavors with traditional grilling methods.
Emily Lawson is the content creator at Daves Grill, turning tasty ideas into clear, easy recipes. Based in Portland, she trained at the Oregon Culinary Institute and loves cooking with fresh, seasonal ingredients, especially grilled veggies and global flavors.
Emily mixes food writing with hands-on cooking to bring you recipes that feel fun, not stressful. Her goal is to make every dish simple, flavorful, and worth coming back to. Together, she and Dave serve up real food, one recipe at a time.