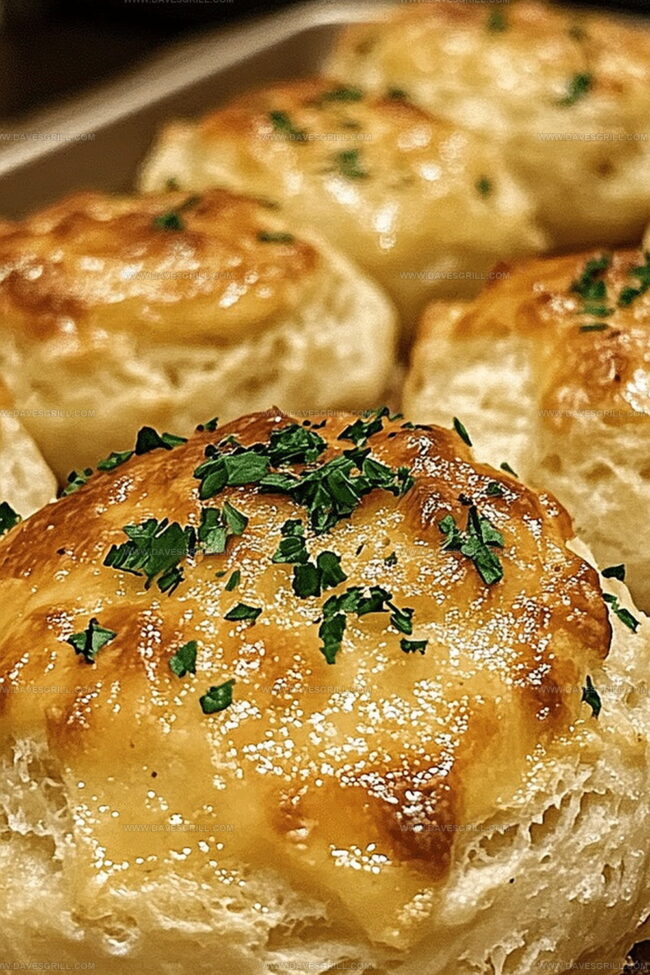
Buttery, golden biscuits packed with garlic and herb flavor elevate this irresistible garlic biscuit bombs recipe to a whole new level of deliciousness.
Comfort food meets gourmet appetizer in these crispy, cheesy delights that’ll make your taste buds dance.
Melted butter cascades over warm, pillowy biscuits bursting with savory goodness.
Cheese oozes from every bite, creating a mouthwatering experience that’s hard to resist.
These biscuit bombs are the perfect side dish or standalone snack that’ll have everyone asking for seconds.
Simple ingredients and easy preparation mean you can whip up these crowd-pleasers in no time.
One bite, and you’ll be hooked on this irresistible combination of crispy exterior and soft, flavor-packed interior.
Quick Recipe Overview
Prep Time: 10 minutes
Cook Time: 15 minutes
Total Time: 25 minutes
Calories: 210 kcal
Servings: 8
Ingredients for Cheesy Garlic Biscuit Bombs
For The Dough Base:
All-Purpose Flour: Provides the sturdy foundation for your fluffy biscuit exterior, select unbleached flour for the best texture.
Baking Powder: Createsal lift and airiness in your biscuits, ensuring a light and tender crumb.
Salt: Enhances overall flavor and balances the richness of other ingredients.
For The Flavor Enhancers:
Garlic Powder: Delivers a robust, warming garlic essence without overwhelming moisture, choose a high-quality brand for maximum punch.
Dried Herbs (Optional Parsley or Chives): Adds a fresh, green note and subtle complexity to the biscuit profile.
For The Creamy Filling And Topping:
Shredded Cheddar Cheese: Brings sharp, tangy melting goodness, opt for freshly grated cheese for superior melting quality.
Cream Cheese: Creates a luscious, smooth interior filling that provides unexpected creaminess.
Butter: Contributes rich flavor and helps achieve golden, crispy exterior, select unsalted for precise seasoning control.
Kitchen Gear for Cheesy Garlic Biscuit Bombs
Baking sheet: Flat metal pan for even cooking and easy biscuit removal.
Parchment paper: Non-stick surface to prevent biscuits from sticking and make cleanup simple.
Measuring cups and spoons: Precise ingredients for perfect biscuit texture.
Mixing bowl: Large container for combining dough ingredients smoothly.
Pastry brush: Quick tool for applying egg wash and adding golden shine.
Sharp knife or pizza cutter: Essential for cutting dough into even pieces.
Cutting board: Clean surface for preparing ingredients and shaping dough.
Instructions for These Ooey-Gooey Biscuit Bombs
Warm Up the Oven Crank your oven to a toasty 375°F and get a baking sheet ready with a light coating of grease or parchment paper.
Mix Dough Blend the flour, baking powder, salt, and herbs in a big mixing bowl. Cut cold butter into tiny pieces and work it into the dry ingredients until the mixture looks like coarse crumbs.
Add Moisture Pour in milk and stir until a soft dough forms. Don’t overwork the mixture – gentle mixing keeps biscuits tender.
Create Cheese Pockets Pinch off a chunk of dough and flatten it into a small circle. Drop a cube of cheese in the center and carefully wrap the dough around it, sealing all edges completely.
Prepare for Baking Roll each stuffed dough ball in melted butter and sprinkle with minced garlic and herbs for extra flavor.
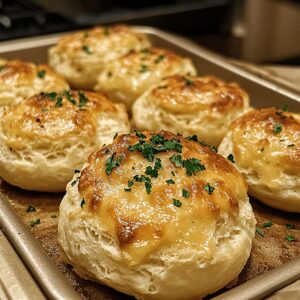
Bake to Golden Perfection Place the cheese-filled bombs on the prepared baking sheet, leaving space between each one. Slide into the hot oven and bake for 12-15 minutes until they turn a gorgeous golden brown.
Cool and Serve Let the biscuit bombs rest for a few minutes after removing from the oven. The cheese inside will be molten hot, so give them a moment to cool down before devouring.
Tips for Making Cheesy Garlic Biscuits Irresistible
Let biscuit dough sit at room temperature for 10-15 minutes before shaping to ensure easier handling and more even rising.
Experiment with different cheese varieties like sharp cheddar, pepper jack, or gouda for unique flavor profiles that complement the garlic butter.
Swap regular flour with a gluten-free all-purpose flour blend and add xanthan gum for similar texture and structure in the biscuits.
Incorporate fresh chopped herbs like chives, rosemary, or thyme into the dough or sprinkle on top for an elevated aromatic experience.
Prepare the biscuit bombs up to the point of assembly, then refrigerate for up to 24 hours before baking, making meal prep easier and more flexible.
How to Serve Biscuit Bombs with a Bang
Game Night Crowd-Pleaser: Slice these biscuit bombs in half and serve alongside marinara sauce or ranch dressing for dipping during movie marathons or game nights with friends.
Brunch Buddy: Pair these cheesy treats with a light garden salad or fresh scrambled eggs for a delightful weekend morning breakfast spread that feels indulgent yet satisfying.
Appetizer Extravaganza: Arrange the biscuit bombs on a rustic wooden board with sliced charcuterie, olives, and pickled vegetables for an impressive party starter that will wow your guests.
Quick Meal Companion: Serve these biscuit bombs as a hearty side dish with roasted chicken, grilled steak, or a comforting bowl of tomato soup for a complete and filling meal that everyone will love.
Best Way to Store Leftover Biscuit Bombs
Store leftover biscuit bombs in an airtight container within the refrigerator for up to 3-4 days. Wrap each biscuit individually in plastic wrap to maintain moisture and prevent them from drying out.
Freeze unbaked or baked biscuit bombs for future enjoyment. Place them on a baking sheet, freeze until solid, then transfer to a freezer-safe bag. They’ll stay delicious for 2-3 months when properly sealed.
Warm refrigerated or thawed biscuit bombs in the oven at 350F for 5-7 minutes to restore their crispy exterior and gooey cheese center. Avoid microwave reheating to prevent soggy texture.
Assemble biscuit bombs up to 24 hours before baking. Cover and refrigerate the prepared batch, then bake directly from the cold state, adding 2-3 extra minutes to cooking time for perfect golden-brown results.
FAQs
What makes these biscuit bombs so irresistible?
The combination of soft, buttery biscuit dough filled with melted cheese and brushed with garlic butter creates an incredibly flavorful and indulgent appetizer that’s hard to resist.
Can I use different types of cheese?
Absolutely! While cheddar works great, you can experiment with mozzarella, pepper jack, or even blue cheese for unique flavor variations.
Do I need any special equipment to make these?
No special equipment is needed – just a basic baking sheet, parchment paper, and standard mixing tools you likely already have in your kitchen.
Are these biscuit bombs suitable for make-ahead preparation?
Yes, you can prepare the biscuit bombs ahead of time and refrigerate them before baking. Just add a few extra minutes to the baking time if cooking them straight from the refrigerator.
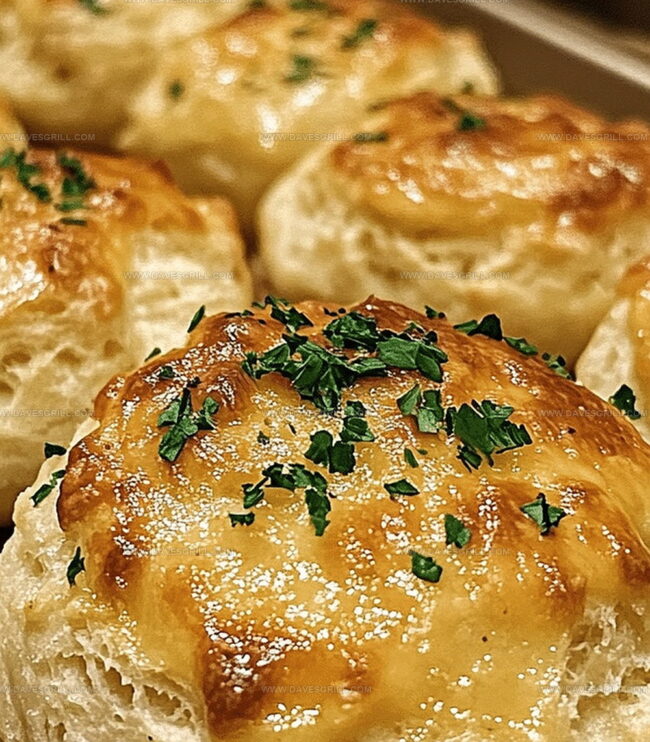
Savory Cheesy Garlic Biscuit Bombs blend buttery layers with melted cheese and garlic’s bold flavor. Crisp outside and tender inside, these irresistible bites deliver comfort straight from Southern kitchens.
Ingredients
Scale
1 can (16 oz or 454 g) refrigerated biscuit dough
8 oz (225 g) mozzarella cheese
2 tbsps butter, melted
1 tsp garlic powder
1 tsp dried parsley
½ tsp Italian seasoning
grated Parmesan cheese
parsley for garnish
Instructions
Preheat Preparation: Configure the oven to 375F (190C) and arrange a parchment-lined or lightly greased baking sheet for optimal baking conditions.
Cheese Fusion: Thoroughly blend cream cheese and shredded cheddar into a smooth, homogeneous filling with consistent texture.
Dough Manipulation: Delicately expand refrigerated biscuit rounds, creating a broader surface for cheese encapsulation.
Filling Technique: Centralize a precise cheese dollop within each dough round, maintaining careful portion control to prevent overflow.
Sealing Process: Meticulously fold and pinch dough edges, creating a complete seal that securely traps the cheese mixture without compromising structural integrity.
Shaping Transformation: Gently roll sealed pouches into uniform spherical shapes, ensuring no cheese exposure and maintaining compact form.
Aromatic Coating: Craft a luxurious butter blend by combining minced garlic, melted butter, and finely chopped parsley for enhanced flavor profile.
Surface Enhancement: Liberally brush each biscuit bomb with the garlic-herb butter mixture, achieving comprehensive coverage and flavor infusion.
Baking Configuration: Position biscuit bombs strategically on the prepared sheet, allowing adequate spacing for even heat circulation and consistent browning.
Culinary Completion: Bake for 10-12 minutes until achieving a lustrous golden-brown exterior, signaling perfect doneness and internal cheese melting.
Notes
Prevent Cheese Leakage: Seal biscuit edges meticulously by pinching and folding to stop cheese from oozing out during baking, ensuring a perfect, intact bomb.
Optimize Dough Stretch: Gently pull biscuit dough without tearing, creating enough surface area to wrap cheese completely without creating thin, fragile spots.
Control Moisture Balance: Use room temperature cream cheese for smoother mixing and easier filling distribution, reducing potential soggy texture in biscuit bombs.
Enhance Flavor Infusion: Brush garlic-herb butter generously and immediately after baking to maximize herb and garlic absorption, creating a more intense taste profile.
Oregon Culinary Institute Diploma in Culinary Arts Focus: Emphasis on farm-to-table cooking, sustainable practices, and the fusion of global flavors with traditional grilling methods.
Emily Lawson is the content creator at Daves Grill, turning tasty ideas into clear, easy recipes. Based in Portland, she trained at the Oregon Culinary Institute and loves cooking with fresh, seasonal ingredients, especially grilled veggies and global flavors.
Emily mixes food writing with hands-on cooking to bring you recipes that feel fun, not stressful. Her goal is to make every dish simple, flavorful, and worth coming back to. Together, she and Dave serve up real food, one recipe at a time.

Emily Lawson
Content Creator & Culinary Specialist
Expertise
Education
Oregon Culinary Institute
Diploma in Culinary Arts
Focus: Emphasis on farm-to-table cooking, sustainable practices, and the fusion of global flavors with traditional grilling methods.
Emily Lawson is the content creator at Daves Grill, turning tasty ideas into clear, easy recipes. Based in Portland, she trained at the Oregon Culinary Institute and loves cooking with fresh, seasonal ingredients, especially grilled veggies and global flavors.
Emily mixes food writing with hands-on cooking to bring you recipes that feel fun, not stressful. Her goal is to make every dish simple, flavorful, and worth coming back to. Together, she and Dave serve up real food, one recipe at a time.