Golden Garlic Knots Recipe: Crunchy Bites of Flavor Magic
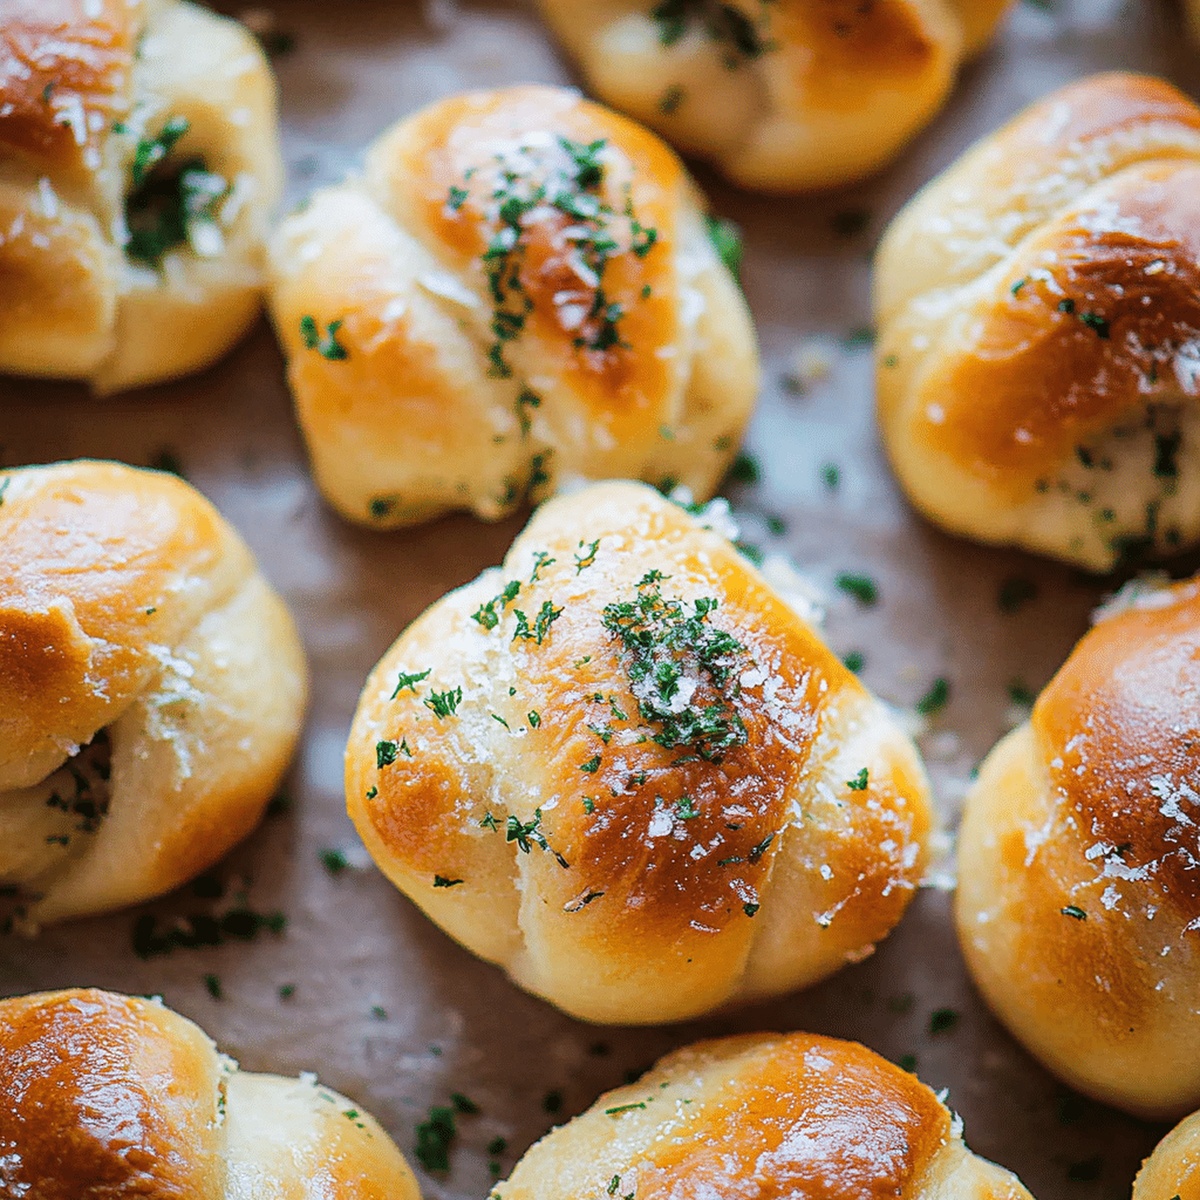
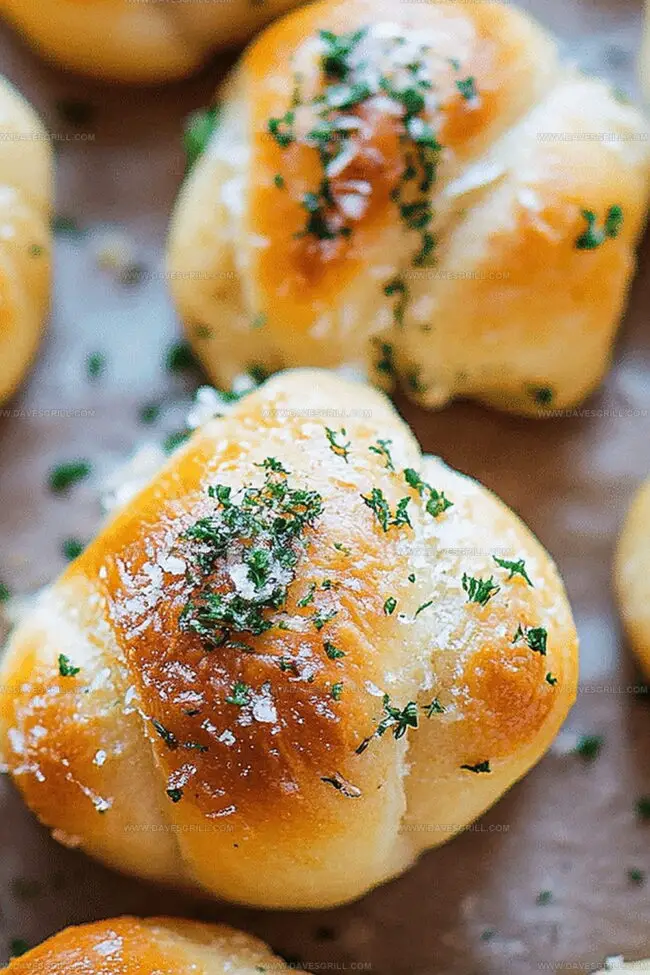
Warm, golden-brown garlic knots with a crispy garlic parmesan recipe dance between comfort and culinary delight.
These little bread twists pack serious flavor into every bite.
Knotted dough brushed with herbs and butter creates an irresistible aroma that fills your kitchen.
Each piece promises a perfect balance of crunchy exterior and soft, pillowy interior.
The combination of garlic, olive oil, and fresh herbs transforms simple bread into a mouthwatering appetizer.
Salt and parmesan cheese add an extra layer of savory goodness.
You’ll want to serve these crowd-pleasing knots at every gathering.
Quick Recipe Overview
Garlic Knot Ingredients to Have Ready
For Dough Base:For Yeast Activation:For Flavor and Finish:Bakeware for Fresh Garlic Knots
How to Make Soft, Buttery Garlic Knots

Blend warm water, sugar, and yeast in a cozy bowl. Watch the happen as the mixture transforms into a bubbly, frothy wonder in about 5 minutes.
Toss flour and salt into a spacious mixing bowl. Pour in the awakened yeast and a splash of olive oil. Stir and mix until a soft, pliable dough emerges.
Spread some flour on your workspace and gently knead the dough. Work it with your hands for 5-7 minutes until it becomes smooth and stretchy. Let your mixer do the work if you prefer, using a dough hook for 4-5 minutes.
Transfer the dough to a lightly greased bowl. Cover it with a soft cloth and find a warm, cozy spot for it to relax. Give it 1-1.5 hours to double in size, transforming into a puffy, pillowy treasure.
Roll out the risen dough and cut into strips. Tie each strip into a playful knot. Brush with garlic-infused olive oil and sprinkle with herbs.
Pop the knots into a preheated oven. Bake until they turn a beautiful golden brown, filling your kitchen with an irresistible aroma.
Quick Tips to Boost Garlic Knot Flavor
Serve Garlic Knots Hot and Savory
Store Garlic Knots and Keep Them Soft
FAQs
Garlic knots are surprisingly easy to make, even for beginner bakers. With basic ingredients and simple steps, you can create delicious homemade garlic knots in under two hours.
Bread flour is ideal because it has higher protein content, which helps create a chewier, more authentic texture. However, all-purpose flour works perfectly fine and will still produce tasty knots.
Absolutely! You can knead the dough by hand on a floured surface. It takes a bit more effort, but hand-kneading allows you to feel the dough’s texture and develop gluten effectively.
Check if the yeast becomes foamy after 5 minutes in warm water with sugar. If it doesn’t foam or activate, the yeast is likely dead and you’ll need fresh yeast to ensure your dough rises properly.
Print
Crispy Garlic Knots Recipe
- Total Time: 35 minutes
- Yield: 13 1x
Description
Savory garlic knots whisper Italian street charm with their buttery, herb-infused twists. Crisp edges and tender centers make these classic appetizers a crowd-pleasing starter you’ll want to share with friends.
Ingredients
- 3 cups (375 g) all-purpose flour
- 2 ¼ tsps (1 packet) instant yeast
- 1 cup (240 ml) warm water (110°F/45°C)
- 2 tbsps olive oil
- ¼ cup (60 g) unsalted butter, melted
- 2 tsps granulated sugar
- 1 tsp salt
- 2 cloves garlic, minced
- 1 tbsp fresh parsley, finely chopped (or 1 tsp dried parsley)
- ¼ tsp salt
Instructions
- Yeast Activation: Dissolve sugar and yeast in warm water, allowing the mixture to foam and develop for 5 minutes, signaling live yeast culture.
- Dough Formation: Combine flour and salt in a large mixing bowl, creating a central well for the activated yeast and olive oil. Blend liquid and dry ingredients until a cohesive, slightly rough dough forms.
- Kneading Process: Transfer dough to a floured surface, using palm heels to knead vigorously for 6-7 minutes. Develop a smooth, elastic texture that springs back when gently pressed.
- First Fermentation: Place dough in a lightly oiled bowl, rotating to coat entire surface. Cover with a clean kitchen towel and position in a warm, draft-free zone for 1-1.25 hours until volume doubles and surface becomes puffy.
- Shaping Preparation: Punch down risen dough to release trapped air, then divide into uniform portions for creating classic garlic knot shapes.
- Flavor Infusion: Roll each dough segment into a rope, tie into a knot, and brush with garlic-infused olive oil mixture to enhance aromatic profile.
- Baking Transformation: Arrange knots on a parchment-lined baking sheet, allowing slight spacing for expansion. Preheat oven to 425°F and bake for 12-15 minutes until golden brown and fragrant.
- Finishing Touch: Remove from oven, immediately brush with additional garlic herb butter, and sprinkle with fresh parsley for vibrant presentation and enhanced flavor.
Notes
- Check Yeast Activation: Ensure water temperature is precisely between 100-110°F to activate yeast without killing it, creating perfect frothy bloom.
- Master Kneading Technique: Use consistent, firm hand motions when kneading, applying steady pressure to develop strong gluten structure for chewy, elastic texture.
- Control Proofing Environment: Place dough in consistently warm spot around 80-85°F, away from drafts, to guarantee optimal rising and soft, airy final result.
- Prevent Dryness Strategically: Lightly brush dough with olive oil during rising process to maintain moisture and create smooth, supple surface that prevents cracking.
- Prep Time: 20 minutes
- Cook Time: 15 minutes
- Category: Appetizer, Snacks
- Method: Baking
- Cuisine: Italian
Nutrition
- Serving Size: 13
- Calories: 150
- Sugar: 1 g
- Sodium: 200 mg
- Fat: 6 g
- Saturated Fat: 3 g
- Unsaturated Fat: 2 g
- Trans Fat: 0 g
- Carbohydrates: 20 g
- Fiber: 1 g
- Protein: 3 g
- Cholesterol: 10 mg
Emily Lawson
Content Creator & Culinary Specialist
Expertise
Education
Oregon Culinary Institute
Diploma in Culinary Arts
Focus: Emphasis on farm-to-table cooking, sustainable practices, and the fusion of global flavors with traditional grilling methods.
Emily Lawson is the content creator at Daves Grill, turning tasty ideas into clear, easy recipes. Based in Portland, she trained at the Oregon Culinary Institute and loves cooking with fresh, seasonal ingredients, especially grilled veggies and global flavors.
Emily mixes food writing with hands-on cooking to bring you recipes that feel fun, not stressful. Her goal is to make every dish simple, flavorful, and worth coming back to. Together, she and Dave serve up real food, one recipe at a time.