Golden Hasselback Cheesy Bread Recipe: Crispy Bliss in Slices
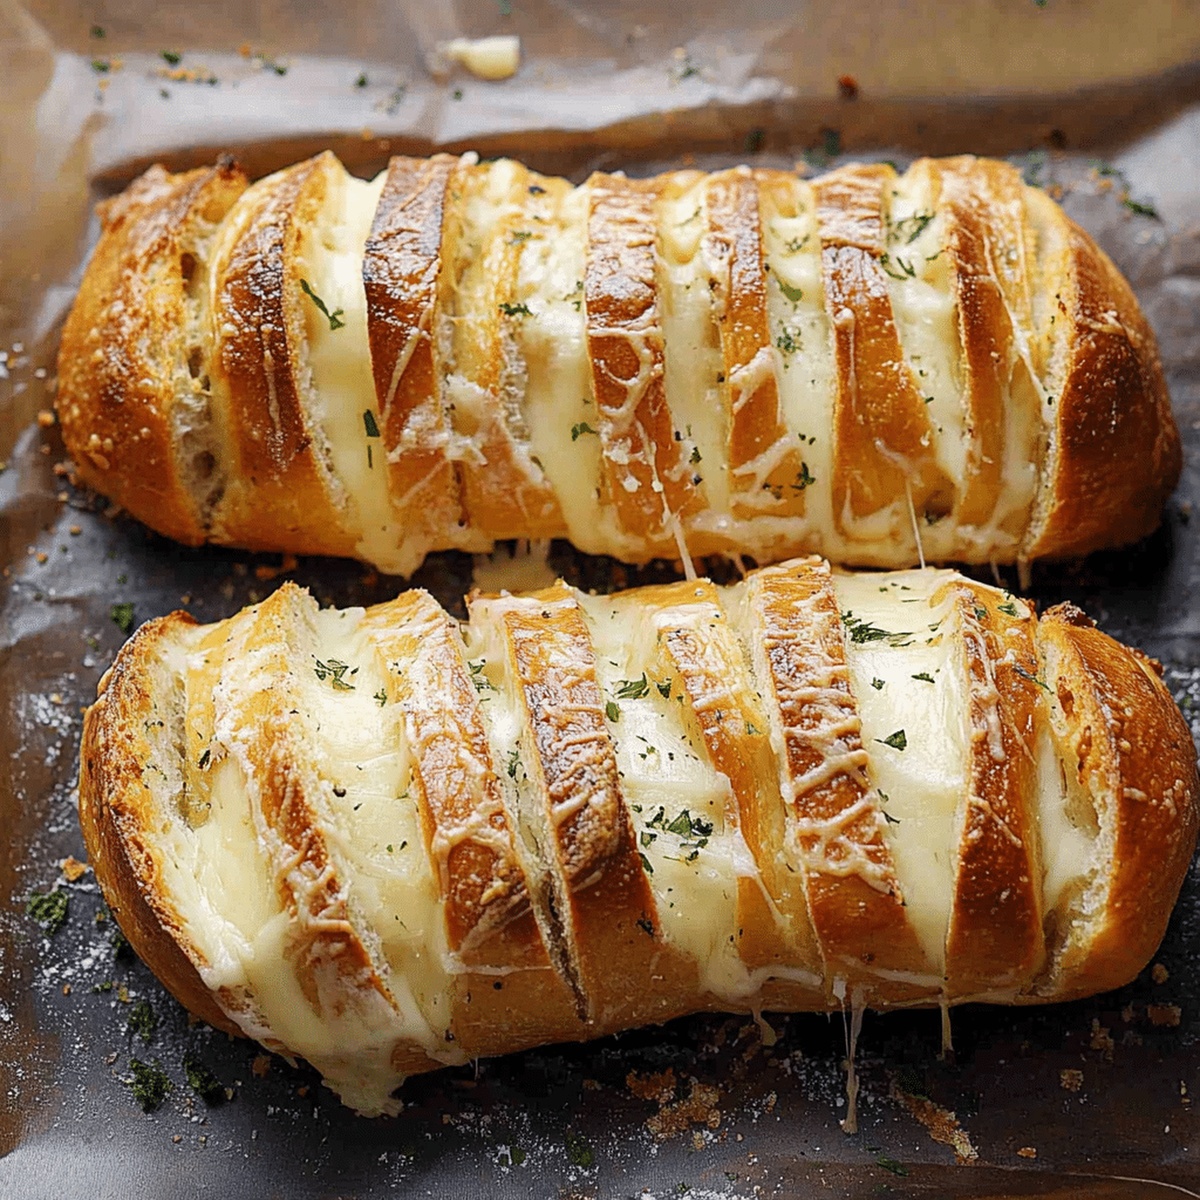
Bread lovers swoon over this crispy hasselback cheesy bread that combines golden-brown edges with gooey, melted cheese in every delectable slice.
Layers of sliced and seasoned bread create a stunning presentation that’s sure to impress at any gathering.
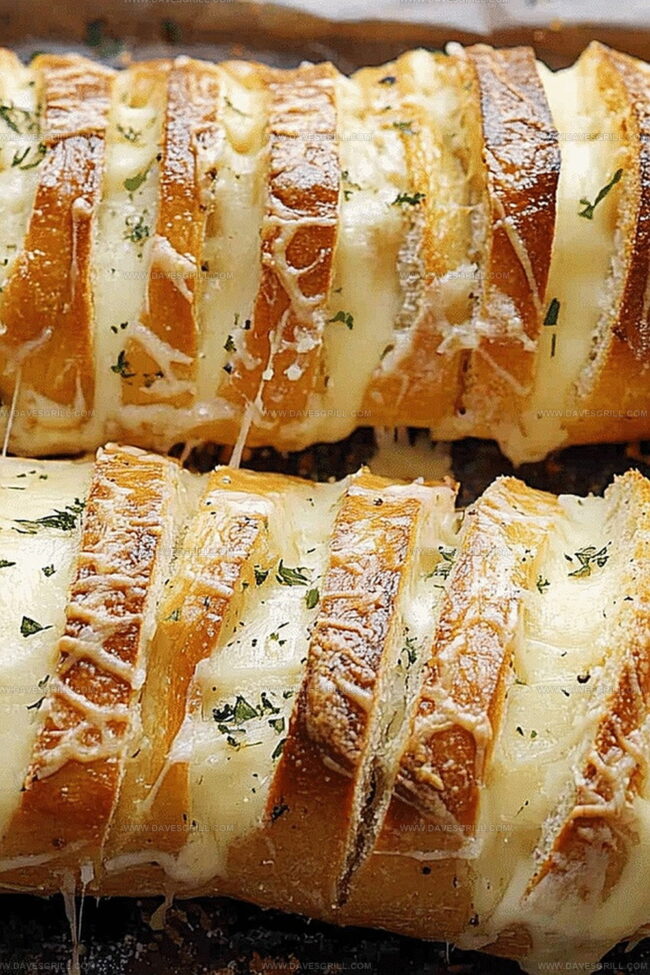
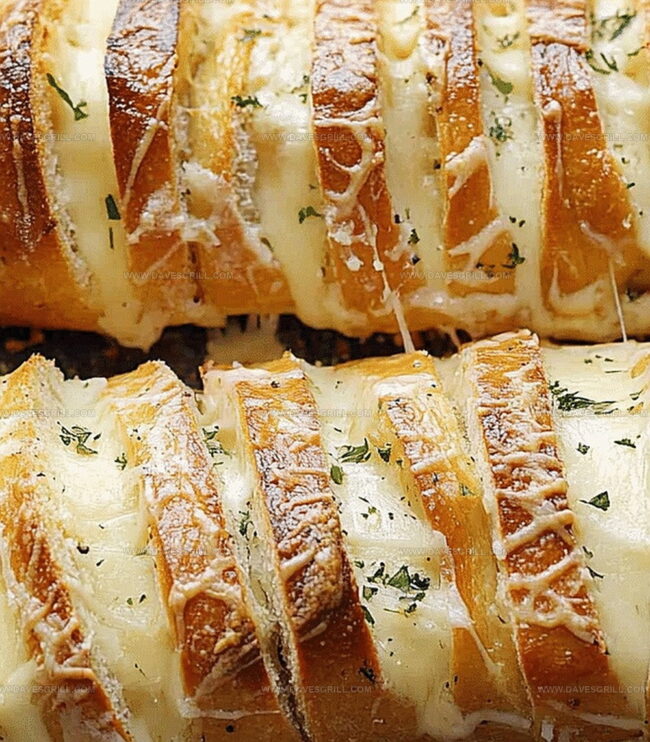
Each carefully cut section becomes a crispy, cheesy vessel bursting with incredible flavor.
The aroma of herbs and melting cheese will draw everyone to the kitchen, eager to sample this irresistible treat.
Minimal ingredients and simple techniques make this recipe accessible to home cooks of all skill levels.
Prepare to be the star of your next meal with this crowd-pleasing side dish that transforms ordinary bread into an extraordinary culinary experience.
Grab a slice and watch as your guests request seconds.
Quick Recipe Overview
Hasselback Cheesy Bread Ingredient Checklist
For Bread Base:For Cheese Filling:For Flavor Enhancers:Essentials to Bake Hasselback Cheesy Bread
Steps to Craft Hasselback Cheesy Bread
Use a sharp serrated knife to make deep, precise cuts across the loaf. Slice almost through but keep the bottom intact, creating an accordion-like pattern with connected sections.
Gently separate bread sections and generously tuck shredded mozzarella and cheddar between each slice. Ensure cheese is evenly distributed throughout the loaf.
Whisk together melted butter, olive oil, minced garlic, and herbs in a small bowl. Carefully drizzle this aromatic mixture between bread cuts, allowing flavors to seep into every crevice.
Cover bread loosely with aluminum foil and place in a preheated 375F oven. Bake for 15 minutes, then remove foil and continue cooking until cheese melts and edges turn golden brown, approximately 10-15 additional minutes.
Transfer cheesy bread to a beautiful serving platter. Allow it to cool briefly, then invite guests to pull apart the gooey, crispy sections and savor the delicious creation.
Cheesy Bread Tweaks Worth Trying
Serve Hasselback Cheesy Bread Fresh and Hot
Store Your Hasselback Cheesy Bread the Right Way
FAQs
Yes, you can swap mozzarella and cheddar with monterey jack, gruyere, or provolone. Just ensure the cheese melts well and complements the garlic flavor.
Make sure to not cut through the bottom of the bread completely and distribute the cheese and butter evenly. Baking with foil initially helps prevent drying out while ensuring proper melting.
Absolutely! This Hasselback Cheesy Bread is vegetarian-friendly. It contains no meat products and can be easily prepared with basic ingredients like bread, cheese, butter, and seasonings.
You can prepare the bread and stuff it with cheese up to 2 hours before baking. Keep it refrigerated and bring to room temperature before placing in the oven. For best results, bake just before serving to maintain crispiness.
Print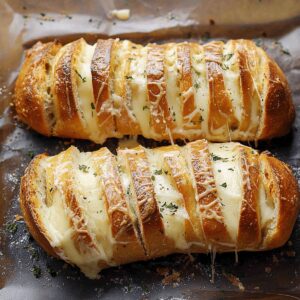
Crispy Hasselback Cheesy Bread Recipe
- Total Time: 35 minutes
- Yield: 9 1x
Description
Swedish Hasselback Cheesy Bread combines crispy potato-like slicing with melted cheese and herbs. Garlic butter and sharp cheddar create a mouthwatering side dish you can enjoy alongside favorite meals.
Ingredients
- 1 large crusty loaf (sourdough or Italian bread)
- 1 cup / 100 grams shredded mozzarella cheese
- ½ cup / 50 grams shredded cheddar cheese
- 3 tbsps / tablespoons unsalted butter, melted
- 2 tbsps / tablespoons olive oil
- 3 cloves garlic, minced
- 1 tsp / teaspoon dried Italian seasoning
- 2 tbsps / tablespoons chopped fresh parsley (optional)
- 1 pinch red pepper flakes (optional, for spicy kick)
Instructions
- Preheat and Prepare: Heat oven to 375F (190C) and position rack centrally. Line baking sheet with parchment paper for easy cleanup and optimal heat circulation.
- Bread Transformation: Slice bread loaf with precision, creating parallel cuts approximately 1 inch apart while maintaining the bottom base intact. These cuts will become flavor channels for cheese and seasoning.
- Flavor Infusion: Whisk melted butter, olive oil, minced garlic, Italian seasoning, parsley, and red pepper flakes into a harmonious aromatic liquid. This mixture will elevate the bread’s taste profile.
- Cheese Integration: Carefully separate bread cuts and nestle shredded mozzarella and cheddar cheese into each intricate crevice. Ensure even distribution for consistent melting and flavor.
- Butter Saturation: Drizzle the garlic butter mixture generously throughout the bread’s architectural cuts, coating every layer with robust flavors and ensuring cheese is thoroughly embraced.
- Strategic Baking: Cover bread with aluminum foil and bake for 15 minutes, allowing initial cheese melting and flavor development. Remove foil and continue baking for additional 10-15 minutes until exterior turns golden and cheese becomes perfectly molten.
- Resting and Serving: Allow bread to rest briefly, enabling flavors to meld and structure to stabilize. Serve as an irresistible, pull-apart appetizer or side dish that promises communal enjoyment.
Notes
- Slice Carefully: Make precise, even cuts without slicing through the bread’s bottom, using a sharp knife and gentle hand to maintain loaf structure.
- Cheese Distribution: Push shredded cheese deeply into cuts for even melting and maximum flavor coverage throughout the bread.
- Butter Balance: Don’t oversaturate bread with garlic butter; drizzle sparingly to prevent soggy texture while ensuring rich, aromatic flavor.
- Temperature Timing: Watch bread closely during final uncovered baking stage to achieve golden-brown exterior without burning cheese or edges.
- Prep Time: 10 minutes
- Cook Time: 25 minutes
- Category: Snacks, Appetizer
- Method: Baking
- Cuisine: Swedish
Nutrition
- Serving Size: 9
- Calories: 252
- Sugar: 1 g
- Sodium: 430 mg
- Fat: 16 g
- Saturated Fat: 8 g
- Unsaturated Fat: 6 g
- Trans Fat: 0 g
- Carbohydrates: 24 g
- Fiber: 1 g
- Protein: 9 g
- Cholesterol: 30 mg
Emily Lawson
Content Creator & Culinary Specialist
Expertise
Education
Oregon Culinary Institute
Diploma in Culinary Arts
Focus: Emphasis on farm-to-table cooking, sustainable practices, and the fusion of global flavors with traditional grilling methods.
Emily Lawson is the content creator at Daves Grill, turning tasty ideas into clear, easy recipes. Based in Portland, she trained at the Oregon Culinary Institute and loves cooking with fresh, seasonal ingredients, especially grilled veggies and global flavors.
Emily mixes food writing with hands-on cooking to bring you recipes that feel fun, not stressful. Her goal is to make every dish simple, flavorful, and worth coming back to. Together, she and Dave serve up real food, one recipe at a time.