Irresistibly Crispy Crunchy Cereal Bars Recipe for Snackers
Weekends call for the perfect snack that combines classic chocolate chip cereal bars with a delightful homemade twist.
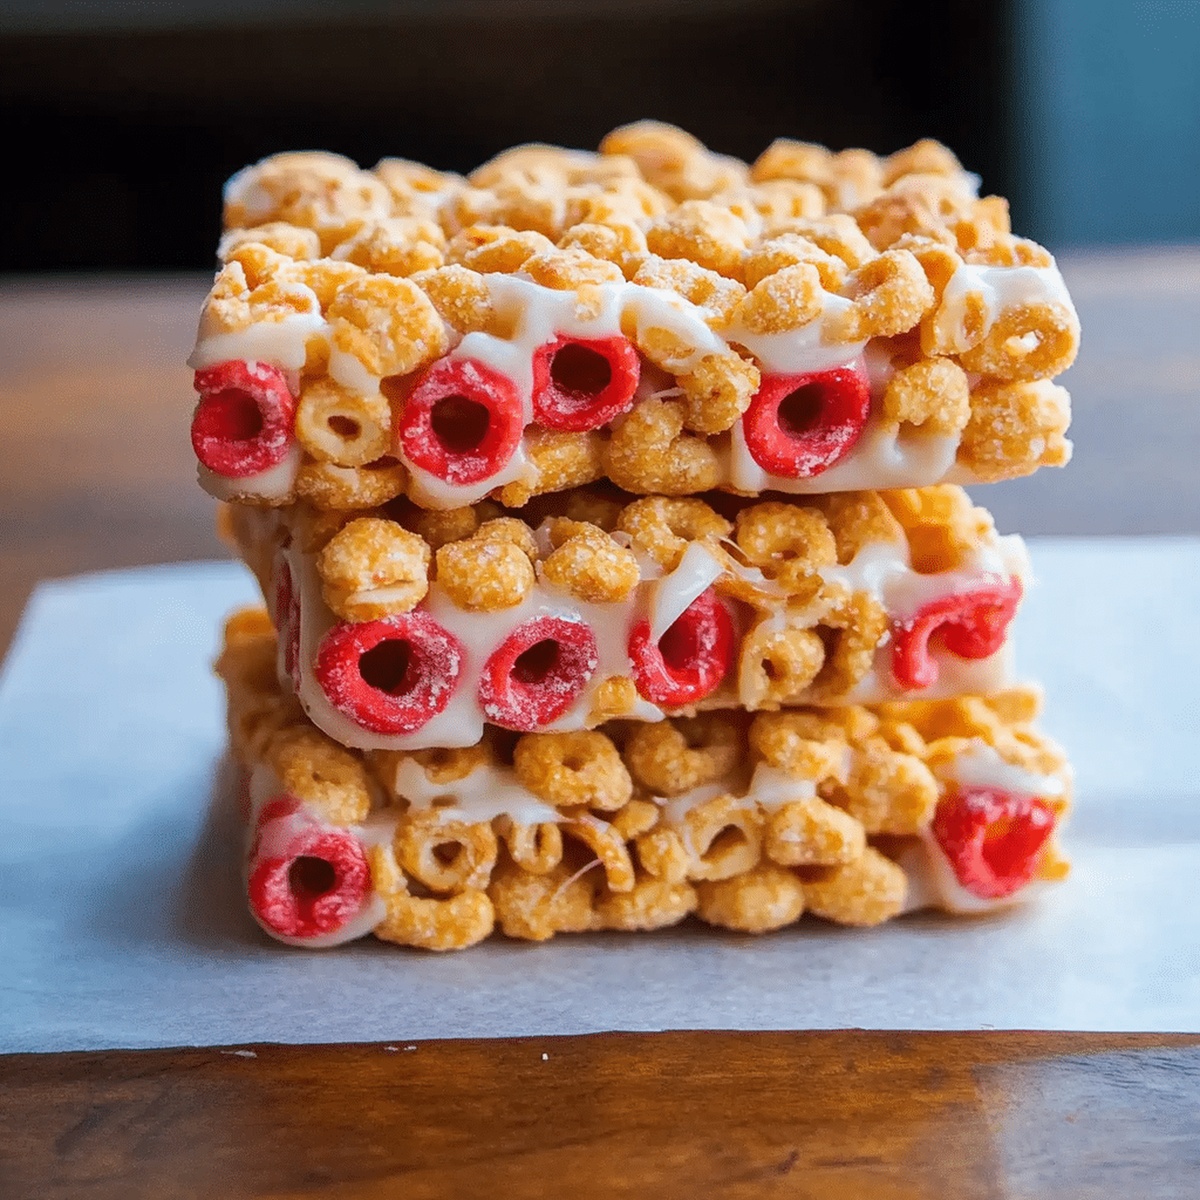
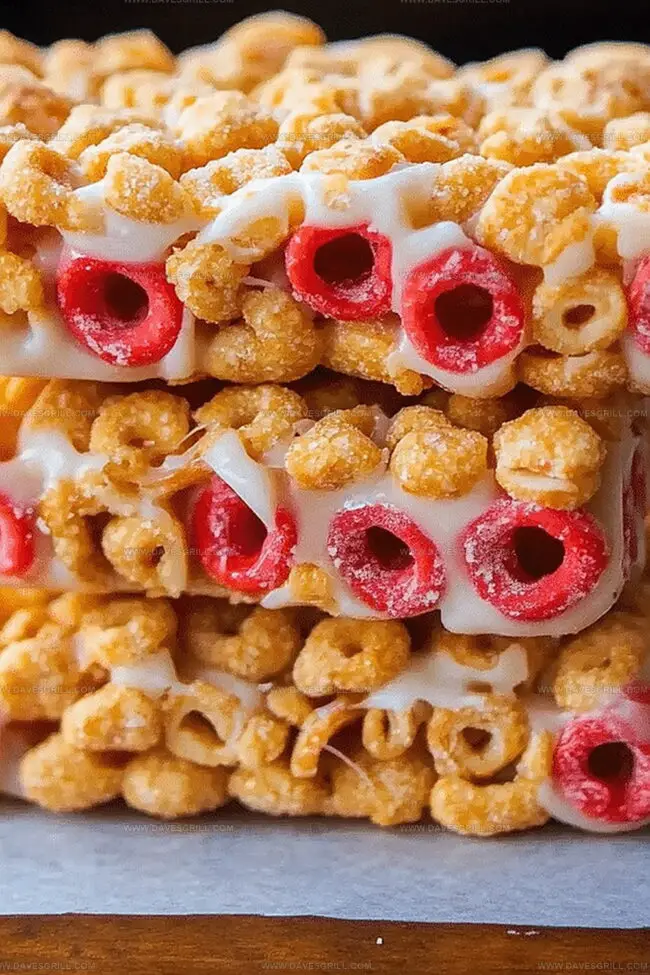
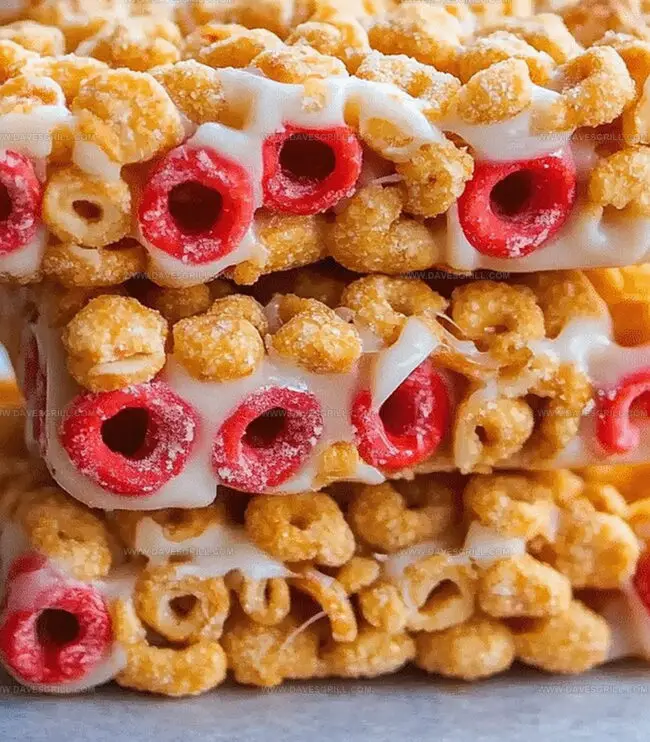
These irresistible cereal bars bring together crunchy textures and sweet flavors that dance across your taste buds.
Packed with simple ingredients, the recipe offers a quick and satisfying treat for any moment.
No complicated techniques stand between you and these delectable bars.
Each bite promises a nostalgic crunch that reminds us of childhood mornings.
The blend of crisp cereal and gooey marshmallows creates a harmonious balance of textures and sweetness.
Dive into this simple recipe and treat yourself to a delightful snack that everyone will love.
Quick Recipe Overview
Ingredients for Quick and Crunchy Cereal Bars
For Base Ingredients:For Binding Ingredients:For Optional Enhancements:Tools That Help You Shape Cereal Bars Easily
How to Press and Chill These Cereal Bars
Line a baking pan with parchment paper or grease it lightly to keep bars from sticking.
Blend rolled oats with dried fruit, nuts, and seeds in a large bowl, ensuring even distribution.
Gently heat nut butter, honey, milk, and vanilla in a saucepan, stirring until smooth and slightly warm.
Pour warm liquid over dry mix, stirring completely to coat all ingredients thoroughly.
Transfer mixture into prepared pan, using a spatula to press firmly and create an even layer.
Refrigerate for at least two hours until mixture becomes firm and holds together well.
Remove from refrigerator, cut into desired bar shapes and sizes.
Store in an airtight container at room temperature for up to a week, or refrigerate for extended freshness.
Tips That Add Flavor to Your Cereal Bar Mix
Serve Cereal Bars as Snacks or Lunchbox Treats
Store These Bars in Airtight Containers
FAQs
Yes, you can easily swap or mix nuts and seeds based on your preference or availability. Almonds, pecans, sunflower seeds, and pumpkin seeds work great in this recipe.
These bars are packed with nutritious ingredients like oats, nuts, and seeds, providing protein, fiber, and healthy fats. They’re a much healthier alternative to store-bought processed snack bars.
Absolutely! Replace honey with maple syrup, and use plant-based milk like almond or oat milk. Choose vegan-friendly nut butter to create a completely vegan version of these cereal bars.
Ensure you press the mixture firmly into the pan and let it refrigerate for the full 2 hours. The chilling time helps the bars bind together and maintain their shape when cut.
Print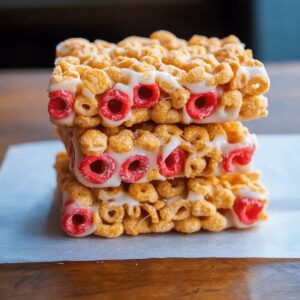
Crunchy Cereal Bars Recipe
- Total Time: 1 hour 10 minutes
- Yield: 13 1x
Description
Homemade granola bars with classic Cereal Bars offer a delightful blend of wholesome ingredients and nostalgic flavors. Crisp oats, honey, and nuts combine for a satisfying snack you’ll crave from first bite to last.
Ingredients
- 3 cups (75 g / 2.6 oz) cereal (Cheerios, puffed rice, or granola)
- ½ cup (120 g / 4.2 oz) nut butter (peanut butter, almond butter, or sunflower seed butter for nut-free)
- ½ cup (120 ml / 4 fl oz) honey or maple syrup
- ¼ cup (40 g / 1.4 oz) mini chocolate chips
- ¼ cup (30 g / 1 oz) dried fruit (raisins, cranberries, or chopped apricots)
- 2 tbsps (20 g / 0.7 oz) chia seeds or flaxseeds for extra nutrition
- 1 tsp vanilla extract
- ¼ tsp salt
Instructions
- Preparation: Line a rectangular dish with parchment paper, extending edges for effortless removal and ensuring complete coverage.
- Ingredient Fusion: Combine oats, seeds, nuts, and dried fruits in a large mixing bowl, blending thoroughly to create a harmonious dry mixture.
- Liquid Base Creation: Gently heat nut butter, honey, milk, and vanilla extract in a saucepan, stirring continuously until the mixture transforms into a smooth, integrated liquid.
- Mixture Integration: Pour warm liquid over dry ingredients, using a comprehensive folding technique to ensure complete and even coating of all components.
- Compaction: Transfer the moistened mixture into the prepared dish, applying firm, uniform pressure with a spatula to create a dense, consistent layer.
- Setting and Stabilization: Refrigerate the assembled mixture for two hours, allowing the bars to solidify and develop a robust structure.
- Portioning: Remove the set block from the refrigerator, use parchment paper edges to lift onto a cutting surface, and slice into uniform rectangles or squares.
- Storage: Store crafted bars in an airtight container, choosing room temperature for short-term preservation or refrigeration for extended freshness.
Notes
Optimize Ingredient Mixing: Thoroughly combine dry ingredients before adding wet components to ensure even distribution of flavors and prevent clumping of nuts, seeds, or fruits.
Adjust Binding Consistency: Control the liquid-to-dry ratio by gradually adding heated mixture, watching for proper cohesion that allows bars to hold together without becoming too sticky or crumbly.
Customize Dietary Preferences: Swap ingredients to accommodate allergies or dietary needs – use gluten-free oats for celiac diets, replace honey with maple syrup for vegan options, or substitute nut butter with seed butter for nut-free versions.
Master Chilling Technique: Press mixture firmly into pan and refrigerate exactly two hours for optimal texture – too short means crumbly bars, while over-chilling can make them hard and difficult to cut cleanly.
- Prep Time: 10 minutes
- Cook Time: 1 hour
- Category: Snacks, Breakfast
- Method: Baking
- Cuisine: American
Nutrition
- Serving Size: 13
- Calories: 181
- Sugar: 10 g
- Sodium: 55 mg
- Fat: 7 g
- Saturated Fat: 1 g
- Unsaturated Fat: 6 g
- Trans Fat: 0 g
- Carbohydrates: 26 g
- Fiber: 2 g
- Protein: 4 g
- Cholesterol: 0 mg
Emily Lawson
Content Creator & Culinary Specialist
Expertise
Education
Oregon Culinary Institute
Diploma in Culinary Arts
Focus: Emphasis on farm-to-table cooking, sustainable practices, and the fusion of global flavors with traditional grilling methods.
Emily Lawson is the content creator at Daves Grill, turning tasty ideas into clear, easy recipes. Based in Portland, she trained at the Oregon Culinary Institute and loves cooking with fresh, seasonal ingredients, especially grilled veggies and global flavors.
Emily mixes food writing with hands-on cooking to bring you recipes that feel fun, not stressful. Her goal is to make every dish simple, flavorful, and worth coming back to. Together, she and Dave serve up real food, one recipe at a time.