
Jolly Peppermint Bark Recipe: A Sweet Holiday Treat!
Chocolate lovers can’t resist the festive magic of homemade peppermint bark that combines rich chocolate with a refreshing minty crunch.
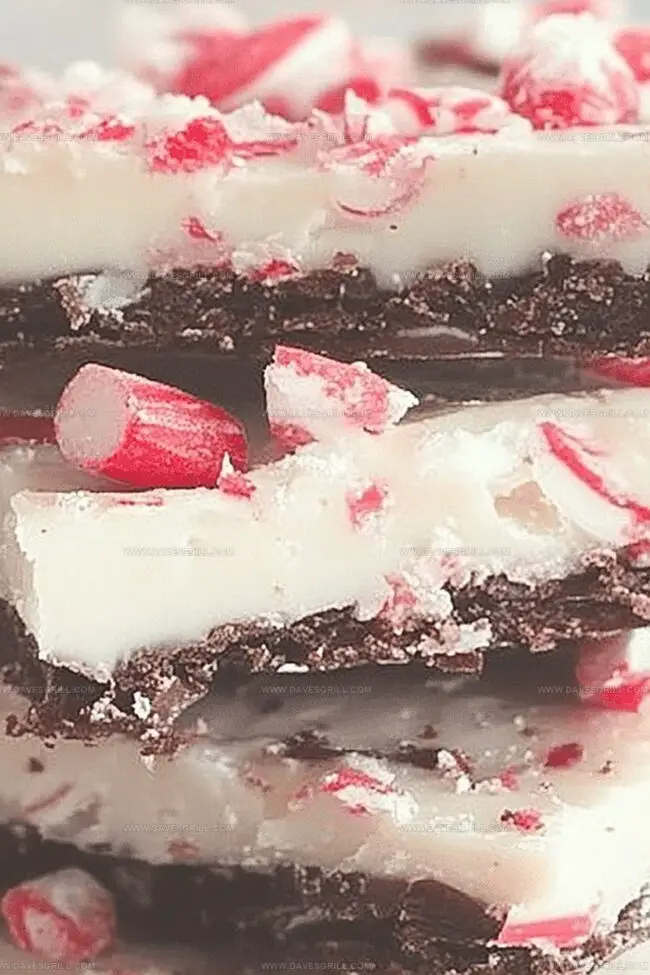
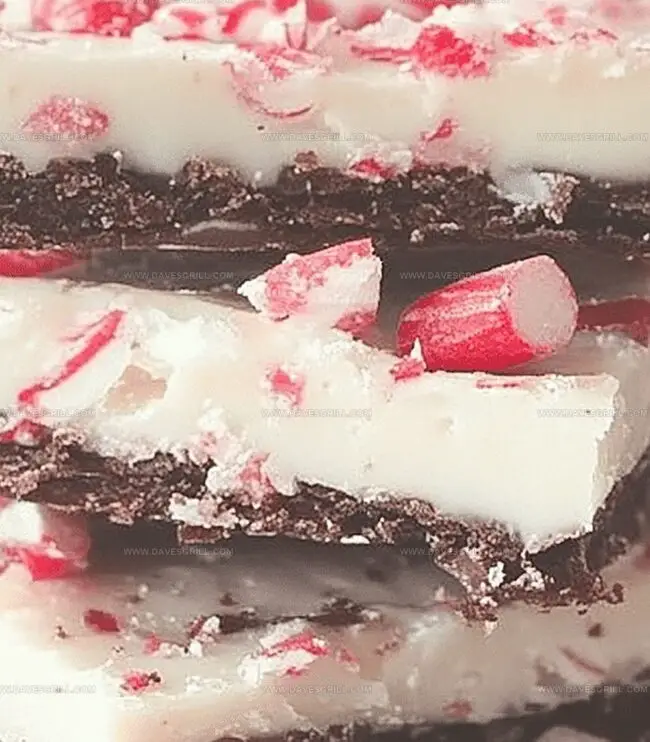
This seasonal treat captures the essence of winter celebrations with its delicate layers of dark and white chocolate.
Crisp peppermint candies create a delightful texture that melts in your mouth.
The simple recipe requires just a few ingredients and minimal kitchen skills.
Each bite delivers a perfect balance of sweetness and cool mint flavor.
With just 15 minutes of preparation, you can create a stunning dessert that looks like it came from an expensive candy shop.
Prepare to wow everyone at your next holiday gathering with this irresistible confection.
Quick Recipe Overview
Peppermint Bark Ingredient Essentials
For Chocolate Base:For White Chocolate Layer:For Topping and Decoration:Tools That Help Spread and Chill Peppermint Bark
Make Classic Peppermint Bark with Crunchy Bits
Grab a baking sheet and line it with parchment paper for easy candy creation.
Carefully melt dark chocolate in short microwave bursts or using a double boiler. Spread smoothly across the lined sheet and chill until firm.
Gently melt white chocolate and pour over the dark chocolate layer. Sprinkle crushed peppermint candies across the surface, pressing lightly to ensure they stick.
Refrigerate the bark until completely hardened, which takes about 30-45 minutes.
Remove the bark from the parchment and crack into delightful irregular pieces. Serve immediately or store in an airtight container for future sweet moments.
Tips to Layer Chocolate and Peppermint Just Right
Serve Peppermint Bark as Holiday Treats
Store Peppermint Bark in Cool, Dry Places
FAQs
Always use low heat and stir frequently. For microwave method, use 20-second intervals and stir between each interval. If using a double boiler, ensure water doesn’t touch the bottom of the bowl and keep heat low and gentle.
Yes, you can use milk chocolate or semi-sweet chocolate instead of dark chocolate. Just ensure the chocolate is high-quality and melts smoothly. The key is using chocolate that has good melting properties.
No problem! You can skip the extract entirely, and the bark will still taste delicious. The crushed peppermint candies will provide plenty of peppermint flavor. Alternatively, you can use a small amount of mint flavoring from your baking supplies.
Aim for a mix of fine and small chunks. Some pieces should be powdery, while others can be slightly larger. This creates a more interesting texture and ensures peppermint flavor is distributed evenly across the bark.
Print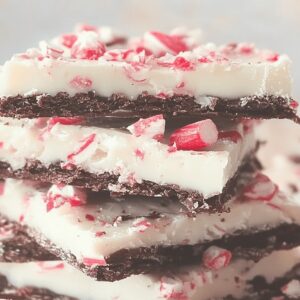
Delightful Peppermint Bark Recipe
- Total Time: 1 hour 5 minutes
- Yield: 17 1x
Description
Homemade Peppermint Bark delights holiday guests with its festive chocolate layers and crushed candy cane topping. Crisp peppermint pieces and rich chocolate create a simple yet irresistible seasonal treat you’ll enjoy sharing with friends and family.
Ingredients
- 200 g (7 oz) dark or semi-sweet chocolate, chopped
- 200 g (7 oz) white chocolate, chopped
- 1 tsp peppermint extract (optional)
- ½ cup (75 g) crushed peppermint candies or candy canes
Instructions
- Preparation: Line a baking sheet with parchment paper or silicone mat, ensuring complete surface coverage for easy chocolate removal.
- Dark Chocolate Base: Melt dark chocolate using a double boiler or microwave, stirring constantly to achieve a smooth, glossy consistency. Blend in peppermint extract, then spread evenly across the prepared baking sheet.
- Initial Setting: Refrigerate the dark chocolate layer for 20 minutes until firm and stable, creating a solid foundation for the white chocolate topping.
- White Chocolate Layer: Melt white chocolate with gentle heat, stirring continuously. Incorporate remaining peppermint extract and pour carefully over the chilled dark chocolate base.
- Garnishing: Immediately sprinkle crushed peppermint candies across the surface, pressing lightly to ensure they stick to the chocolate.
- Final Chilling: Return the bark to the refrigerator for at least 30 minutes, allowing it to solidify completely.
- Serving: Break the chilled bark into irregular, rustic pieces. Store in an airtight container at room temperature or refrigerated for up to two weeks.
Notes
Prevent Chocolate Burning: Use low, steady heat when melting chocolate to avoid scorching, which can create a bitter taste and grainy texture.
Temperature Control: Allow melted chocolate to cool slightly before spreading to prevent separation and ensure a smooth, glossy finish.
Candy Crushing Technique: Place peppermint candies in a sealed plastic bag and gently crush with a rolling pin for uniform, fine pieces that distribute evenly.
Storage Smartness: Layer parchment paper between bark pieces when storing to prevent sticking and maintain the chocolate’s pristine appearance.
- Prep Time: 15 minutes
- Cook Time: 50 minutes
- Category: Desserts, Snacks
- Method: Baking
- Cuisine: American
Nutrition
- Serving Size: 17
- Calories: 150
- Sugar: 18 g
- Sodium: 20 mg
- Fat: 8 g
- Saturated Fat: 4.5 g
- Unsaturated Fat: 3.5 g
- Trans Fat: 0 g
- Carbohydrates: 18 g
- Fiber: 0.5 g
- Protein: 1 g
- Cholesterol: 0 mg
Emily Lawson
Content Creator & Culinary Specialist
Expertise
Education
Oregon Culinary Institute
Diploma in Culinary Arts
Focus: Emphasis on farm-to-table cooking, sustainable practices, and the fusion of global flavors with traditional grilling methods.
Emily Lawson is the content creator at Daves Grill, turning tasty ideas into clear, easy recipes. Based in Portland, she trained at the Oregon Culinary Institute and loves cooking with fresh, seasonal ingredients, especially grilled veggies and global flavors.
Emily mixes food writing with hands-on cooking to bring you recipes that feel fun, not stressful. Her goal is to make every dish simple, flavorful, and worth coming back to. Together, she and Dave serve up real food, one recipe at a time.