Enchanting Oreo Mud Pie Recipe: A Sweet Cloud of Bliss
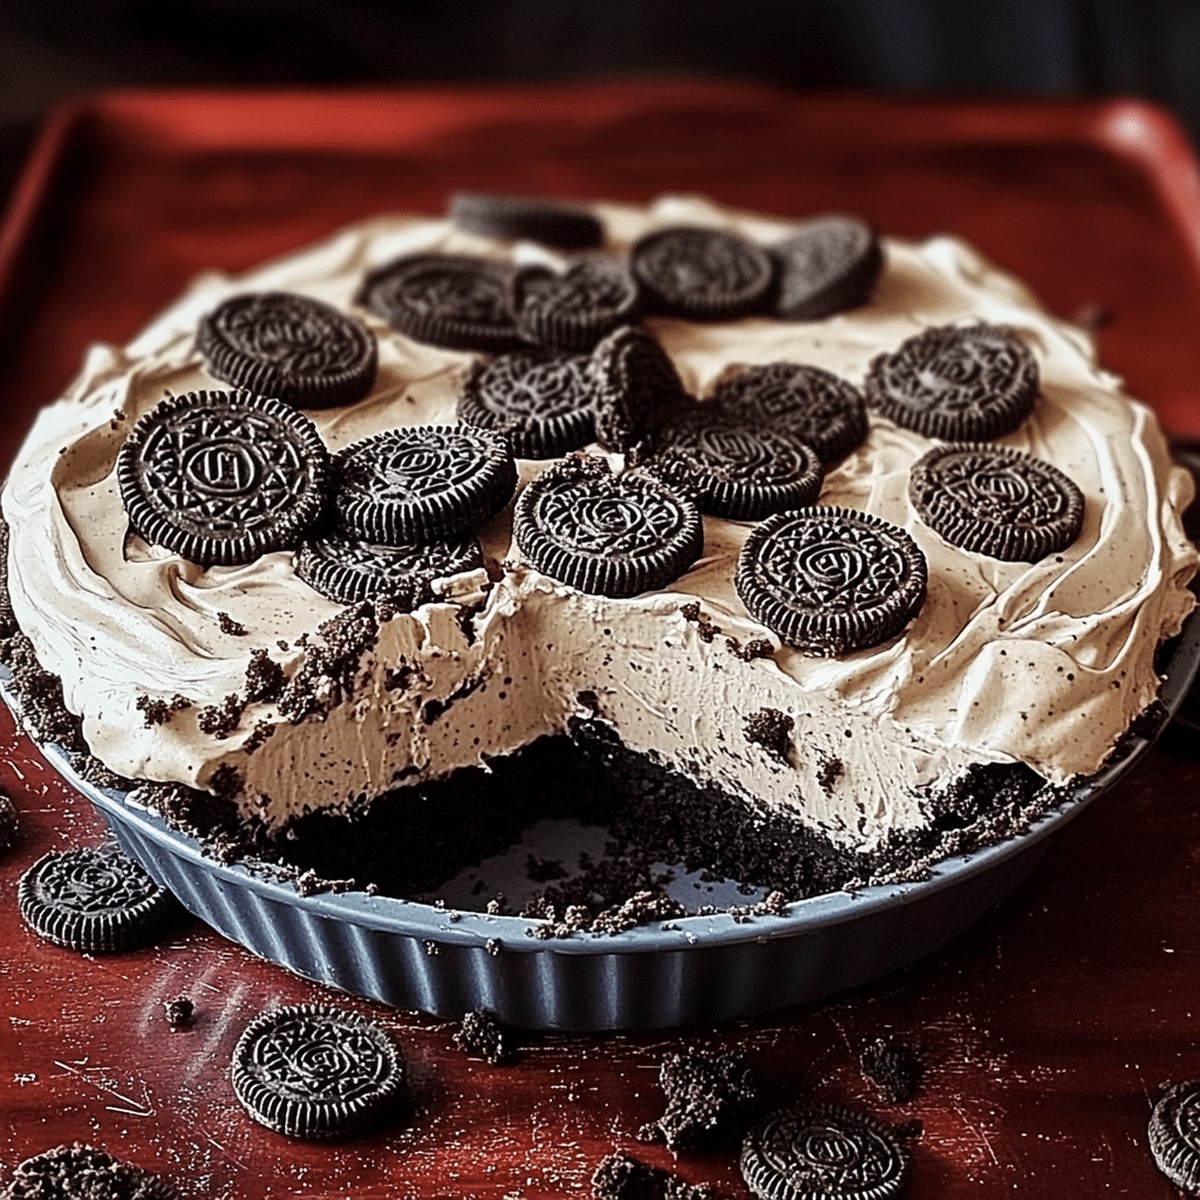
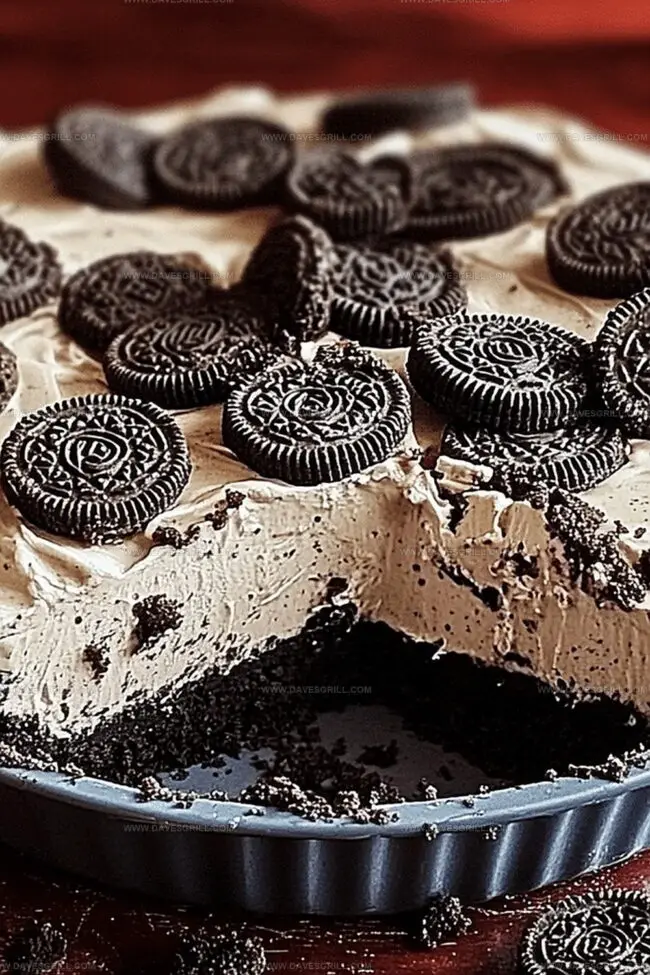
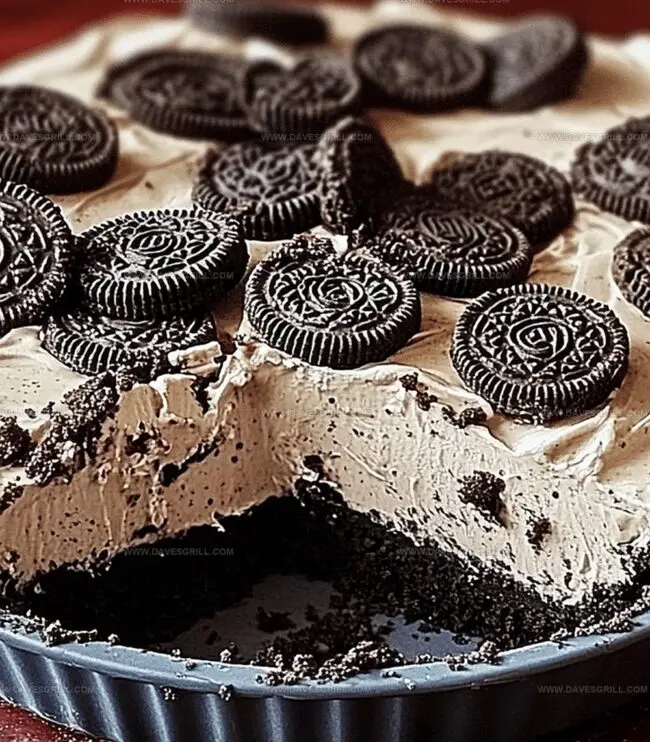
Chocolate enthusiasts go wild for this decadent Oreo mud pie that blends rich, creamy textures with an irresistible cookie crunch.
The silky smooth dessert captures layers of indulgence in every single bite.
Deep chocolate flavors mingle with crushed Oreo cookies, creating a dessert that feels like pure bliss.
Each spoonful promises a luxurious experience that melts effortlessly on your tongue.
The pie’s velvety filling and crisp cookie base form a perfect harmony of tastes and textures.
Dark chocolate ganache drizzled on top adds an elegant finishing touch that elevates this classic treat.
Prepare to satisfy your sweetest cravings with this show-stopping dessert that’s sure to impress at any gathering.
Quick Recipe Overview
No-Bake Oreo Mud Pie Ingredients You’ll Crave
For Crust:For Creamy Layers:For Garnish:What You’ll Need to Make No-Bake Oreo Mud Pie
Layer and Chill Your Oreo Mud Pie Step-by-Step
Pulverize cookies into fine crumbs using a food processor or sealed bag. Blend crumbs with melted butter until thoroughly mixed. Press mixture firmly into pie pan creating a smooth foundation. Refrigerate while preparing next layers.
Beat cream cheese with powdered sugar until silky and luxurious. Spread evenly across chilled cookie crust creating a decadent initial layer.
Combine pudding mix and milk, whisking until mixture transforms into thick chocolatey goodness. Pour smoothly over cream cheese foundation.
Generously spread whipped topping across chocolate layer, creating a light and airy surface.
Refrigerate pie for minimum 4 hours, allowing layers to meld and solidify into a dreamy dessert. Overnight chilling enhances flavor complexity.
Sprinkle additional crushed cookies or drizzle chocolate sauce before presenting this irresistible treat. Slice and indulge in creamy, chocolatey bliss.
Flavor Boosts for Oreo Mud Pie You’ll Love
Serving No-Bake Oreo Mud Pie with Style
Chilling and Storing Your Oreo Mud Pie Right
FAQs
Yes, Oreo cookies are essential for creating the crust and adding a rich chocolate flavor to the mud pie. If you don’t have Oreos, similar chocolate sandwich cookies can work as a substitute.
Absolutely! Homemade whipped cream is a great alternative to store-bought whipped topping. Just whip heavy cream with a bit of powdered sugar until stiff peaks form.
No, this recipe contains dairy ingredients like cream cheese, milk, and whipped topping. Those with dairy allergies or lactose intolerance should avoid this dessert or seek dairy-free alternatives.
The pie can be stored in the refrigerator for up to 3-4 days when covered with plastic wrap or kept in an airtight container. The texture remains best within the first 2 days.
Print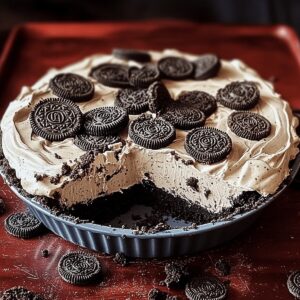
Dreamy Oreo Mud Pie Recipe
- Total Time: 20 minutes
- Yield: 9 1x
Description
Creamy No-Bake Oreo Mud Pie delivers a chocolatey paradise of crushed cookies and smooth layers. Rich textures and indulgent flavors promise a delightful dessert experience you won’t want to miss.
Ingredients
- 24 oreo cookies
- 5 tbsps (75 g) unsalted butter
- 1 package (3.9 oz / 110 g) instant chocolate pudding mix
- 2 cups (475 ml) cold milk
- 1 ½ cups (360 ml) whipped cream
- ½ cup (120 ml) heavy cream
- ½ cup (90 g) crushed oreos
- 2 tbsps powdered sugar
- 1 tsp vanilla extract
- Chocolate sauce (optional)
- Extra crushed oreos or chocolate shavings for garnish
Instructions
- Crust Formation: Pulverize Oreo cookies into fine crumbs and blend with melted butter, pressing the mixture firmly and evenly across the bottom and sides of a 9-inch pie dish to create a sturdy, uniform foundation.
- Cream Cheese Layer: Whip cream cheese with powdered sugar until achieving a smooth, creamy texture, then carefully spread the mixture over the chilled Oreo crust, ensuring complete coverage.
- Chocolate Pudding Layer: Prepare chocolate pudding by whisking mix with milk until the consistency transforms into a rich, glossy chocolate layer, then gently pour over the cream cheese base to create an even, tempting surface.
- Whipped Topping Finale: Generously spread whipped topping across the chocolate pudding layer, crafting elegant swirls and peaks that promise a light, airy contrast to the underlying dense layers.
- Chilling and Garnishing: Refrigerate the pie for at least four hours to allow layers to set and flavors to meld, then garnish with crushed Oreo cookies and a dramatic chocolate syrup drizzle just before serving.
Notes
- Crush Cookies Completely: Ensure Oreo cookies are ground into ultra-fine crumbs for a smooth, even crust that holds together perfectly without falling apart.
- Chill Thoroughly: Refrigerate the pie for at least 4-6 hours, or ideally overnight, to allow layers to set completely and develop rich, harmonious flavors.
- Soften Ingredients Strategically: Bring cream cheese to room temperature before mixing to achieve a lump-free, silky smooth filling that spreads effortlessly.
- Customize Creatively: Swap regular Oreos with gluten-free or double-stuffed varieties, or experiment with different pudding flavors to personalize the dessert according to dietary needs or taste preferences.
- Prep Time: 20 minutes
- Cook Time: 0 minutes
- Category: Desserts, Snacks
- Method: Blending
- Cuisine: American
Nutrition
- Serving Size: 9
- Calories: 305
- Sugar: 24 g
- Sodium: 200 mg
- Fat: 19 g
- Saturated Fat: 10 g
- Unsaturated Fat: 9 g
- Trans Fat: 0 g
- Carbohydrates: 34 g
- Fiber: 1 g
- Protein: 3 g
- Cholesterol: 30 mg
Emily Lawson
Content Creator & Culinary Specialist
Expertise
Education
Oregon Culinary Institute
Diploma in Culinary Arts
Focus: Emphasis on farm-to-table cooking, sustainable practices, and the fusion of global flavors with traditional grilling methods.
Emily Lawson is the content creator at Daves Grill, turning tasty ideas into clear, easy recipes. Based in Portland, she trained at the Oregon Culinary Institute and loves cooking with fresh, seasonal ingredients, especially grilled veggies and global flavors.
Emily mixes food writing with hands-on cooking to bring you recipes that feel fun, not stressful. Her goal is to make every dish simple, flavorful, and worth coming back to. Together, she and Dave serve up real food, one recipe at a time.