Fluffy Banana & Condensed Milk Cake Recipe: Baking Joy!
Sweet aromas dance through the kitchen when baking a delectable banana and condensed milk cake that promises pure comfort.
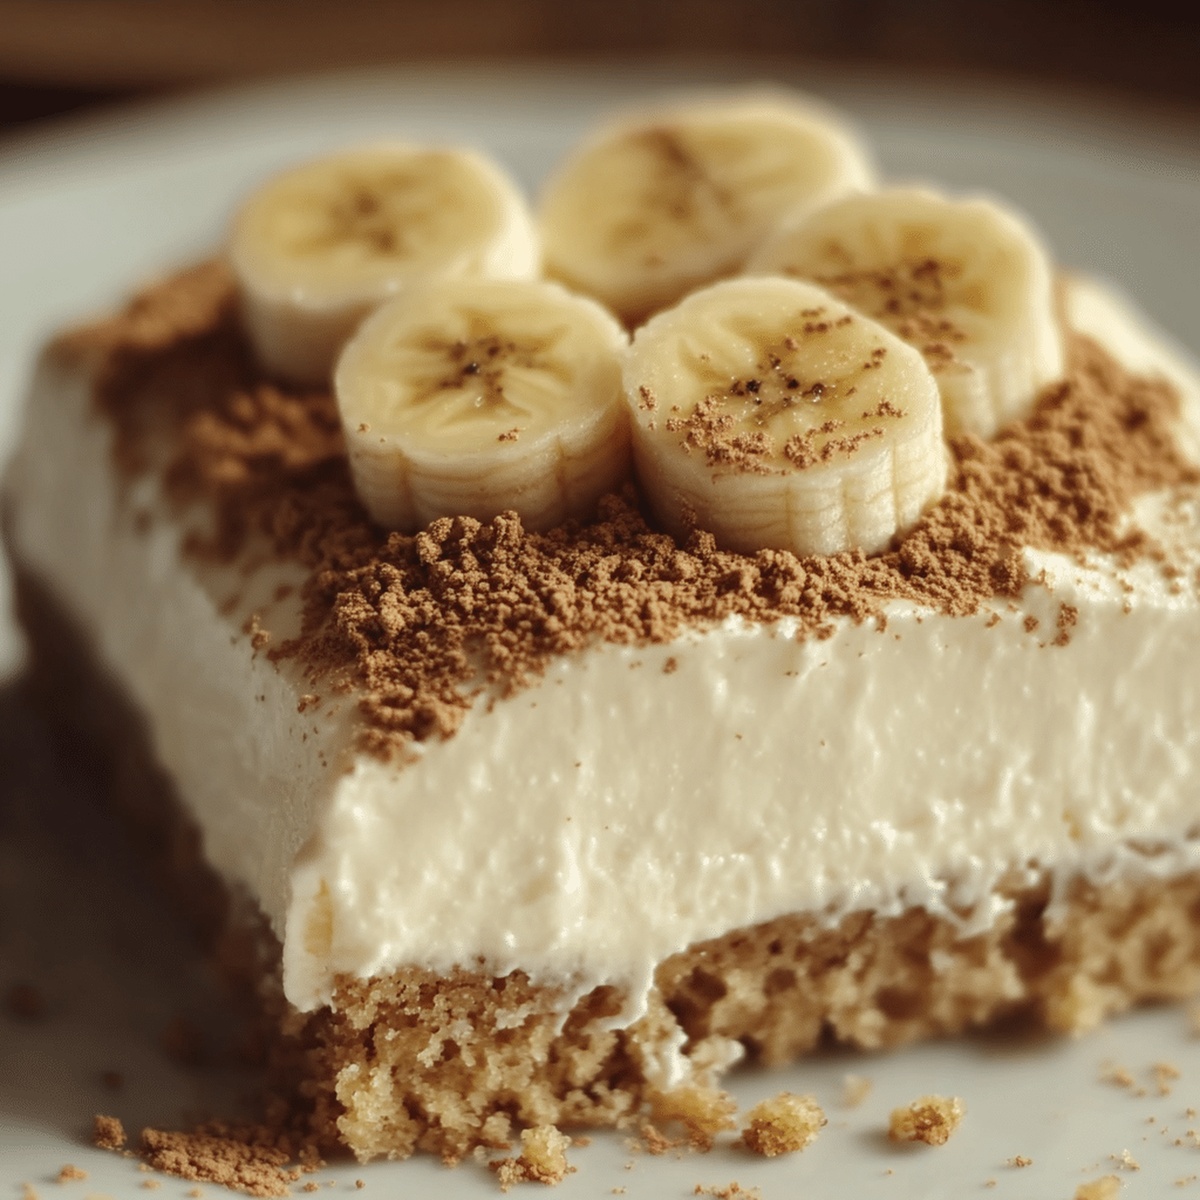
This moist, decadent treat blends ripe bananas with creamy condensed milk for an irresistible dessert.
The recipe combines simple ingredients into a magical culinary experience that elevates home baking.
Each slice carries rich, velvety textures that melt effortlessly on your palate.
Soft bananas infuse natural sweetness while condensed milk adds luxurious depth to every crumb.
The cake emerges golden and tender, beckoning eager taste buds with its enticing fragrance.
Prepare to savor a slice of pure, homemade bliss that will have everyone asking for seconds.
Quick Recipe Overview

Ingredients for No-Bake Banana and Condensed Milk Cake
For Base Layer:For Fruit Base:For Binding and Creaminess:For Optional Enhancement:Tools to Whip Up No-Bake Banana and Condensed Milk Cake
Assemble Banana and Condensed Milk Cake in Minutes

Crush digestive biscuits into fine crumbs using a rolling pin or food processor. Break them into tiny pieces that will form a delicious foundation for your dessert.
Mash ripe bananas until silky smooth in a large bowl. Pour in condensed milk and mix thoroughly, creating a luscious, sweet blend that will make your taste buds dance.
In a serving dish, spread a generous layer of banana-milk mixture. Top with a sprinkle of biscuit crumbs, pressing gently. Repeat layers, finishing with a creamy banana topping that looks irresistible.
Refrigerate your creation for at least 3 hours or overnight. During this time, the biscuits will soften and merge with the banana mixture, creating a heavenly no-bake cake experience.
Before serving, get creative with toppings. Scatter fresh banana slices, drizzle extra condensed milk, or sprinkle chocolate shavings for an extra touch of decadence.
Tips That Create a Smooth, Sweet No-Bake Dessert
Serve Banana Condensed Milk Cake for Summer or Weeknights
Store This Chilled Cake for a Soft Texture
FAQs
Use a blender or food processor to mash bananas completely. If using a fork, mash thoroughly and press against the bowl’s sides to break down any large chunks.
Graham crackers or vanilla wafers work great as alternatives to digestive biscuits. Choose a neutral-flavored, crisp cookie that will absorb the banana mixture well.
Use riper bananas for better sweetness and easier mashing. If your bananas are still firm, let them sit at room temperature for a few days until they develop brown spots and become softer.
Yes, it’s a kid-friendly dessert with simple ingredients and no baking required. The sweet, creamy texture makes it appealing to children, and they can even help with mixing and layering.
Print
Effortless Banana And Condensed Milk Cake Recipe
- Total Time: 4 hours 15 minutes
- Yield: 13 1x
Description
Banana condensed milk cake delights dessert enthusiasts with simple ingredients and zero oven time. Rich Colombian-inspired layers blend creamy textures and sweet tropical flavors you’ll crave after one delicious bite.
Ingredients
- 4–5 ripe bananas (sliced into thin rounds)
- 1 can (397 g / 14 oz) sweetened condensed milk
- 300 g (10 oz) digestive biscuits or graham crackers
- 1 cup (240 ml) heavy cream
- 1 tsp vanilla extract
- Grated chocolate or cocoa powder (optional)
- Crushed nuts (optional)
- Whipped cream (optional)
Instructions
- Preparation: Pulverize digestive biscuits into fine, uniform crumbs using a rolling pin or food processor, ensuring a consistent texture for the dessert’s foundation.
- Banana Fusion: Transform ripe bananas into a silky puree, blending thoroughly to eliminate lumps and create a smooth mixture.
- Creamy Amalgamation: Whisk sweetened condensed milk into the banana puree, stirring until the ingredients merge into a glossy, luscious blend.
- Flavor Enhancement: Gently fold heavy cream and vanilla extract into the mixture, amplifying its richness and complexity.
- Layering Technique: In a serving dish, spread a generous layer of banana-condensed milk mixture as the base, then carefully distribute a uniform layer of biscuit crumbs, pressing gently to create a stable foundation.
- Texture Building: Continue alternating layers of banana mixture and biscuit crumbs, creating an enticing visual pattern and building height.
- Final Touch: Complete the layering with a luxurious top coat of banana and condensed milk mixture, ensuring an appealing surface.
- Chilling Process: Refrigerate for a minimum of three hours, preferably overnight, allowing ingredients to meld and biscuits to soften into a cake-like consistency.
- Garnishing: Optional – Embellish with banana slices, a condensed milk drizzle, or chocolate shavings to elevate presentation and flavor complexity before serving.
Notes
- Choose Ripe Bananas: Select soft, golden-brown bananas with brown speckles for maximum sweetness and easier blending.
- Control Biscuit Texture: Crush digestive biscuits to a fine, uniform consistency to prevent crumbly layers and ensure smooth cake structure.
- Manage Cream Incorporation: Fold heavy cream gently to maintain air bubbles, preventing mixture from becoming dense and preserving light, creamy texture.
- Refrigeration is Key: Allow minimum 3-4 hours chilling time, preferably overnight, for flavors to develop and layers to set properly, creating perfect cake-like consistency.
- Prep Time: 15 minutes
- Cook Time: 4 hours
- Category: Desserts, Snacks
- Method: Blending
- Cuisine: American
Nutrition
- Serving Size: 13
- Calories: 210
- Sugar: 17 g
- Sodium: 85 mg
- Fat: 10 g
- Saturated Fat: 6 g
- Unsaturated Fat: 4 g
- Trans Fat: 0 g
- Carbohydrates: 28 g
- Fiber: 1 g
- Protein: 3 g
- Cholesterol: 30 mg
Emily Lawson
Content Creator & Culinary Specialist
Expertise
Education
Oregon Culinary Institute
Diploma in Culinary Arts
Focus: Emphasis on farm-to-table cooking, sustainable practices, and the fusion of global flavors with traditional grilling methods.
Emily Lawson is the content creator at Daves Grill, turning tasty ideas into clear, easy recipes. Based in Portland, she trained at the Oregon Culinary Institute and loves cooking with fresh, seasonal ingredients, especially grilled veggies and global flavors.
Emily mixes food writing with hands-on cooking to bring you recipes that feel fun, not stressful. Her goal is to make every dish simple, flavorful, and worth coming back to. Together, she and Dave serve up real food, one recipe at a time.