
Grandma’s Secret Pecan Pie Bars Recipe: Sweet Bliss Made Simple
Indulge in a dessert that marries buttery, flaky pastry with gooey pecan pie bars that melt in your mouth.
Every baker dreams of creating a treat so irresistible, it becomes an instant classic.
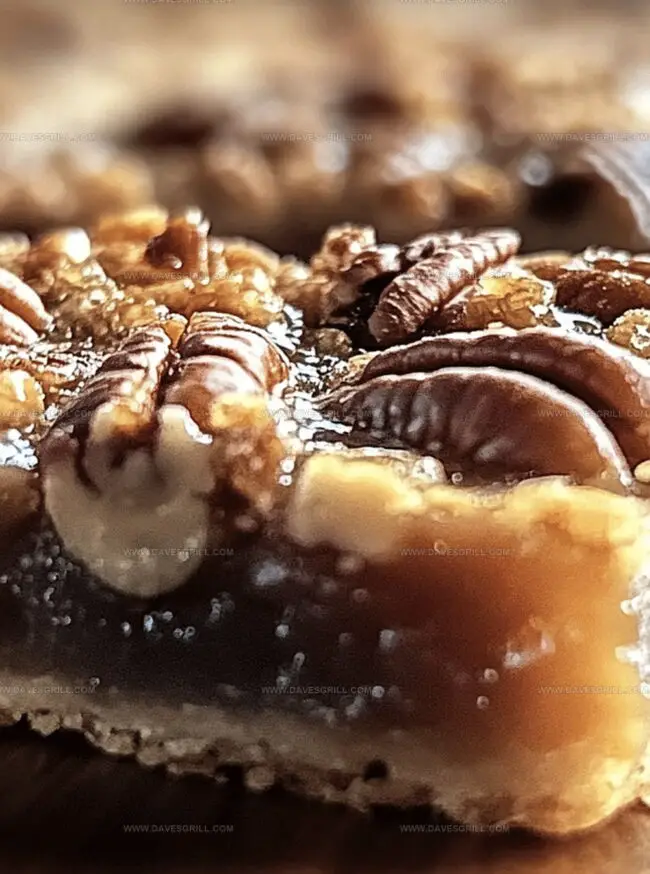
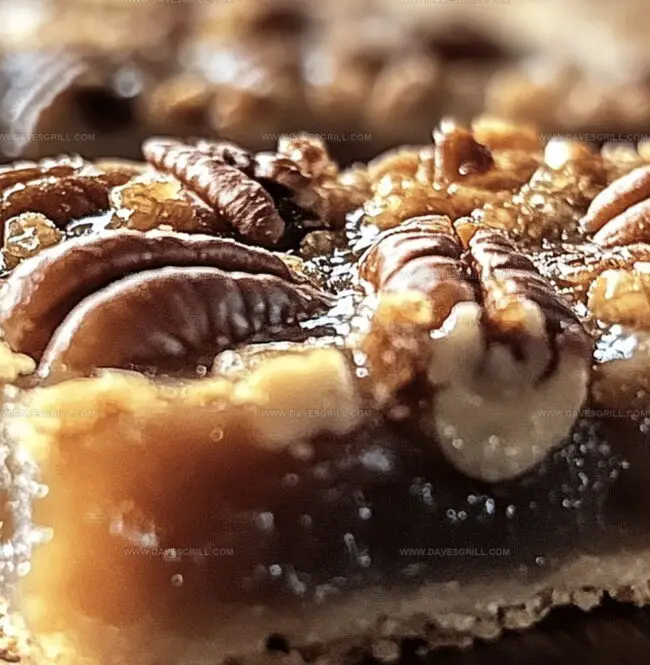
The rich, caramel-like filling nestled between a crisp shortbread crust promises pure comfort in each bite.
Pecans bring a delightful crunch that elevates this sweet delicacy beyond ordinary desserts.
Southern baking traditions shine through with this simple yet decadent recipe.
These bars are perfect for weekend gatherings, potlucks, or when you crave something truly special.
Prepare to fall in love with a dessert that celebrates the art of simple, delicious baking.
Quick Recipe Overview
Pecan Pie Bar Ingredient Breakdown
For Crust:For Filling Base:For Topping:Tools for Easy, No-Fuss Pie Bars
Make Gooey, Nutty Bars in Less Time
Crank the oven to a toasty 350F and grab a 9×13 baking dish. Give it a quick spray of cooking oil to prevent any sticky situations.
Unroll those pre-made pie crusts and gently press them into the bottom of the pan, making sure they cover every inch like a cozy blanket.
In a big mixing bowl, blend corn syrup, brown sugar, melted butter, eggs, vanilla, and a pinch of salt until super smooth. Toss in the pecans and give everything a good stir so they’re all swimming in that delicious mixture.
Pour the pecan mixture over the crust, spreading it out evenly like you’re painting a delicious masterpiece. Slide the pan into the oven and let it bake for 30-35 minutes. You’ll know it’s done when the top turns a gorgeous golden brown and the filling looks set.
Let the bars cool completely – this is crucial for getting those perfect, clean slices. Once cooled, cut into squares and prepare for a flavor explosion.
Tips That Keep the Bottom Firm and Crisp
Serve Sliced or in Squares
Store at Room Temp or in the Fridge
FAQs
Yes, you can definitely use homemade pie crust. It will add a more personal touch and potentially enhance the flavor of the pecan pie bars.
The bars are done when the filling is set (no longer jiggly) and the top has turned a golden brown color. A slight wobble is okay, but it shouldn’t look liquidy.
No toasting is required for this recipe. The pecans will toast and develop flavor during the baking process, saving you an extra step.
Absolutely! These pecan pie bars can be made 1-2 days in advance and stored at room temperature. They actually taste better as the flavors meld together over time.
Print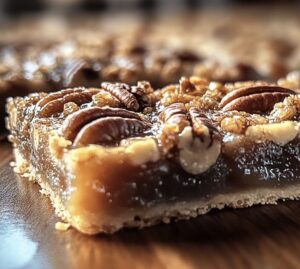
Effortless Pecan Pie Bars Recipe
- Total Time: 50 minutes
- Yield: 13 1x
Description
Pecan pie bars offer a delightful Southern dessert perfect for busy bakers. Buttery graham cracker crust and rich caramel-like filling create an irresistible treat you’ll crave again and again.
Ingredients
- 1 ½ cups (360 ml) pecan halves
- 3 large eggs
- 1 cup (220 g) packed brown sugar
- 1 cup (240 ml) light corn syrup
- ½ cup (226 g or 8 oz) unsalted butter, melted
- 2 refrigerated pie crusts (16 oz or 454 g)
- 1 tsp vanilla extract
- ¼ tsp salt
Instructions
- Preparation: Preheat the oven to 350°F (175°C) and thoroughly grease a 9×13-inch baking pan, ensuring complete surface coverage.
- Crust Formation: Carefully spread the pastry dough across the entire pan bottom, gently pressing to create a smooth, seamless foundation without cracks or gaps.
- Filling Creation: Whisk together corn syrup, sugar, butter, eggs, vanilla, and salt in a large bowl until the mixture develops a silky, uniform texture that hints at the decadent dessert to come.
- Pecan Integration: Gently fold pecan halves into the liquid mixture, ensuring each nut becomes completely enrobed and evenly distributed throughout the filling.
- Assembly and Baking: Pour the pecan-laden filling over the pastry base, using a spatula to create an even layer, then transfer to the preheated oven and bake for 30-35 minutes until the surface turns a rich golden bronze and the filling sets with a firm, minimal jiggle.
- Cooling and Serving: Remove from the oven and allow the bars to cool completely, giving the filling time to solidify. Once cooled, slice into rectangular portions that reveal the pie’s luscious nutty interior and delicate pastry base.
Notes
- Pastry Perfection: Roll out the chilled dough carefully to prevent cracking, ensuring a smooth, even base that won’t break during baking.
- Prevent Soggy Bottom: Blind bake the pastry for 10 minutes before adding filling to create a crisp, golden crust that resists moisture.
- Pecan Distribution Magic: Gently fold pecans to avoid sinking, ensuring an even spread of nuts throughout the filling for consistent texture.
- Temperature Precision: Let bars cool completely at room temperature to allow filling to set properly, preventing runny or overly soft centers.
- Prep Time: 15 minutes
- Cook Time: 35 minutes
- Category: Desserts, Snacks
- Method: Baking
- Cuisine: American
Nutrition
- Serving Size: 13
- Calories: 280
- Sugar: 22 g
- Sodium: 100 mg
- Fat: 14 g
- Saturated Fat: 6 g
- Unsaturated Fat: 8 g
- Trans Fat: 0 g
- Carbohydrates: 34 g
- Fiber: 1 g
- Protein: 3 g
- Cholesterol: 70 mg
Emily Lawson
Content Creator & Culinary Specialist
Expertise
Education
Oregon Culinary Institute
Diploma in Culinary Arts
Focus: Emphasis on farm-to-table cooking, sustainable practices, and the fusion of global flavors with traditional grilling methods.
Emily Lawson is the content creator at Daves Grill, turning tasty ideas into clear, easy recipes. Based in Portland, she trained at the Oregon Culinary Institute and loves cooking with fresh, seasonal ingredients, especially grilled veggies and global flavors.
Emily mixes food writing with hands-on cooking to bring you recipes that feel fun, not stressful. Her goal is to make every dish simple, flavorful, and worth coming back to. Together, she and Dave serve up real food, one recipe at a time.