
Festive Eggnog Rum Balls Recipe: Holiday Joy in Each Bite
Holiday parties sparkle with these decadent rum balls that blend festive cheer and nostalgic flavors.
Seasonal baking brings unexpected delights to cookie platters and gift boxes.
Creamy eggnog whispers sweet memories of winter celebrations and cozy gatherings.
Rich rum-soaked crumbs promise a delightful adult treat that tingles taste buds.
Traditional cookie recipes get a playful upgrade with this boozy confection.
Compact and intensely flavored, these rum balls deliver a punch of seasonal spirit.
Each bite connects you to cherished moments of joy and celebration.
Join me in crafting these irresistible no-bake delights that will make your holiday gathering unforgettable.
Standout Elements of Eggnog Rum Balls
Ingredients to Make Eggnog Rum Balls
Dry Base Ingredients:Liquid Ingredients:Coating Ingredient:Simple Prep for Eggnog Rum Balls
Step 1: Crush the Base
Place vanilla wafers in a food processor or seal them in a zip-top bag. Crush until they become fine crumbs. Transfer the crumbs into a large mixing bowl.
Step 2: Blend Dry Ingredients
Add these ingredients to the wafer crumbs:Mix thoroughly to ensure even distribution.
Step 3: Incorporate Liquid Elements
Pour into the mixture:Stir until the mixture becomes moist and holds together. Add extra eggnog if the consistency seems dry.
Step 4: Shape the Treats
Use your hands to scoop and roll the mixture into small balls. Aim for bite-sized rounds about one inch in diameter. This recipe typically yields 20-25 rum balls.
Step 5: Create a Snowy Coating
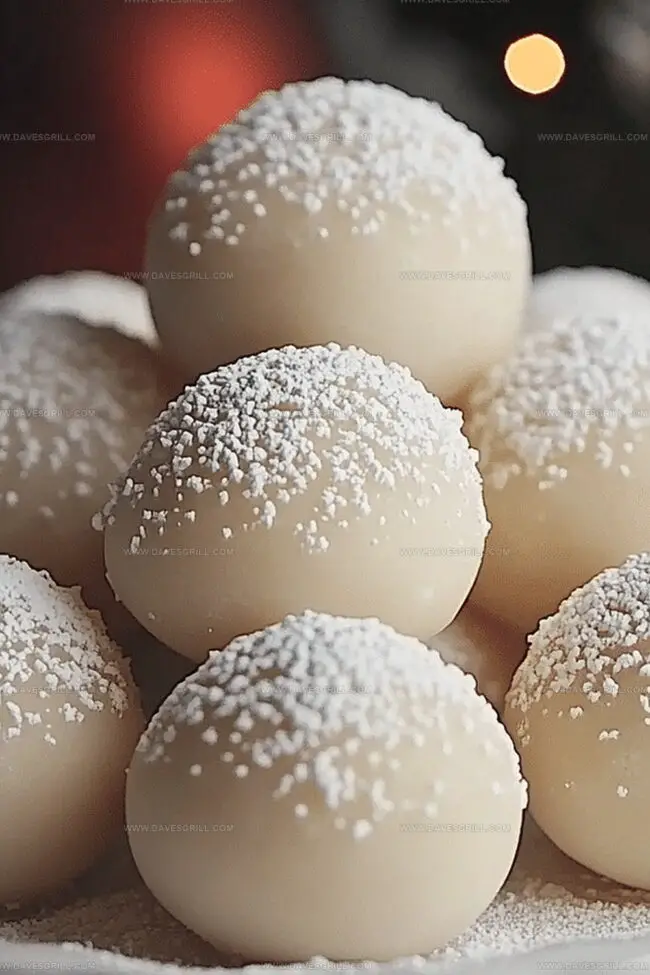
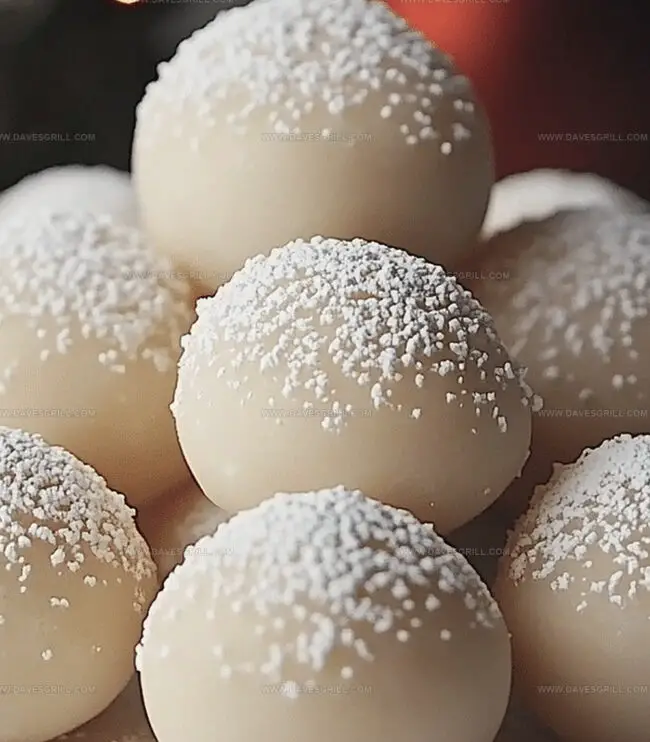
Roll each ball completely in powdered sugar. This gives them a festive, winter-white appearance.
Step 6: Chill and Solidify
Place the coated rum balls on a parchment-lined tray. Refrigerate for at least two hours to help them set. For longer storage, these can be frozen up to one month.
Step 7: Serve and Celebrate
Remove from refrigerator and serve. These delightful treats are perfect for holiday gatherings or as homemade gifts for friends and family.
Tips for Rolling and Storing Rum Balls
Keep Eggnog Rum Balls Fresh Longer
Serving Eggnog Rum Balls at Gatherings
Holiday-Ready Eggnog Rum Ball Flavors
Print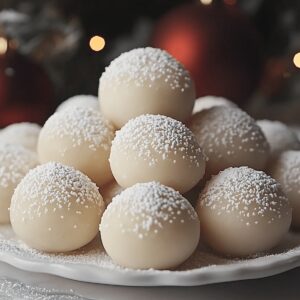
Eggnog Rum Balls Recipe
- Total Time: 1 hour 15 minutes
- Yield: 24 1x
Description
Festive holiday cheer meets sweet indulgence in these eggnog rum balls, a delightful confection that whisks Christmas spirit into a bite-sized treat. Rich with warming rum and creamy eggnog, these no-bake delights will become your new seasonal favorite.
Ingredients
Dry Ingredients:
- 2 cups (473 ml) vanilla wafer crumbs
- 1 cup (120 g) powdered sugar
- ½ cup (50 g) finely chopped pecans or walnuts
- ½ teaspoon ground nutmeg
- ¼ teaspoon ground cinnamon
Liquid Ingredients:
- ¼ cup (60 ml) spiced rum
- ¼ cup (60 ml) eggnog
- ¼ cup (57 g) unsalted butter, melted
Instructions
- Pulverize vanilla wafers into fine, uniform crumbs using a food processor or by crushing within a sealed plastic bag with a rolling pin. Transfer the resulting crumb mixture into a spacious mixing bowl.
- Integrate powdered sugar, ground cinnamon, freshly grated nutmeg, and a delicate sprinkle of salt into the wafer crumb foundation. Thoroughly blend dry components to ensure comprehensive distribution.
- Introduce dark rum, creamy eggnog, and pure vanilla extract into the crumb mixture. Gently fold liquids until the consistency transforms into a cohesive, slightly tacky dough. Adjust moisture levels by incrementally adding more eggnog if the mixture appears crumbly.
- Carefully shape the rum ball mixture into compact, spherical formations approximately one inch in diameter. Utilize clean hands to craft uniform orbs, anticipating roughly 20-25 delectable morsels.
- Delicately enrobe each rum ball in a luxurious layer of powdered sugar, ensuring complete and elegant coverage that mimics a gentle winter frost.
- Arrange sugar-coated rum balls on a parchment-lined tray, then refrigerate for a minimum of two hours. This chilling process allows the treats to solidify and intensify their rich, complex flavors. For extended storage, these festive confections can be frozen up to one month.
- Retrieve chilled rum balls and present as an indulgent holiday confection suitable for celebratory gatherings or as a thoughtful homemade gift for cherished companions.
Notes
- Select high-quality rum with a rich, smooth flavor to enhance the overall taste of the rum balls.
- Crush wafers finely to ensure a consistent texture and even distribution of ingredients throughout the mixture.
- Adjust the amount of rum and eggnog based on personal preference for stronger or milder flavors.
- Experiment with alternative coatings like cocoa powder, chopped nuts, or melted chocolate for added variety and texture.
- Prep Time: 15 minutes
- Cook Time: 1 hour
- Category: Desserts, Snacks, Cocktails
- Method: Blending
- Cuisine: American
Nutrition
- Serving Size: 24
- Calories: 120
- Sugar: 8 g
- Sodium: 30 mg
- Fat: 6 g
- Saturated Fat: 3 g
- Unsaturated Fat: 2 g
- Trans Fat: 0 g
- Carbohydrates: 15 g
- Fiber: 0.5 g
- Protein: 1 g
- Cholesterol: 10 mg
Dave Mitchell
Founder & Chief Recipe Developer
Expertise
Education
Asheville-Buncombe Technical Community College
Associate of Applied Science in Culinary Arts
Focus: Comprehensive training in culinary techniques, kitchen management, and menu planning, with a special emphasis on grilling and outdoor cooking.
Dave Mitchell is the heart behind Daves Grill, a cook, writer, and lover of all things grilled. He studied Culinary Arts at Asheville-Buncombe Technical Community College and spent years cooking, testing, and sharing recipes that actually work.
Dave started Daves Grill to keep things simple: one great recipe at a time. His food is bold, easy to follow, and made for real people with regular kitchens. From juicy steaks to quick sides, Dave’s recipes bring the heat without the hassle.