
Jolly Elf Hats Holiday Treats Recipe: Magical Sweets for Everyone
Magical tiny elf hats sparkle with festive charm on your holiday dessert table.
Sweet pockets of delight catch everyone’s attention with their whimsical shape.
These cute confections bring playful spirit to seasonal gatherings.
Crafted from simple ingredients, these treats require minimal kitchen skills.
Delicate pastry transforms into charming miniature headgear that delights both children and adults.
Chocolate and peppermint dance together in a merry celebration of winter magic.
You’ll want to share these adorable morsels at every celebration this season.
Why Everyone Loves Elf Hats Holiday Treats
Ingredients You’ll Need for Festive Elf Hats Treats
Base Cookies:Decorative Icing:Decorative Accents:How to Make Elf Hats Treats the Way
Step 1: Create Cookie Foundation
Grab your favorite sugar or shortbread cookies and place them on a clean surface. A thin layer of frosting helps decorations stick perfectly.
Step 2: Craft Green Hat Shape
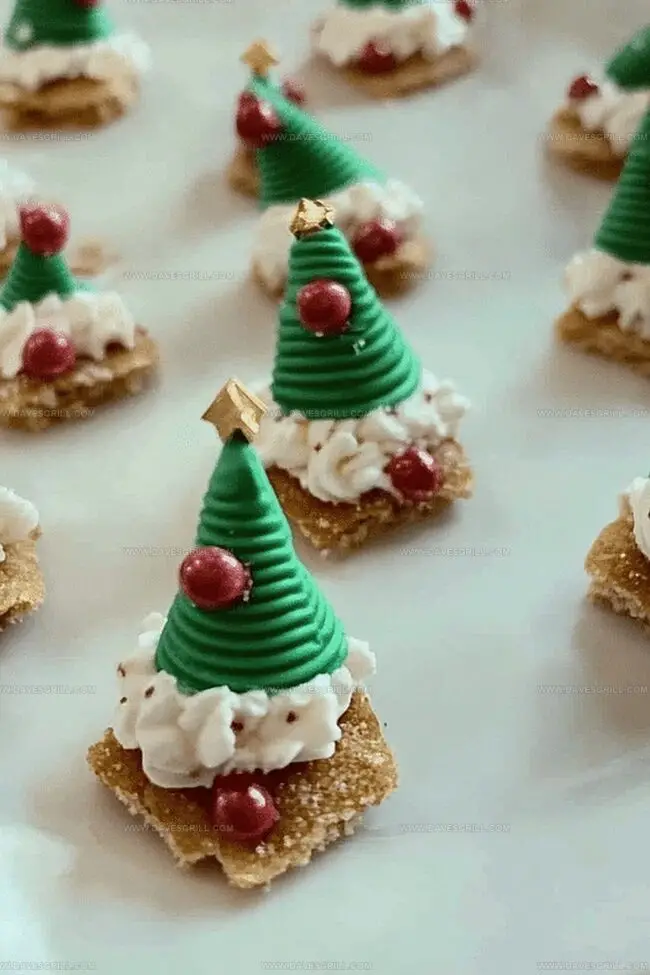
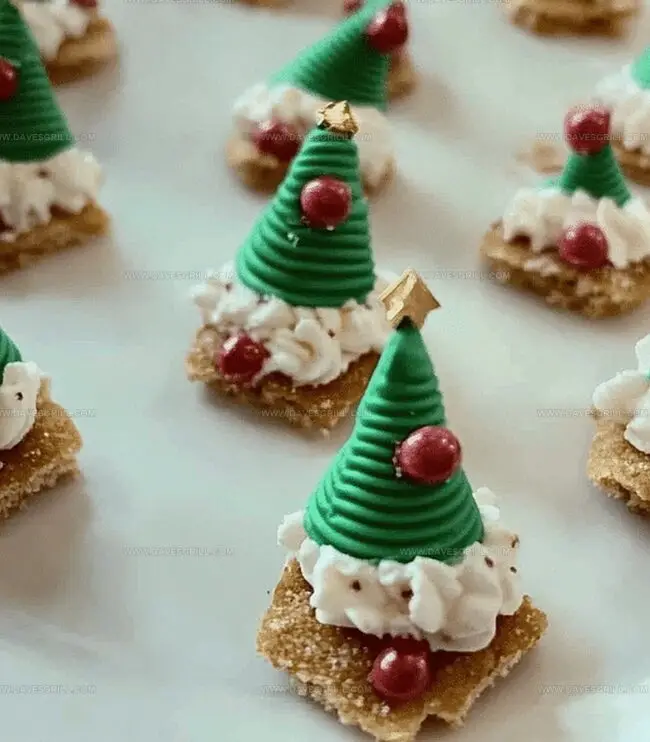
Grab green icing and transform your cookie into a festive elf hat. Using a piping bag or spatula, cover the cookie’s top with a smooth cone-like design. Aim for a pointy peak that screams holiday cheer.
Step 3: Add Playful Pom-Pom
Select a vibrant red candy or gumdrop and perch it right on the hat’s tip. This little splash of color brings instant whimsy to your treat.
Step 4: Design Fluffy White Trim
Take white frosting and outline the green hat’s base with a soft, wavy border. This creates a cozy winter wonderland feel that makes each cookie pop.
Step 5: Sprinkle Some Magic
Dust your elf hats with edible glitter or festive sprinkles. These tiny sparkles transform simple cookies into extraordinary holiday delights.
Step 6: Let Treats Set and Celebrate
Allow your magical elf hats to rest for 15-20 minutes. The icing will harden, creating picture-perfect holiday treats ready to delight family and friends.
Fun Tips for Assembling Elf Hats Like a Pro
How to Store and Serve Elf Hats for Maximum Cheer
What to Pair With Your Elf Hats Sweets
Cute Variations for Your Elf Hat Dessert Bites
Print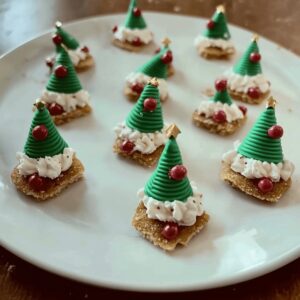
Elf Hats Holiday Treats Recipe
- Total Time: 1 hour 10 minutes
- Yield: 8 1x
Description
Festive “elf hats” holiday treats sparkle with whimsical charm, bringing Christmas magic to dessert tables. Crisp cookies topped with colorful frosting and playful details ensure cheerful smiles will melt hearts faster than sweet seasonal memories.
Ingredients
Main Ingredients:
- 1 can (20 ounces / 567 grams) crushed pineapple, undrained
- 1 tub (8 ounces / 227 grams) whipped topping, thawed
- 1 box (3.4 ounces / 96 grams) instant pistachio pudding mix
Texture Enhancers:
- 1 cup mini marshmallows
- ½ cup chopped walnuts
Garnish (Optional):
- Maraschino cherries
- Extra chopped nuts
Instructions
- Position sugar cookies or shortbread on a clean, flat workspace, creating a stable foundation for the elf hat design.
- Apply a thin layer of frosting or icing across the cookie surface to enhance decoration adhesion and provide a smooth base.
- Carefully pipe green icing in a conical shape, covering the entire cookie top and extending downward to create a pointed hat silhouette.
- Utilize a spatula or piping tool to smooth the green icing, ensuring a clean and uniform appearance with crisp edges.
- Select a vibrant red candy or gumdrop and strategically place it at the hat’s peak, mimicking a traditional elf hat’s playful pom-pom.
- Craft a delicate white frosting trim around the green icing’s base, creating either a wavy or smooth border that adds winter-inspired dimension.
- Enhance the festive aesthetic by gently sprinkling edible glitter or colorful decorative elements across the elf hat’s surface.
- Allow the decorated treats to rest for approximately 15-20 minutes, permitting the icing to solidify and maintain the intricate design.
- Serve immediately or store in a cool, dry environment to preserve the whimsical holiday treat’s appearance and texture.
Notes
- Customize cookie base with homemade shortbread or gluten-free sugar cookies for dietary restrictions.
- Use gel food coloring for vibrant green icing that maintains thick, smooth consistency without running.
- Stabilize decorations by chilling cookies briefly after each icing layer to prevent sliding or melting.
- Create kid-friendly decorating station with pre-piped icing and candies for interactive holiday baking experience.
- Prep Time: 10 minutes
- Cook Time: 1 hour
- Category: Snacks, Desserts
- Method: Blending
- Cuisine: American
Nutrition
- Serving Size: 8
- Calories: 150
- Sugar: 18 g
- Sodium: 80 mg
- Fat: 5 g
- Saturated Fat: 1 g
- Unsaturated Fat: 4 g
- Trans Fat: 0 g
- Carbohydrates: 24 g
- Fiber: 1 g
- Protein: 2 g
- Cholesterol: 0 mg
Dave Mitchell
Founder & Chief Recipe Developer
Expertise
Education
Asheville-Buncombe Technical Community College
Associate of Applied Science in Culinary Arts
Focus: Comprehensive training in culinary techniques, kitchen management, and menu planning, with a special emphasis on grilling and outdoor cooking.
Dave Mitchell is the heart behind Daves Grill, a cook, writer, and lover of all things grilled. He studied Culinary Arts at Asheville-Buncombe Technical Community College and spent years cooking, testing, and sharing recipes that actually work.
Dave started Daves Grill to keep things simple: one great recipe at a time. His food is bold, easy to follow, and made for real people with regular kitchens. From juicy steaks to quick sides, Dave’s recipes bring the heat without the hassle.