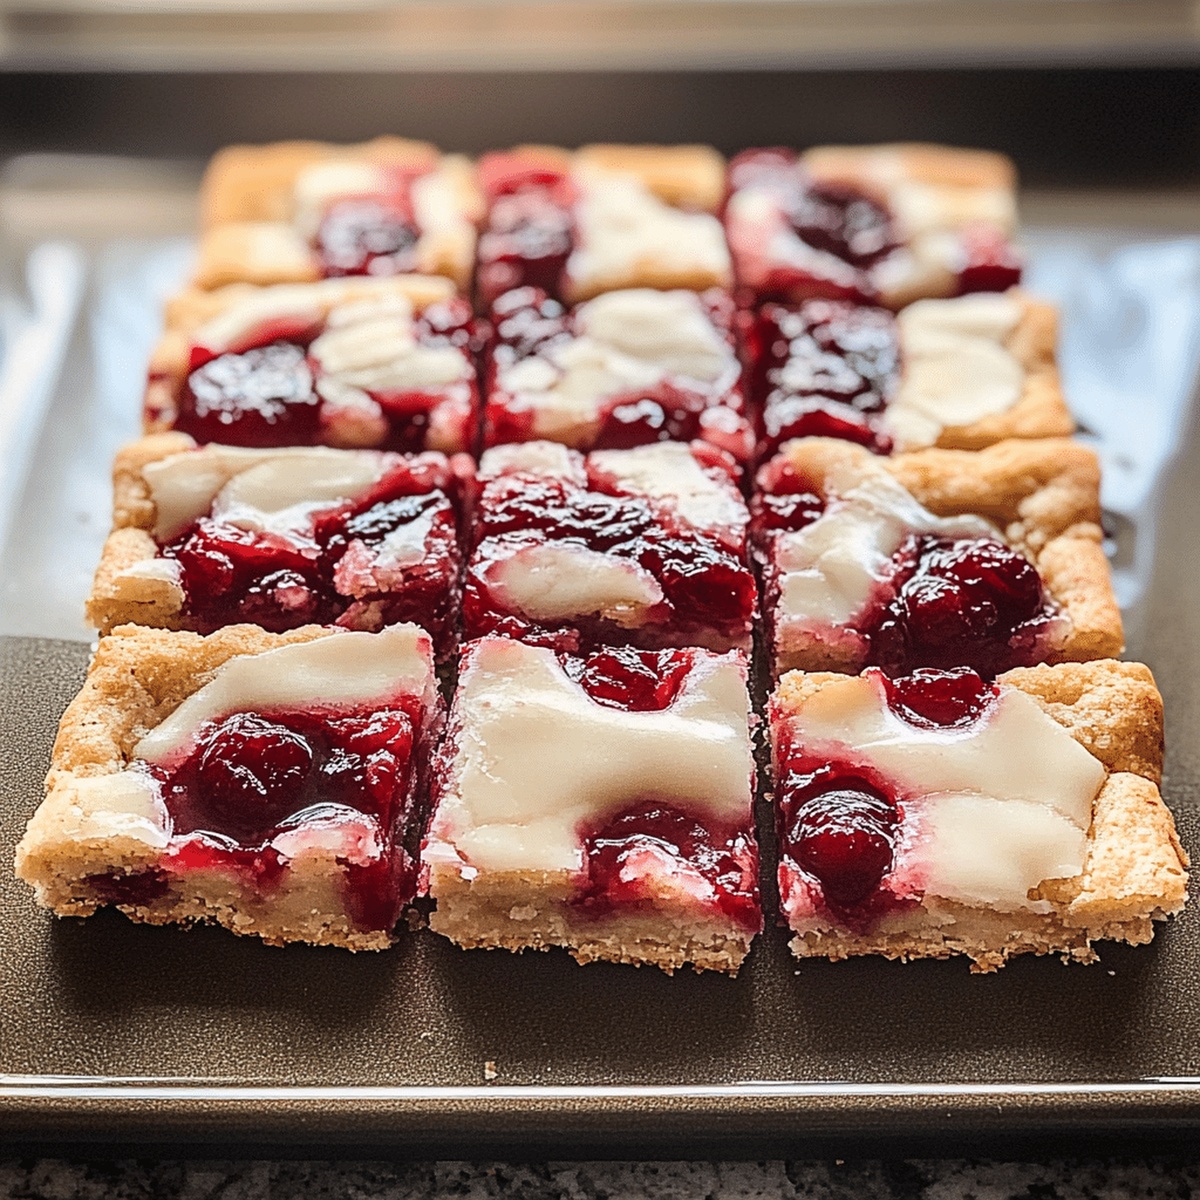
Jolly Red Delights: Festive Christmas Cherry Bars Recipe
Decadent holiday treats always spark joy during seasonal celebrations, and these delightful christmas cherry bars bring sweet magic to any gathering.
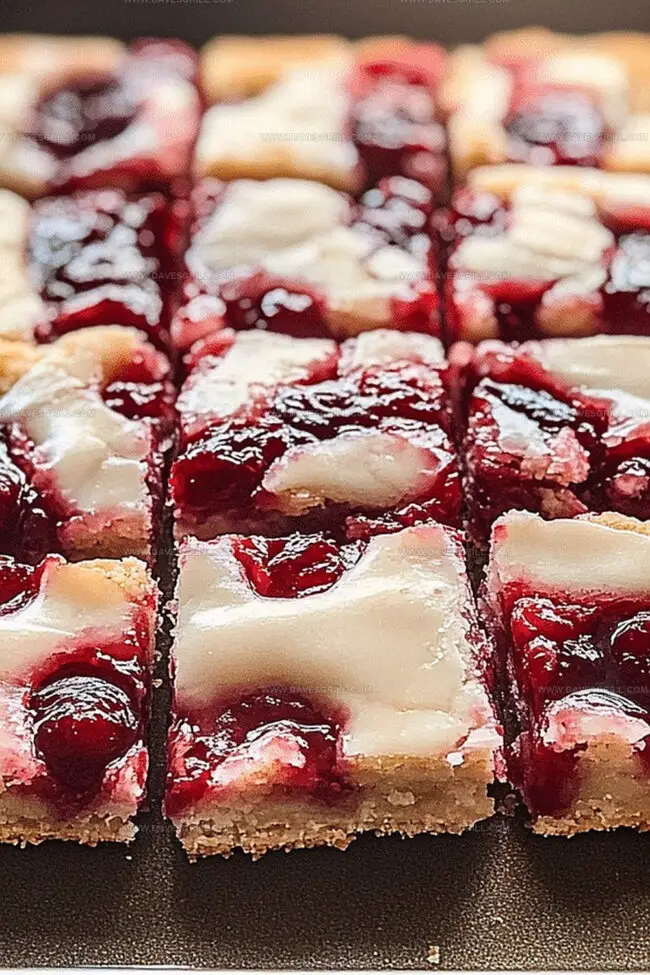
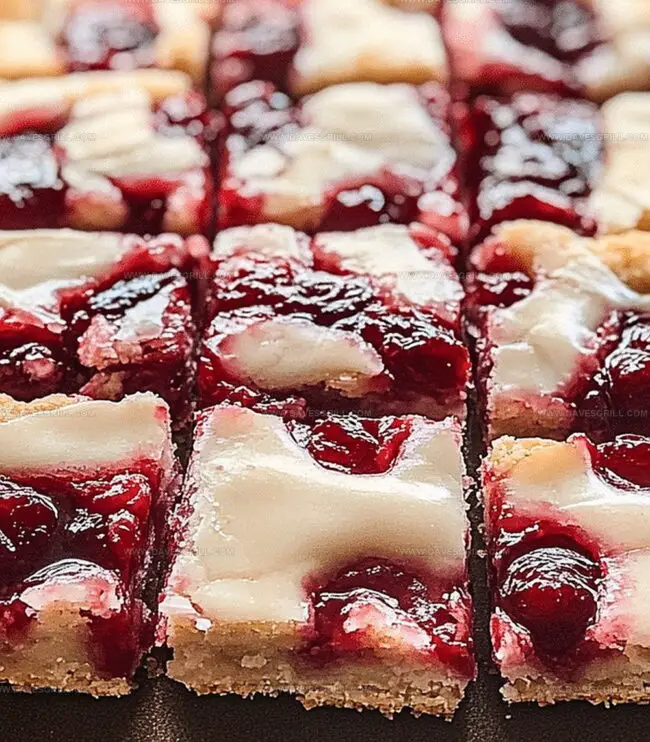
Layers of buttery crust and vibrant cherry filling create a dessert that delights the senses.
Crumbly, rich, and wonderfully nostalgic, this classic recipe connects generations through shared culinary traditions.
Each bite tells a story of warmth and comfort, blending simple ingredients into something extraordinary.
The balance of tart cherries and sweet pastry makes these bars irresistible.
Perfectly portioned and easy to serve, they’re an ideal addition to your holiday dessert spread.
Indulge in this cherished recipe that promises to become a new family favorite.
Quick Recipe Overview
Cherry Bar Ingredient Rundown
For Shortbread Crust:For Cherry Filling:For Crumb Topping:Tools to Make Christmas Cherry Bars Fun
Bake Cherry Bars That Look Festive
Crank the temperature to 350F and get a baking pan ready with parchment paper for easy removal.
Whip softened butter and sugar until they’re light and dreamy. Fold in flour and salt, pressing the dough firmly into the pan. Bake until edges turn a soft golden color.
Splash almond extract into cherry pie filling and pour evenly across the golden crust.
Mix flour, brown sugar, and melted butter until it looks like delightful, chunky sand. Dust this topping generously over the cherry layer.
Pop the pan back into the oven and let it transform for 25-30 minutes until the topping becomes a gorgeous golden brown.
Allow the bars to cool completely. Lift out using parchment paper and cut into delectable squares ready to devour.
Sweet Tips for a Juicy Finish
Serve Bars on a Cookie Tray
Store Cherry Bars and Keep ‘Em Fresh
FAQs
Fresh cherries can work, but you’ll need to cook them down with sugar and cornstarch first to create a thick filling similar to pie filling. Canned pie filling is much easier and provides consistent results.
Almond extract is optional but adds a delicious depth of flavor that complements the cherries. If you don’t have it or don’t like almond flavor, you can skip it without affecting the overall recipe.
All-purpose flour is perfect for both the crust and crumb topping. Avoid using cake or bread flour, as they have different protein contents that could change the texture of your bars.
Yes, these Christmas Cherry Bars can be prepared a day in advance and stored at room temperature. They actually taste great when the flavors have had time to meld together overnight.
Print
Festive Christmas Cherry Bars Recipe
- Total Time: 1 hour 5 minutes
- Yield: 13 1x
Description
Rich Christmas Cherry Bars bring festive cheer to holiday dessert tables. Layers of buttery crust, sweet cherries, and crumbly topping create a delightful treat you’ll savor with each delectable bite.
Ingredients
- 2 cups (250 g) all-purpose flour (crust)
- 1 cup (225 g) unsalted butter, softened (crust)
- ½ cup (100 g) granulated sugar (crust)
- ¼ tsp salt (crust)
- 1 can (21 oz/600 g) cherry pie filling
- ¼ tsp almond extract
- 1 cup (120 g) all-purpose flour (topping)
- ½ cup (100 g) brown sugar (topping)
- ¼ cup (60 g) unsalted butter, melted (topping)
- ¼ tsp cinnamon (topping)
Instructions
- Crust Preparation: Combine softened butter and sugar until fluffy, then fold in flour and salt to create a uniform dough. Press evenly into parchment-lined 9×13-inch pan, creating a smooth foundation.
- Initial Baking: Slide the pan into a preheated 350F (175C) oven, baking the shortbread base until edges turn delicately golden, approximately 15 minutes.
- Filling Enhancement: While the crust bakes, elevate cherry pie filling with a splash of almond extract, stirring to harmonize flavors and create a vibrant fruit layer.
- Layer Assembly: Remove crust from oven and generously spread the aromatic cherry mixture across the golden surface, ensuring complete and even coverage.
- Crumble Creation: Whisk together flour, brown sugar, and cinnamon, then drizzle melted butter to form a textured, rustic topping with subtle granular characteristics.
- Final Baking: Sprinkle the crumble across the cherry layer, then return to the oven. Bake for 25-30 minutes until the topping achieves a rich, bronzed appearance.
- Cooling and Serving: Let the bars rest completely in the pan, then utilize parchment edges to transfer to a cutting board. Slice into precise rectangular portions, serving at room temperature to maximize flavor complexity.
Notes
- Butter Temperature Matters: Use room temperature butter for smoother mixing and better texture in the shortbread crust, avoiding cold or melted butter that can disrupt the dough’s consistency.
- Even Pressing Technique: When creating the base layer, use the back of a spoon or flat-bottomed measuring cup to press the dough uniformly, ensuring a compact and level crust.
- Crumble Coverage Strategy: Distribute the crumble topping generously but gently, aiming for complete coverage without pressing down, which helps create a light, crispy texture.
- Cooling is Crucial: Let the bars cool completely in the pan to allow the layers to set properly, preventing crumbling and ensuring clean, precise cuts when serving.
- Prep Time: 20 minutes
- Cook Time: 45 minutes
- Category: Desserts, Snacks
- Method: Baking
- Cuisine: American
Nutrition
- Serving Size: 13
- Calories: 290
- Sugar: 17 g
- Sodium: 70 mg
- Fat: 14 g
- Saturated Fat: 8 g
- Unsaturated Fat: 4 g
- Trans Fat: 0 g
- Carbohydrates: 39 g
- Fiber: 1 g
- Protein: 2 g
- Cholesterol: 35 mg
Emily Lawson
Content Creator & Culinary Specialist
Expertise
Education
Oregon Culinary Institute
Diploma in Culinary Arts
Focus: Emphasis on farm-to-table cooking, sustainable practices, and the fusion of global flavors with traditional grilling methods.
Emily Lawson is the content creator at Daves Grill, turning tasty ideas into clear, easy recipes. Based in Portland, she trained at the Oregon Culinary Institute and loves cooking with fresh, seasonal ingredients, especially grilled veggies and global flavors.
Emily mixes food writing with hands-on cooking to bring you recipes that feel fun, not stressful. Her goal is to make every dish simple, flavorful, and worth coming back to. Together, she and Dave serve up real food, one recipe at a time.