
Magical Holiday Garlic Bread Wreath Recipe for Cheerful Feasts
Crisp winter evenings call for a comforting homemade garlic bread wreath that sparks pure culinary delight.
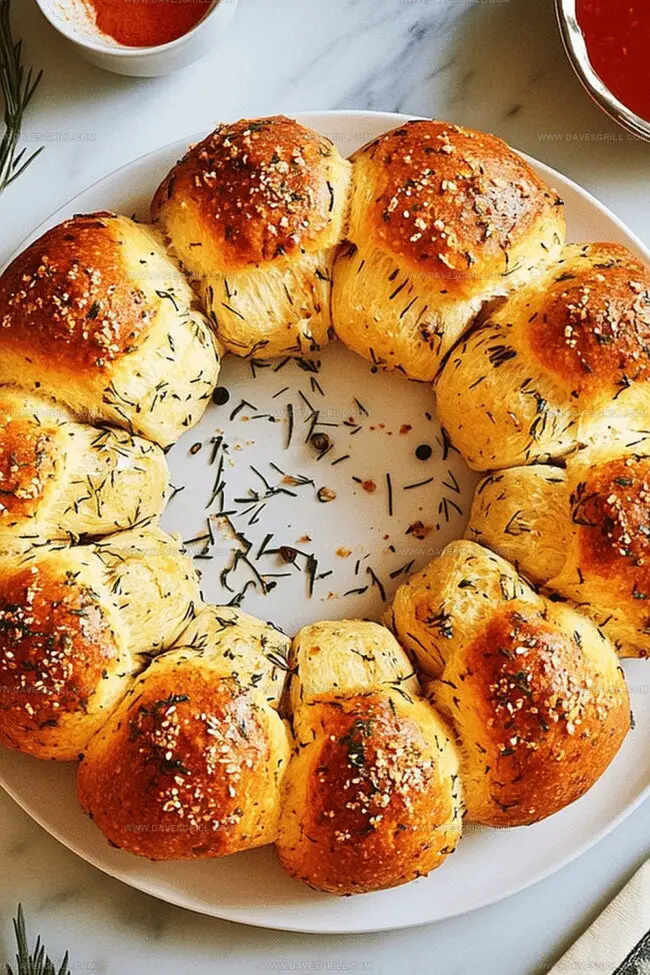
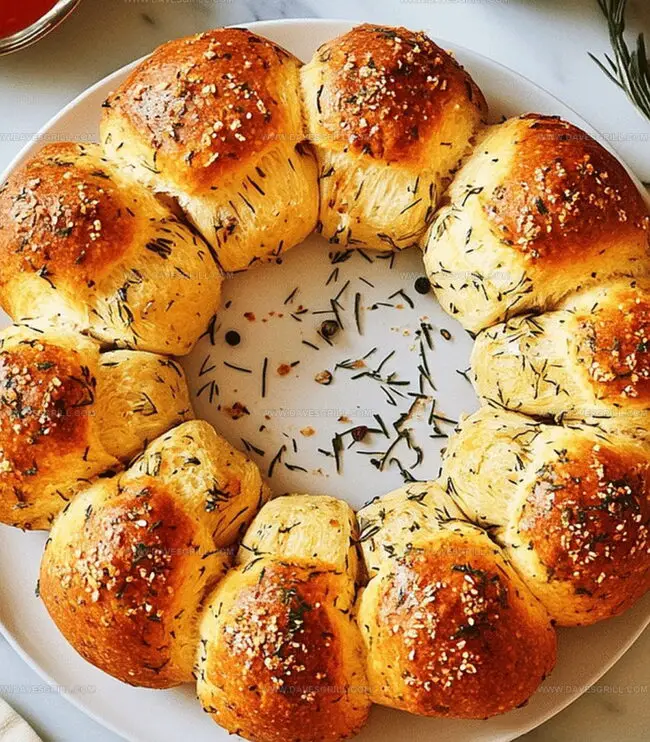
This golden, herb-infused creation weaves aromatic garlic and fresh herbs into a stunning circular masterpiece.
Soft, pillowy dough embraces rich butter and minced garlic, creating a delectable canvas of flavor.
Each slice promises a warm, buttery experience that melts in your mouth with robust herbal notes.
The wreath’s elegant circular design makes it a showstopping centerpiece for holiday gatherings.
Perfectly seasoned and beautifully braided, this recipe transforms simple ingredients into an extraordinary bread experience.
Prepare to dazzle your guests with this irresistible garlic bread wreath that celebrates winter’s warmth and comfort.
Quick Recipe Overview
Ingredients for Pull Apart Garlic Bread Wreath
For Dough Base:For Yeast Activation:For Flavor Enhancers:Tools That Help Shape a Garlic Bread Wreath Neatly
Bake Pull Apart Garlic Bread Wreath to Golden
Grab warm water, sugar, and yeast. Mix them together and let the happen for about 5 minutes until it gets all puffy and alive.
Toss flour and salt into a big mixing bowl. Pour in the yeast mixture and olive oil. Knead the dough until it feels smooth and stretchy – either by hand on a floured surface or using a stand mixer with a dough hook.
Nestle the dough into a greased bowl, cover it with a damp towel, and let it chill in a cozy spot until it doubles in size – about 1-1.5 hours.
Whip together melted butter, minced garlic, parsley, and Italian seasoning in a small bowl.
Fire up the oven to 375F. Grab a baking sheet and line it with parchment paper.
Punch down the dough and divide it into 20-25 cute little balls. Dunk each ball into the garlic butter, making sure it’s completely coated.
Arrange the buttery balls in a circle, leaving a bit of breathing room between them.
Slide the wreath into the oven and bake for 20-25 minutes until it turns a beautiful golden brown.
Brush with extra garlic butter, sprinkle some Parmesan, and add a handful of fresh parsley.
Serve piping hot with marinara sauce or herb butter for dipping.
Tips for Buttery and Garlicky Bread Layers
Serve This Wreath as a Savory Holiday Centerpiece
Store Garlic Bread Wreath and Reheat Gently
FAQs
Yes, this pull apart garlic bread wreath is perfect for home bakers with basic skills. The steps are straightforward, and the techniques like kneading and shaping are simple to learn.
Active dry yeast or instant yeast works best for this recipe. Make sure your yeast is fresh and not expired to ensure proper rising of the dough.
Absolutely! You can prepare the dough a day in advance. After the first rise, cover and refrigerate it. When ready to bake, let the dough come to room temperature and proceed with shaping and baking.
The dough should become smooth, elastic, and no longer sticky. When you gently stretch a small piece, it should form a thin, translucent “windowpane” without tearing.
Print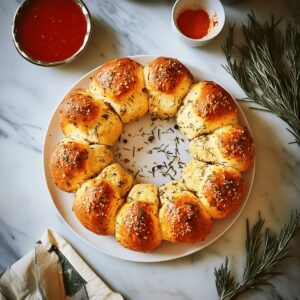
Festive Garlic Bread Wreath Recipe
- Total Time: 45 minutes
- Yield: 9 1x
Description
Delectable Pull Apart Garlic Bread Wreath celebrates holiday gathering traditions with herbed butter and golden-brown edges. Bread circles interlock on platters, promising savory warmth and festive cheer you cannot resist.
Ingredients
- 3 cups / 375 g all-purpose flour
- 1 cup / 240 ml warm water (110°F/45°C)
- 2 ¼ tsps / 1 packet active dry yeast
- 2 tbsps olive oil
- 1 tbsp granulated sugar
- 1 tsp salt
- ¼ cup / 60 g unsalted butter, melted
- 2 cloves garlic, minced
- 2 tbsps fresh parsley, chopped
- 1 tsp dried italian seasoning
- grated parmesan cheese
- fresh parsley for decoration
Instructions
- Yeast Activation: Combine tepid water, sugar, and yeast in a small bowl. Allow the mixture to bloom until frothy, signaling active fermentation.
- Dough Preparation: In a large mixing bowl, blend flour and salt. Incorporate the activated yeast mixture and olive oil, mixing until a unified dough forms. Knead on a floured surface or use a stand mixer with a dough hook until the dough becomes smooth and elastic.
- First Rise: Transfer the dough to a greased container, cover with a damp cloth, and rest in a warm environment. Let the dough expand and double in volume for approximately 90 minutes.
- Garlic Butter Creation: Whisk melted butter with minced garlic, chopped parsley, and Italian seasoning until thoroughly blended.
- Dough Shaping: Deflate the risen dough and divide into 20-25 small balls. Completely coat each ball in the aromatic garlic butter mixture.
- Wreath Assembly: Preheat the oven to 375°F. Arrange the butter-coated dough balls in a circular pattern on a parchment-lined baking sheet or circular pan, leaving minimal space between pieces.
- Baking and Finishing: Bake for 20-25 minutes until the surface turns golden-brown and the bread is fully cooked. Brush the warm bread with remaining garlic butter, sprinkle with grated Parmesan cheese, and garnish with fresh parsley.
- Serving: Present immediately while warm, offering marinara sauce or herb-infused butter as a complementary dipping option.
Notes
Manage Yeast Activation: Ensure water temperature is precisely between 100-110°F to activate yeast without killing it, creating perfect fermentation conditions for soft, fluffy bread.
Knead with Precision: Develop gluten structure by kneading 8-10 minutes manually or 5-6 minutes using a stand mixer, which guarantees a smooth, elastic dough texture that rises beautifully.
Control Moisture Levels: Avoid adding excess flour during kneading; slightly sticky dough yields more tender bread, so use minimal flour when handling to maintain optimal hydration.
Customize Flavor Variations: Experiment with different herb combinations like rosemary, thyme, or oregano in the garlic butter for unique taste profiles while maintaining the bread’s classic soft interior and crispy exterior.
- Prep Time: 20 minutes
- Cook Time: 25 minutes
- Category: Appetizer, Snacks
- Method: Baking
- Cuisine: Italian
Nutrition
- Serving Size: 9
- Calories: 220
- Sugar: 1 g
- Sodium: 300 mg
- Fat: 9 g
- Saturated Fat: 5 g
- Unsaturated Fat: 4 g
- Trans Fat: 0 g
- Carbohydrates: 30 g
- Fiber: 1 g
- Protein: 5 g
- Cholesterol: 15 mg
Emily Lawson
Content Creator & Culinary Specialist
Expertise
Education
Oregon Culinary Institute
Diploma in Culinary Arts
Focus: Emphasis on farm-to-table cooking, sustainable practices, and the fusion of global flavors with traditional grilling methods.
Emily Lawson is the content creator at Daves Grill, turning tasty ideas into clear, easy recipes. Based in Portland, she trained at the Oregon Culinary Institute and loves cooking with fresh, seasonal ingredients, especially grilled veggies and global flavors.
Emily mixes food writing with hands-on cooking to bring you recipes that feel fun, not stressful. Her goal is to make every dish simple, flavorful, and worth coming back to. Together, she and Dave serve up real food, one recipe at a time.