Jolly Peppermint White Chocolate Cookies Recipe for the Holidays
Soft, buttery cookies swirled with classic white chocolate candy cane magic bring winter holiday cheer right to your kitchen.
Sweet peppermint notes dance through these delightful treats, creating a festive sensation.
Crumbly edges and a smooth center make these cookies irresistibly delectable.
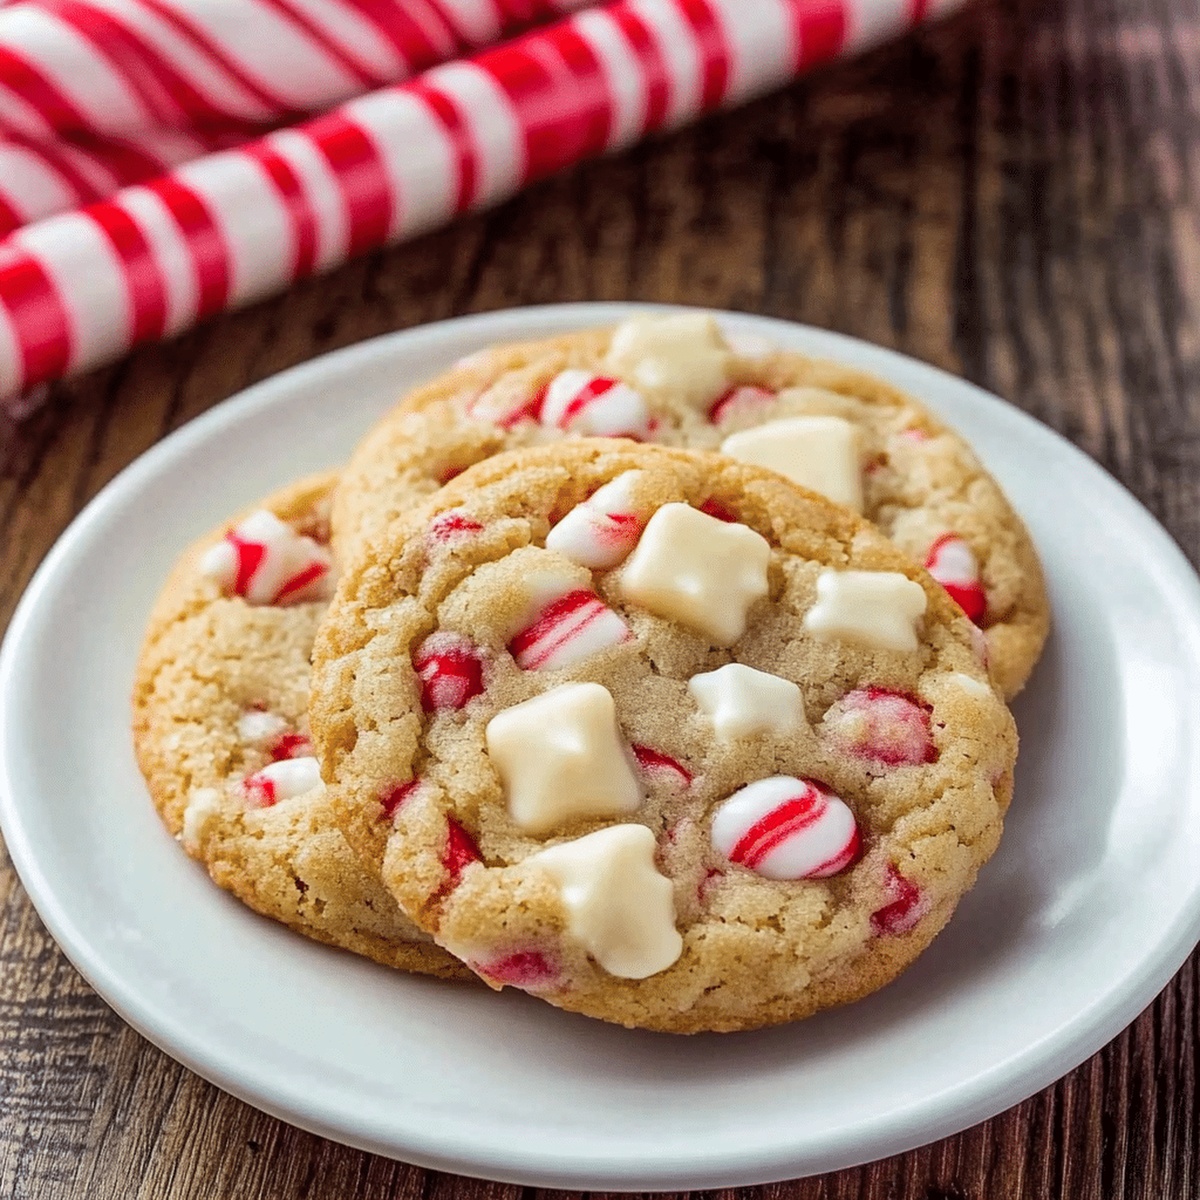
Candy cane pieces scattered throughout add a delightful crunch and burst of holiday spirit.
The white chocolate drizzle transforms simple cookies into an elegant dessert that sparkles with seasonal charm.
Simple ingredients and easy preparation mean anyone can bake these delightful morsels.
Serve these cookies at your next gathering and watch smiles spread as quickly as the peppermint aroma fills the room.
Quick Recipe Overview

What Goes in White Chocolate Candy Cane Cookies
For Fats and Sweet Base:For Binding and Structure:For Festive Mix-Ins:Gear List for Candy Cane Cookie Prep
Baking White Chocolate Candy Cane Cookies

Crank the oven to a toasty 350F and line baking sheets with parchment paper, creating the perfect stage for your sweet adventure.
Grab your mixer and blend butter with sugars until they transform into a fluffy cloud of deliciousness, creating a creamy foundation for your cookies.
Crack eggs into the mixture one by one, stirring in vanilla until everything looks smooth and inviting.
Gently fold flour, baking soda, baking powder, and salt together, then slowly marry them with the wet ingredients until just combined.
Fold white chocolate chips and crushed candy canes into the dough, creating bursts of festive flavor in every bite.
Scoop dough into round balls, placing them on baking sheets with enough breathing room between each cookie.
Slide cookies into the oven and bake for 10-12 minutes until edges look golden and centers remain slightly soft.
Let cookies rest on the baking sheet for a few minutes, then transfer to a cooling rack. While still warm, dust with extra candy cane pieces for a magical finishing touch.
Customizing Candy Cane Cookies for the Season
Presenting Candy Cane Cookies for Gifting
Saving White Chocolate Candy Cane Cookies the Smart Way
Print
Festive White Chocolate Candy Cane Cookies
- Total Time: 22 minutes
- Yield: 25 1x
Description
White chocolate candy cane cookies blend festive peppermint with creamy white chocolate in a delightful holiday treat. Crisp edges and chewy centers make these cookies a perfect seasonal indulgence for winter celebrations.
Ingredients
- 1 cup (225 g / 8 oz) unsalted butter, softened
- 1 cup (200 g / 7 oz) granulated sugar
- ½ cup (110 g / 4 oz) brown sugar, packed
- 2 large eggs
- 2 ¾ cups (345 g / 12.2 oz) all-purpose flour
- 1 cup (175 g / 6.2 oz) white chocolate chips
- ½ cup (50 g / 1.8 oz) crushed candy canes (plus extra for garnish)
- 2 tsps vanilla extract
- 1 tsp baking soda
- ½ tsp baking powder
- ½ tsp salt
Instructions
- Preheat and Prepare: Configure the oven to 350F (175C) and line baking sheets with parchment paper, creating an optimal baking environment.
- Cream Butter Mixture: Whip softened butter with granulated and brown sugars until the mixture transforms into a light, voluminous consistency, incorporating air for a tender texture.
- Integrate Wet Ingredients: Add eggs one at a time, ensuring complete blending after each addition, then thoroughly mix in vanilla extract to enhance flavor complexity.
- Combine Dry Components: Sift together flour, baking soda, baking powder, and salt in a separate bowl, ensuring uniform distribution of leavening agents.
- Merge Mixtures: Delicately fold dry ingredients into wet mixture, stirring minimally to preserve the cookie’s delicate structure and prevent overworking the dough.
- Incorporate Add-ins: Gently fold white chocolate chips and crushed candy canes throughout the dough, creating a balanced distribution of festive elements.
- Shape and Arrange: Craft uniform dough balls approximately 1 1/2 inches in diameter, positioning them strategically on prepared baking sheets with adequate spacing.
- Bake to Perfection: Slide cookies into the preheated oven, baking for 10-12 minutes until edges set and centers remain slightly soft, achieving an ideal texture.
- Cool and Stabilize: Let cookies rest on baking sheets for 5 minutes to solidify structure, then transfer to a wire rack for complete cooling and optimal texture development.
- Finishing Touch: Optionally dust warm cookies with additional crushed candy cane fragments, elevating both visual appeal and festive presentation.
Notes
- Manage Butter Temperature: Ensure butter is softened but not melted, allowing perfect creaming with sugars for light, fluffy cookie texture.
- Prevent Overmixing Dough: Stop stirring dry and wet ingredients immediately after they combine to maintain tender, soft cookie consistency.
- Control Candy Cane Distribution: Crush candy canes into varied sizes – some fine powder and some small chunks – for balanced flavor and texture throughout cookies.
- Optimize Baking Time: Watch cookies closely during last 2 minutes of baking; remove when edges are set but centers appear slightly underdone to guarantee soft, chewy texture.
- Prep Time: 10 minutes
- Cook Time: 12 minutes
- Category: Desserts, Snacks
- Method: Baking
- Cuisine: American
Nutrition
- Serving Size: 25
- Calories: 180
- Sugar: 12 g
- Sodium: 85 mg
- Fat: 9 g
- Saturated Fat: 5 g
- Unsaturated Fat: 4 g
- Trans Fat: 0 g
- Carbohydrates: 24 g
- Fiber: 0.5 g
- Protein: 2 g
- Cholesterol: 30 mg
Emily Lawson
Content Creator & Culinary Specialist
Expertise
Education
Oregon Culinary Institute
Diploma in Culinary Arts
Focus: Emphasis on farm-to-table cooking, sustainable practices, and the fusion of global flavors with traditional grilling methods.
Emily Lawson is the content creator at Daves Grill, turning tasty ideas into clear, easy recipes. Based in Portland, she trained at the Oregon Culinary Institute and loves cooking with fresh, seasonal ingredients, especially grilled veggies and global flavors.
Emily mixes food writing with hands-on cooking to bring you recipes that feel fun, not stressful. Her goal is to make every dish simple, flavorful, and worth coming back to. Together, she and Dave serve up real food, one recipe at a time.