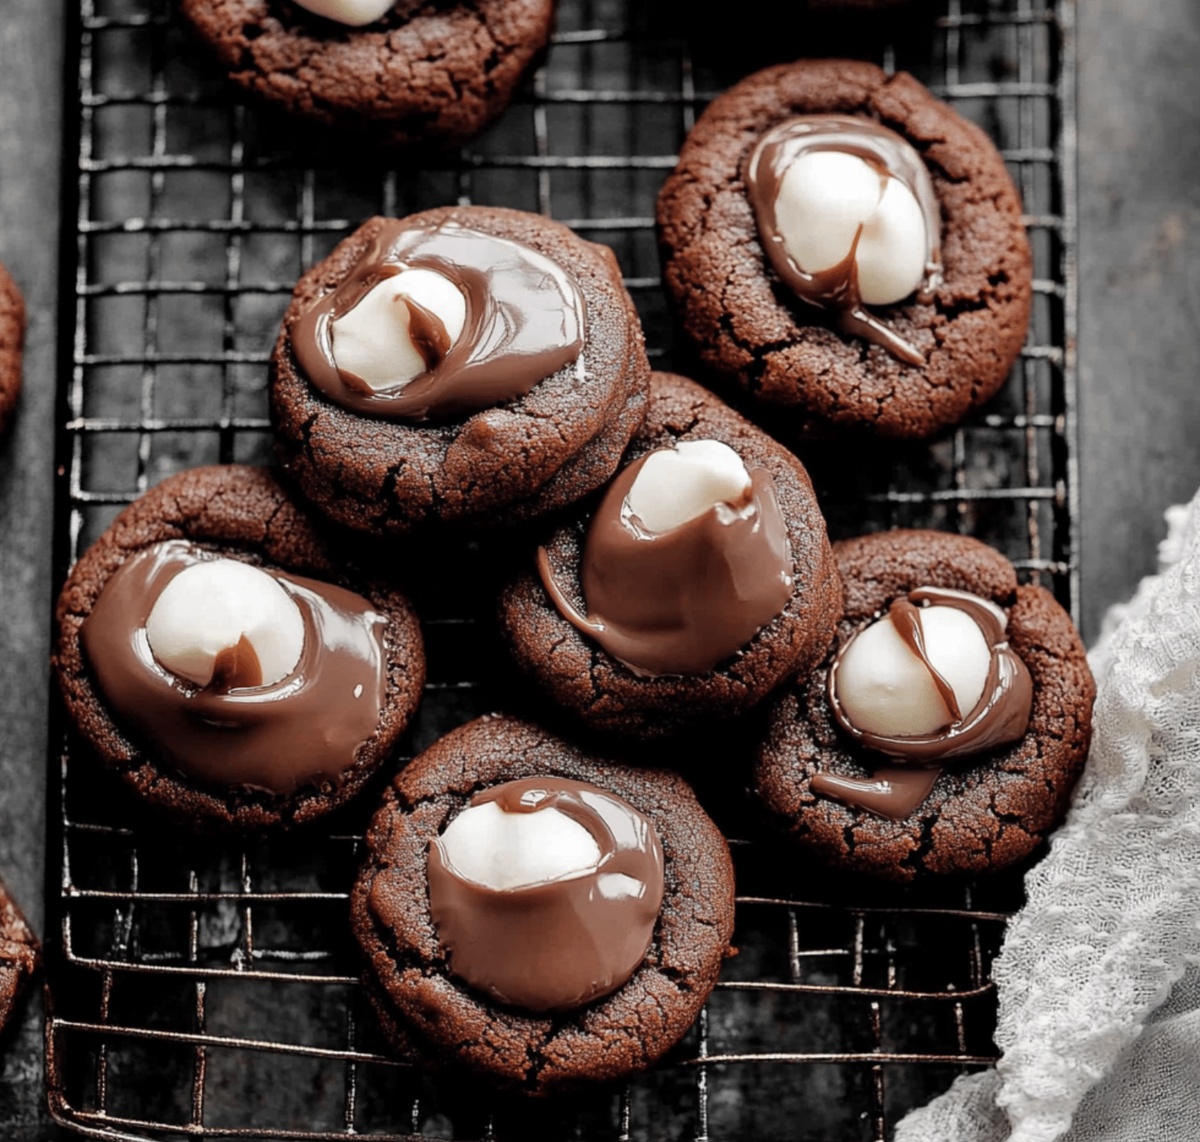
Cozy Fluffy Marshmallow-Surprise Hot Cocoa Cookies Recipe
Chocolate chip cookies have never been more delightful than with this marshmallow-surprise hot cocoa cookies recipe that blends childhood nostalgia with sweet sophistication.
Soft, chewy cookie dough meets pockets of gooey marshmallow in every single bite.
The rich cocoa infusion creates a decadent backdrop for these irresistible treats.
Melted chocolate swirls through the dough, creating tempting marbled patterns that beckon dessert lovers.
Each cookie promises a warm, comforting experience reminiscent of cozy winter evenings.
Sprinkled with a light dusting of cocoa powder, these cookies transform an ordinary snack into an extraordinary indulgence.
You won’t be able to resist their warm, inviting charm.
Quick Recipe Overview
Hot Cocoa Cookie Ingredient List
For Cookie Base Ingredients:For Wet Ingredients:For Topping and Decoration:Tools for Baking These Marshmallow-Stuffed Cookies
Bake Cookies That Hide a Cocoa Surprise
Grab your baking sheets and line them with parchment paper. Crank up the oven to a toasty 350F (175C) to get ready for cookie.
Mix softened butter with sugars until they’re fluffy and dreamy. Crack in an egg and splash of vanilla, blending until smooth. In another bowl, combine flour, cocoa powder, baking soda, and salt. Gently fold dry ingredients into wet mixture, adding a splash of milk to create a silky dough.
Scoop out dollops of cookie dough onto prepared sheets, keeping them a couple inches apart. Pop into the oven and bake for 8 minutes until edges look set but centers remain soft.
Pull cookies from the oven and gently press a marshmallow half into each cookie’s center. Return to the oven for another 2-3 minutes, watching marshmallows puff and soften.
Melt chocolate chips in short microwave bursts, stirring between each. Once smooth, drizzle luxuriously over cooled cookies. Sprinkle with festive decorations if you’re feeling extra.
Let chocolate set for a few minutes, then serve alongside a steaming mug of hot cocoa. Savor every gooey, chocolatey bite of your marshmallow-stuffed creation.
Tips for Gooey Centers and Crispy Edges
Serve Warm With Hot Chocolate
Store in a Covered Tin for Freshness
FAQs
The marshmallow is strategically added midway through baking, creating a gooey surprise center that puffs up and softens, giving the cookie an unexpected creamy texture and delightful marshmallow flavor.
While large marshmallows are recommended for the best visual and textural effect, mini marshmallows can work – just use 2-3 mini marshmallows per cookie and adjust baking time slightly to prevent burning.
Use room temperature ingredients, avoid overmixing the dough, and watch the baking time carefully. Remove cookies from the oven when edges are set but centers are still soft to maintain a tender, moist texture.
Basic baking tools like a mixer, baking sheets, parchment paper, and measuring cups are sufficient. A wire cooling rack helps cookies cool evenly, but isn’t absolutely necessary for the recipe’s success.
Print
Fluffy Marshmallow-Surprise Hot Cocoa Cookies Recipe
- Total Time: 30 minutes
- Yield: 13 1x
Description
Marshmallow-Surprise Hot Cocoa Cookies blend winter comfort with sweet indulgence, offering chocolate lovers a delightful treat. Homemade cookies combine rich cocoa flavors with gooey marshmallow centers that will make dessert lovers swoon.
Ingredients
- 1 cup (125 g) all-purpose flour
- ½ cup (45 g) unsweetened cocoa powder
- ½ cup (100 g) granulated sugar
- ½ cup (100 g) light brown sugar, packed
- ½ cup (115 g) unsalted butter, softened
- 1 large egg
- ¼ cup (60 ml) milk
- 1 tsp vanilla extract
- 1 tsp baking soda
- ¼ tsp salt
- 12 large marshmallows, cut in half
- ½ cup (85 g) semi-sweet chocolate chips
- 1 tsp coconut oil or vegetable oil (optional, for melting)
- Sprinkles (optional, for decoration)
Instructions
- Prep Station: Line two baking sheets with parchment paper, creating a pristine workspace for cookie crafting.
- Butter Fusion: Whip softened butter with granulated and brown sugars until the mixture transforms into a light, fluffy cloud of sweetness.
- Liquid Harmony: Blend egg and vanilla extract into the butter mixture, creating a silky smooth foundation for the cookies.
- Dry Ingredient Symphony: Sift flour, cocoa powder, baking soda, and salt together, ensuring a perfect, even distribution of dry components.
- Dough Alchemy: Gently fold dry ingredients into the wet mixture, incorporating milk to form a glossy, uniform cookie dough.
- Cookie Formation: Scoop tablespoon-sized dough rounds onto prepared baking sheets, spacing them 2 inches apart to allow room for spreading.
- Initial Bake: Roast cookies in a preheated 350F (175C) oven for 8 minutes, watching for set edges and tender centers.
- Marshmallow Magic: Remove cookies and tenderly nestle a marshmallow half into the center of each warm cookie.
- Final Transformation: Return cookies to the oven for 2-3 minutes, allowing marshmallows to puff and caramelize to golden perfection.
- Cooling Choreography: Let cookies rest on the baking sheet for 5 minutes, then transfer to a wire rack for complete cooling.
- Chocolate Drizzle: Melt chocolate chips in short microwave bursts, stirring between intervals and blending in coconut oil to create a silky drizzling consistency.
- Artistic Finish: Elegantly cascade melted chocolate over cooled cookies using a spoon or piping bag, optionally crowning with festive decorations.
- Serving Suggestion: Allow chocolate to set for 15 minutes, then serve alongside a steaming mug of hot cocoa for the ultimate indulgence.
Notes
- Butter Temperature Matters: Ensure butter is soft but not melted for the perfect creamy base, which helps create a smooth, uniform cookie texture.
- Gentle Mixing Technique: Fold dry ingredients into wet ingredients carefully to prevent overmixing, which can make cookies tough and dense.
- Marshmallow Placement Precision: Press marshmallow halves gently into warm cookies immediately after first baking to help them melt and integrate seamlessly.
- Chocolate Drizzle Control: Melt chocolate in short intervals and stir frequently to prevent burning, creating a smooth and glossy chocolate topping.
- Prep Time: 15 minutes
- Cook Time: 15 minutes
- Category: Desserts, Snacks, Drinks
- Method: Baking
- Cuisine: American
Nutrition
- Serving Size: 13
- Calories: 164
- Sugar: 16 g
- Sodium: 85 mg
- Fat: 7 g
- Saturated Fat: 4 g
- Unsaturated Fat: 3 g
- Trans Fat: 0 g
- Carbohydrates: 23 g
- Fiber: 1 g
- Protein: 2 g
- Cholesterol: 20 mg
Emily Lawson
Content Creator & Culinary Specialist
Expertise
Education
Oregon Culinary Institute
Diploma in Culinary Arts
Focus: Emphasis on farm-to-table cooking, sustainable practices, and the fusion of global flavors with traditional grilling methods.
Emily Lawson is the content creator at Daves Grill, turning tasty ideas into clear, easy recipes. Based in Portland, she trained at the Oregon Culinary Institute and loves cooking with fresh, seasonal ingredients, especially grilled veggies and global flavors.
Emily mixes food writing with hands-on cooking to bring you recipes that feel fun, not stressful. Her goal is to make every dish simple, flavorful, and worth coming back to. Together, she and Dave serve up real food, one recipe at a time.