
Homemade Crunchy Granola Bars Recipe: Sweet & Nutty Goodness
Crafting homemade granola bars unleashes a world of delightful flavor possibilities.
Small-batch treats emerge from your kitchen with incredible simplicity.
Every ingredient tells a unique story of wholesome goodness.
These portable snacks bridge nutrition and pure enjoyment effortlessly.
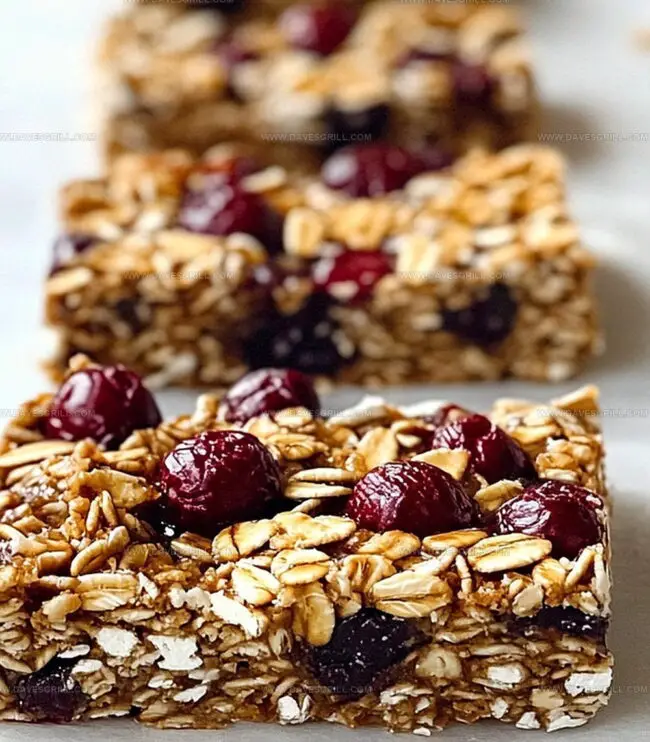
Mixing rolled oats, nuts, and sweet touches creates magic in minutes.
Experiment with different combinations that spark your culinary imagination.
Grab your mixing bowl and let deliciousness begin!
Why Granola Bars Are A Handy Snack
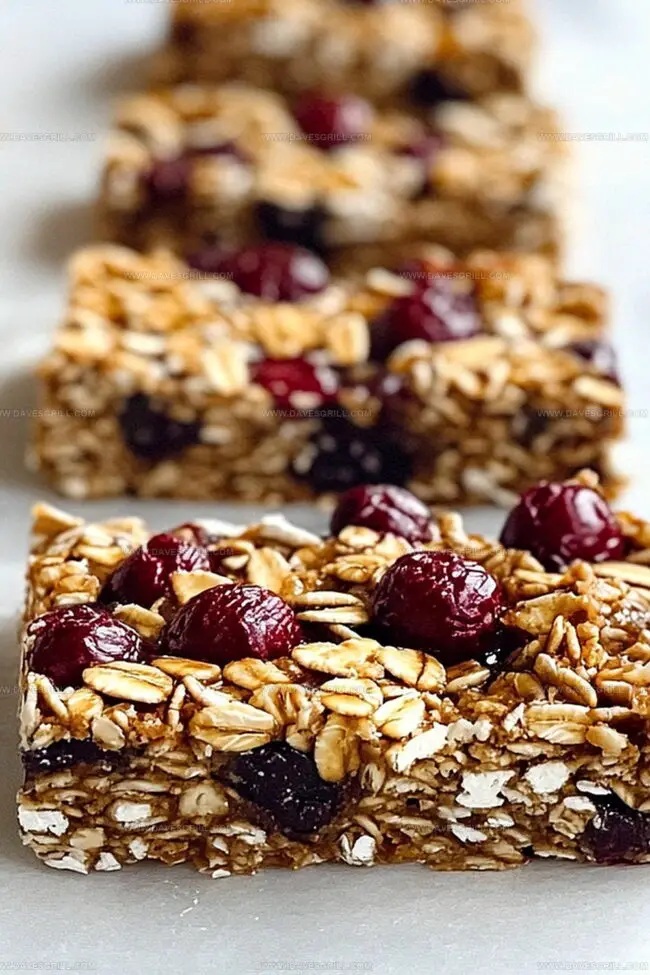
What Goes Into Granola Bars
Base Ingredients:Binding and Sweetening Ingredients:Flavor Enhancers:Preparation Ingredient:How To Make Granola Bars
Step 1: Prepare Baking Surface
Line a square baking pan with parchment paper, allowing excess paper to hang over the sides for easy removal later.
Step 2: Mix Dry Ingredients
In a large mixing bowl, combine:Step 3: Create Sticky Binding Sauce
In a saucepan over medium heat, gently combine:Stir continuously until the mixture becomes silky smooth and starts to bubble slightly (approximately 2-3 minutes).
Step 4: Enhance Flavor Profile
Remove the saucepan from heat and mix in:Step 5: Combine Wet and Dry Components
Pour the warm mixture over the dry ingredients, stirring thoroughly to ensure complete coating. Allow the mixture to cool for a brief moment.
Step 6: Add Optional Mix-Ins
Gently fold in chocolate chips or your preferred additional ingredients like:Step 7: Form and Compress Bars
Transfer the mixture to the prepared pan, pressing firmly and evenly using a spatula or clean hands to create a compact layer.
Step 8: Chill and Set
Refrigerate the pan for at least one hour to allow the bars to firm up completely.
Step 9: Slice and Store
Cut into individual bars using a sharp knife. Store in an airtight container at room temperature for up to one week, or refrigerate for extended freshness.
Tips To Make Better Granola Bars
How To Store Granola Bars The Right Way
Perfect Pairings For Granola Bars
Tasty Twists On Granola Bars
Granola Bars FAQ Guide
Yes! Almond butter, cashew butter, or sunflower seed butter work great as substitutes and can add unique flavor profiles to your granola bars.
Make sure to press the mixture very firmly into the pan and let it cool completely in the refrigerator before cutting. This helps the bars hold their shape and stay together.
They can be if you use gluten-free oats and rice cereal. Always check your ingredient labels to ensure they’re completely gluten-free.
Absolutely! Kids can help mix ingredients, fold in chocolate chips, and press the mixture into the pan. Just supervise them during the heating step with the hot mixture.
Print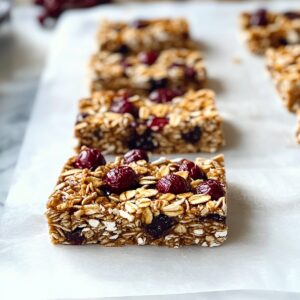
Granola Bars Recipe
- Total Time: 1 hour 15 minutes
- Yield: 12 1x
Description
Homemade Nutty Granola Bars bring wholesome goodness straight from your kitchen, packed with hearty oats and crunchy nuts. These delightful snacks offer a perfect balance of sweet and nutritious ingredients that energize and satisfy hungry appetites.
Ingredients
Dry Ingredients:
- 2 ½ cups (595 milliliters) old-fashioned rolled oats
- 1 cup (240 milliliters) crispy rice cereal
- ½ cup (120 milliliters) mini chocolate chips
- ½ cup (120 milliliters) dried fruit or chopped nuts
- ¼ cup (60 milliliters) brown sugar
Binding Ingredients:
- ½ cup (120 milliliters) peanut butter or almond butter
- ½ cup (120 milliliters) honey or maple syrup
Flavor and Seasoning:
- 1 teaspoon vanilla extract
- ¼ teaspoon salt
Instructions
- Prepare a baking pan by lining it completely with parchment paper, ensuring the paper extends slightly over the edges for easy removal.
- Create a dry base mixture by thoroughly combining rolled oats and crispy rice cereal in a spacious mixing bowl.
- Craft the binding syrup by gently melting peanut butter, honey, and brown sugar together in a small saucepan over medium heat, stirring continuously until the ingredients transform into a smooth, slightly bubbling liquid.
- Remove the syrup from heat and enhance its flavor profile by incorporating vanilla extract and a pinch of salt, mixing until fully integrated.
- Pour the warm syrup over the dry ingredients, using a spatula to coat every morsel evenly, ensuring a consistent mixture.
- Allow the mixture to cool momentarily, then delicately fold in chocolate chips or preferred mix-ins to distribute them throughout the granola.
- Transfer the mixture to the prepared pan, using firm, even pressure to compact the ingredients into a uniform layer that will hold together when sliced.
- Chill the pan in the refrigerator for at least one hour to allow the bars to set and solidify completely.
- Once set, lift the bars out using the parchment paper overhang and slice into desired portions using a sharp knife.
- Store the granola bars in an airtight container, keeping them at room temperature for up to a week or refrigerated for extended freshness.
Notes
- Press the mixture extremely firmly to ensure bars hold together perfectly, preventing crumbling during cutting or eating.
- Use quick-cooking oats for a softer texture or rolled oats for more chewiness and hearty bite.
- Customize mix-ins like dried fruits, nuts, or seeds to create unique flavor combinations and boost nutritional value.
- For gluten-free version, substitute rice cereal with gluten-free crispy rice or additional oats and use certified gluten-free oats.
- Prep Time: 5 minutes
- Cook Time: 10 minutes
- Category: Snacks, Breakfast
- Method: Mixing
- Cuisine: American
Nutrition
- Serving Size: 12
- Calories: 180
- Sugar: 10g
- Sodium: 50mg
- Fat: 7g
- Saturated Fat: 1.5g
- Unsaturated Fat: 4.5g
- Trans Fat: 0g
- Carbohydrates: 26g
- Fiber: 2g
- Protein: 4g
- Cholesterol: 0mg
Dave Mitchell
Founder & Chief Recipe Developer
Expertise
Education
Asheville-Buncombe Technical Community College
Associate of Applied Science in Culinary Arts
Focus: Comprehensive training in culinary techniques, kitchen management, and menu planning, with a special emphasis on grilling and outdoor cooking.
Dave Mitchell is the heart behind Daves Grill, a cook, writer, and lover of all things grilled. He studied Culinary Arts at Asheville-Buncombe Technical Community College and spent years cooking, testing, and sharing recipes that actually work.
Dave started Daves Grill to keep things simple: one great recipe at a time. His food is bold, easy to follow, and made for real people with regular kitchens. From juicy steaks to quick sides, Dave’s recipes bring the heat without the hassle.