Extraordinary Grandma’s Chocolate Pie Recipe: A Nostalgic Sweet Joy
When grandmas chocolate pie recipe hits the table, dessert becomes a nostalgic journey through sweet memories.
Generations have cherished this delectable treat passed down through loving kitchens.
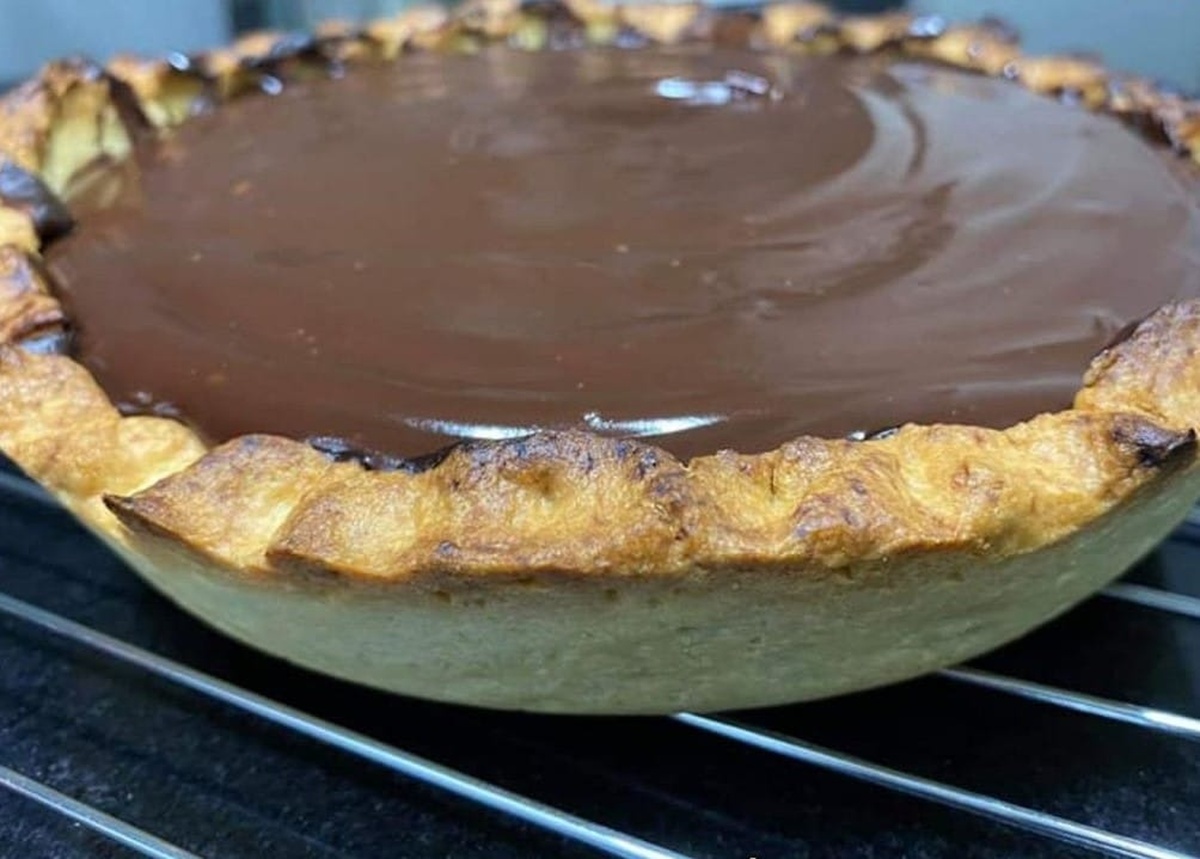
Rich, velvety chocolate fills a perfectly flaky crust with pure comfort.
Warm aromas of chocolate and butter swirl through the kitchen, promising deliciousness.
Every slice tells a story of traditional baking and tender care.
The silky filling melts effortlessly, creating a decadent experience that connects you to cherished family moments.
One bite transports you to childhood kitchens filled with love and warmth.
Prepare to fall in love with this timeless dessert that never fails to bring smiles.
Quick Recipe Overview
Grandma’s Chocolate Pie Ingredients That Matter
For Filling Base:For Liquid Components:For Meringue Topping:For Crust:Tools That Bring Back the Old-School Pie Feel
Make Grandma’s Chocolate Pie from Scratch
Grab a saucepan and mix cocoa, sugar, flour, and a pinch of salt. Slowly pour in milk, stirring like a pro to keep things smooth. Cook over medium heat, watching the mixture transform into a thick, glossy wonder. Keep stirring until it bubbles and thickens.
Pull the pan off the heat and fold in egg yolks, creating a silky chocolate dream. Return to low heat for a quick two-minute dance, stirring constantly. Remove from heat and swirl in vanilla and butter until perfectly smooth.
In a pristine bowl, whisk egg whites until they form soft, billowy peaks. Gradually sprinkle in sugar, continuing to beat until the meringue stands tall and proud.
Pour the chocolate filling into your waiting pie crust. Lovingly spread the meringue on top, making sure it hugs the edges. Slide into a preheated oven and bake until the meringue turns a beautiful golden brown.
Let the pie cool to room temperature, then slice and enjoy a slice of pure comfort that would make any grandmother proud.
Nostalgic Tips to Keep the Recipe Just Right
How to Present Grandma’s Pie at the Table
How to Store Chocolate Pie for Later Enjoyment
FAQs
The key is to gradually add milk while whisking constantly and stirring continuously during cooking. This technique helps break down any potential flour or cocoa powder lumps and ensures a silky, creamy texture.
The filling is ready when it thickens and starts to bubble, then continues cooking for an additional 2 minutes. It should have a pudding-like consistency that coats the back of a spoon.
Egg yolks help create a rich, creamy texture and add a deep, luxurious flavor to the chocolate filling. They also help stabilize and thicken the mixture, giving the pie its classic custard-like consistency.
Use a clean, dry bowl and beat egg whites with salt until soft peaks form. Then gradually add sugar while continuing to beat until stiff, glossy peaks develop. Avoid any moisture or oil in the bowl, as this can prevent the whites from whipping properly.
Print
Heavenly Grandmas Chocolate Pie Recipe
- Total Time: 40 minutes
- Yield: 9 1x
Description
Grandmas chocolate pie delivers a nostalgic journey through generations of family baking traditions. Rich chocolate filling and flaky crust promise comfort and sweet memories for dessert enthusiasts.
Ingredients
- 1 ½ cups (360 ml) whole milk
- 1 unbaked 9-inch pie crust
- 2 egg yolks, lightly beaten
- 4 tbsps (1 ½ squares) cocoa powder or baking chocolate
- ¾ cup (150 g) granulated sugar
- 5 tbsps (40 g) all-purpose flour
- ¼ tsp salt
- ½ tsp vanilla extract
- 1 tbsp (14 g) unsalted butter
- 2 egg whites
- 4 tbsps (50 g) granulated sugar
- 1/8 tsp kosher salt
Instructions
- Prepare Base: Whisk cocoa powder, sugar, flour, and salt in a saucepan, eliminating any dry ingredient clumps with careful mixing.
- Develop Mixture: Gradually pour milk while stirring, creating a smooth, uniform chocolate foundation without lumpy textures.
- Cook Filling: Heat the mixture over medium temperature, stirring constantly until it thickens and reaches a gentle boil, continuing to stir for two additional minutes to enhance flavor and consistency.
- Integrate Eggs: Remove from heat and blend beaten egg yolks into the chocolate mixture, ensuring complete incorporation and creamy texture.
- Finalize Filling: Return to low heat, stirring for two minutes to deepen flavors, then remove and fold in vanilla extract and butter, creating a glossy, velvety chocolate filling.
- Construct Pie: Pour the chocolate mixture into an unbaked pie crust, spreading evenly to cover the entire surface.
- Create Meringue: Whip egg whites with kosher salt until soft peaks form, then gradually add sugar while beating to develop stiff, glossy peaks that maintain their structure.
- Top and Seal: Spread meringue across the chocolate filling, ensuring complete contact with the crust’s edges to prevent shrinkage during baking.
- Bake and Finish: Place in a preheated 350F oven, monitoring until meringue turns golden-brown and lightly toasted, then cool completely at room temperature before serving to preserve the pie’s structural integrity and optimal flavor profile.
Notes
- Prevent Lumpy Texture: Whisk dry ingredients thoroughly before adding milk, ensuring no cocoa or flour clumps remain for a silky-smooth chocolate base.
- Master Meringue Technique: Ensure egg whites are at room temperature and use clean, grease-free utensils to achieve perfect, stiff peaks that won’t deflate.
- Avoid Weeping Meringue: Spread meringue while chocolate filling is still warm, creating a seal that prevents moisture separation and maintains a pristine topping.
- Slice with Precision: Use a wet, clean knife when cutting to achieve clean, beautiful slices without dragging or tearing the delicate meringue surface.
- Prep Time: 20 minutes
- Cook Time: 20 minutes
- Category: Desserts
- Method: Baking
- Cuisine: American
Nutrition
- Serving Size: 9
- Calories: 295
- Sugar: 24 g
- Sodium: 120 mg
- Fat: 10 g
- Saturated Fat: 5 g
- Unsaturated Fat: 4 g
- Trans Fat: 0 g
- Carbohydrates: 43 g
- Fiber: 1 g
- Protein: 4 g
- Cholesterol: 82 mg
Emily Lawson
Content Creator & Culinary Specialist
Expertise
Education
Oregon Culinary Institute
Diploma in Culinary Arts
Focus: Emphasis on farm-to-table cooking, sustainable practices, and the fusion of global flavors with traditional grilling methods.
Emily Lawson is the content creator at Daves Grill, turning tasty ideas into clear, easy recipes. Based in Portland, she trained at the Oregon Culinary Institute and loves cooking with fresh, seasonal ingredients, especially grilled veggies and global flavors.
Emily mixes food writing with hands-on cooking to bring you recipes that feel fun, not stressful. Her goal is to make every dish simple, flavorful, and worth coming back to. Together, she and Dave serve up real food, one recipe at a time.