
Magical Mint Chocolate Chip Snowball Cookies Recipe
Cool winter afternoons call for irresistible mint chocolate chip snowball cookies that melt in your mouth.
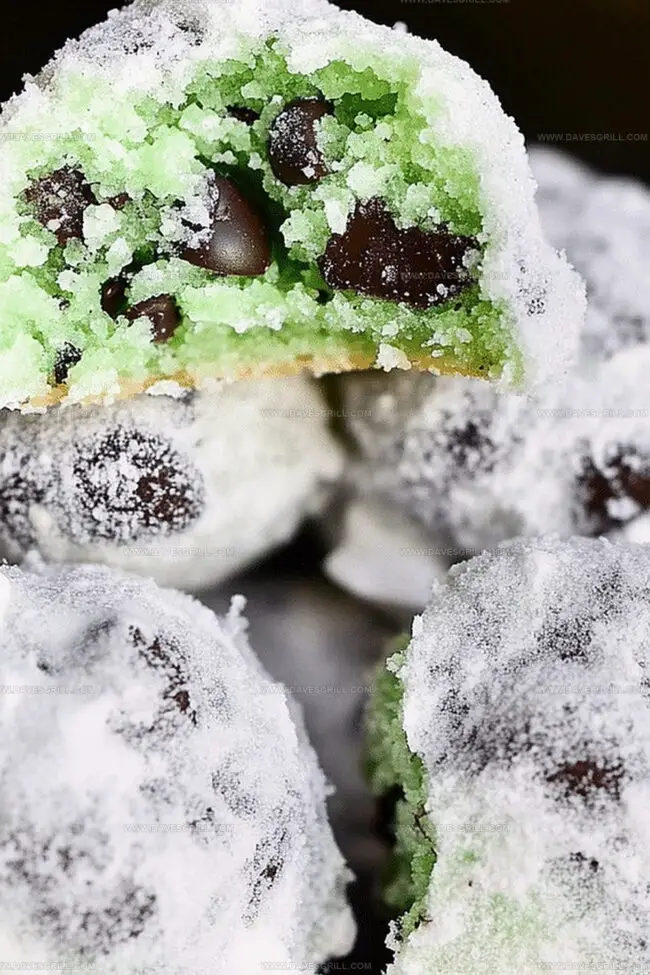
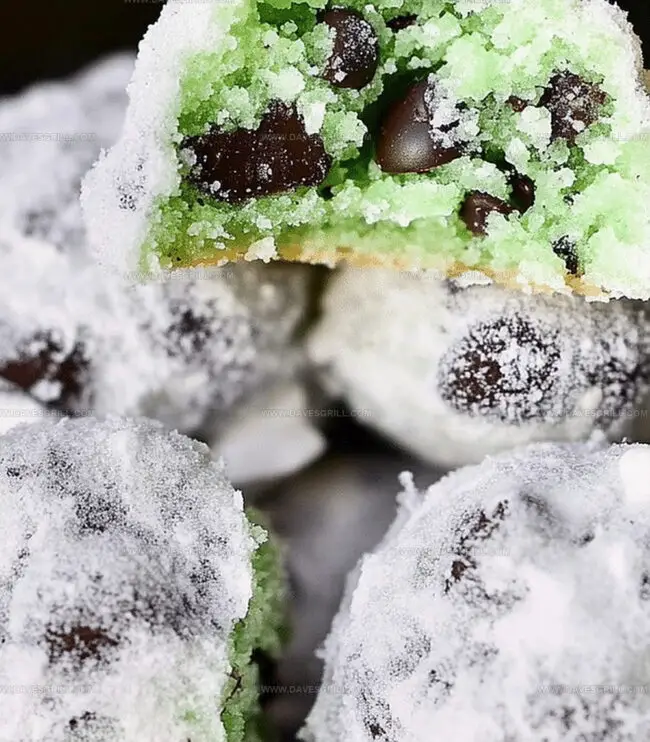
These delicate treats combine rich chocolate and refreshing mint in a powdery white cookie package.
Buttery, crumbly, and elegantly dusted with confectioners’ sugar, these cookies bring pure comfort to every bite.
The classic snowball design gets a delightful upgrade with miniature chocolate chips and a hint of peppermint extract.
Each cookie offers a perfect balance of smooth chocolate and cool mint flavors that dance across your palate.
Baking these delectable morsels fills your kitchen with an enchanting aroma that beckons family to gather around.
Prepare to savor a cookie that transforms a simple dessert into a winter wonderland of flavor.
Quick Recipe Overview
Mint Chocolate Chip Snowball Cookie Ingredient List
For Base and Flavor:For Dry Components:For Texture and Excitement:Tools for Shaping Mint Chocolate Chip Snowball Cookies
Bake Mint Chocolate Chip Snowballs That Melt in Your Mouth
Grab your mixer and whip softened butter with powdered sugar until it looks fluffy and gorgeous, creating a creamy base that’ll make your cookies irresistible.
Add peppermint and vanilla extracts, giving your dough a delightful minty twist. Toss in a hint of green food coloring if you want that festive snowball look.
Gently fold flour and salt into your buttery mixture, stirring until everything comes together in a soft, delectable dough.
Carefully stir mini chocolate chips throughout the dough, ensuring they’re evenly distributed for a delicious surprise in every bite.
Roll small portions of dough into perfect little balls, placing them slightly apart on a baking sheet lined with parchment paper.
Pop your cookie sheet into a 350F oven and bake for 10-12 minutes until edges look set but not browned.
Once cookies are slightly cooled, roll them in powdered sugar, creating a beautiful snowy coating. Let them cool completely, then dust with another layer of sugar for thatal winter wonderland effect.
Tips for Flavor Balance in Mint Snowball Cookies
Serve Mint Chocolate Chip Snowballs with Holiday Cheer
Keep Mint Snowballs Cool and Ready to Eat
FAQs
While you can use regular chocolate chips, mini chocolate chips blend more evenly into the dough and distribute better throughout the cookies, giving a more consistent mint chocolate flavor.
Keep the dough chilled and don’t overmix the ingredients. Use room temperature butter that’s softened but not melted, and make sure to measure flour accurately by spooning it into the measuring cup and leveling it off.
Peppermint extract is key to creating the mint flavor in these snowball cookies. Without it, you’ll lose the signature mint chocolate chip taste. If you don’t have peppermint extract, you could substitute with a small amount of mint flavoring.
Yes, you can prepare the dough in advance and refrigerate it for up to 3 days before baking. You can also freeze the unbaked dough balls for up to 2 months, adding an extra minute or two to the baking time when cooking from frozen.
Print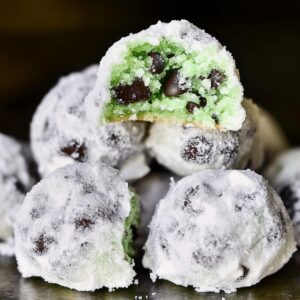
Heavenly Mint Chocolate Chip Snowball Cookies Recipe
- Total Time: 27 minutes
- Yield: 25 1x
Description
Classic Mint Chocolate Chip Snowball Cookies bring delightful winter magic to holiday dessert tables. Powdered sugar-coated spheres pack cool peppermint flavor with rich chocolate chips for festive winter indulgence you’ll savor with each delicate bite.
Ingredients
- 1 ½ cups (226 g) unsalted butter, softened
- 2 cups (250 g) all-purpose flour
- ¾ cup (135 g) mini chocolate chips
- ½ cup (60 g) powdered sugar, plus more for coating
- 1 tsp peppermint extract
- ½ tsp vanilla extract
- ¼ tsp salt
- Green food coloring (optional, for a minty look)
Instructions
- Preheat and Prepare: Set oven to 350F (175C) and line a baking sheet with parchment paper for optimal cookie performance.
- Cream Butter Base: Whip butter and powdered sugar into a light, fluffy texture, blending thoroughly to create a smooth foundation for the cookies.
- Flavor and Color: Introduce peppermint and vanilla extracts, optional green food coloring to enhance the mint chocolate chip theme, mixing until evenly distributed.
- Combine Dry and Wet Ingredients: Sift flour and salt, then gently fold into the butter mixture, stirring minimally to maintain a tender cookie texture.
- Incorporate Chocolate Chips: Fold mini chocolate chips throughout the dough, ensuring an even spread of chocolatey goodness in each bite.
- Shape and Arrange: Form uniform dough balls, rolling between palms, and position on the prepared baking sheet with slight spacing to allow proper expansion.
- Bake to Perfection: Transfer to preheated oven, baking 10-12 minutes until edges set and surfaces remain pristine, watching carefully to avoid over-browning.
- Sugar Coating: Immediately after removing from oven, while still warm, generously coat each cookie in powdered sugar for a magical, snow-like finish.
- Final Touch: Once completely cooled, apply a second dusting of powdered sugar, creating a delicate, winter-inspired exterior that showcases the mint chocolate chip snowball’s elegance.
Notes
- Temperature Control: Maintain precise oven temperature at 350F to prevent over-browning or undercooking; use an oven thermometer for accuracy.
- Butter Technique: Ensure butter is softened but not melted for optimal cookie texture and smooth mixing consistency.
- Chocolate Chip Distribution: Gently fold chocolate chips to prevent overmixing, which can toughen the cookie’s delicate structure.
- Cooling Strategy: Allow cookies to cool slightly before first powdered sugar coating to help sugar adhere better and create a smooth, elegant finish.
- Prep Time: 15 minutes
- Cook Time: 12 minutes
- Category: Desserts, Snacks
- Method: Baking
- Cuisine: American
Nutrition
- Serving Size: 25
- Calories: 145
- Sugar: 3 g
- Sodium: 20 mg
- Fat: 10 g
- Saturated Fat: 6 g
- Unsaturated Fat: 4 g
- Trans Fat: 0 g
- Carbohydrates: 15 g
- Fiber: 0 g
- Protein: 1 g
- Cholesterol: 30 mg
Emily Lawson
Content Creator & Culinary Specialist
Expertise
Education
Oregon Culinary Institute
Diploma in Culinary Arts
Focus: Emphasis on farm-to-table cooking, sustainable practices, and the fusion of global flavors with traditional grilling methods.
Emily Lawson is the content creator at Daves Grill, turning tasty ideas into clear, easy recipes. Based in Portland, she trained at the Oregon Culinary Institute and loves cooking with fresh, seasonal ingredients, especially grilled veggies and global flavors.
Emily mixes food writing with hands-on cooking to bring you recipes that feel fun, not stressful. Her goal is to make every dish simple, flavorful, and worth coming back to. Together, she and Dave serve up real food, one recipe at a time.