
Easy Homemade Crunch Bars Recipe: Sweet & Snappy Treats
Chocolate and crispy rice create magic in this homemade crunch bars recipe that will make snack time extraordinary.
Sweet memories flood back with every delectable bite of this nostalgic treat.
Childhood favorites get a delightful upgrade through simple ingredients and minimal effort.
My kitchen always buzzes with excitement when these bars come together.
Anyone can master this straightforward technique with just a few pantry staples.
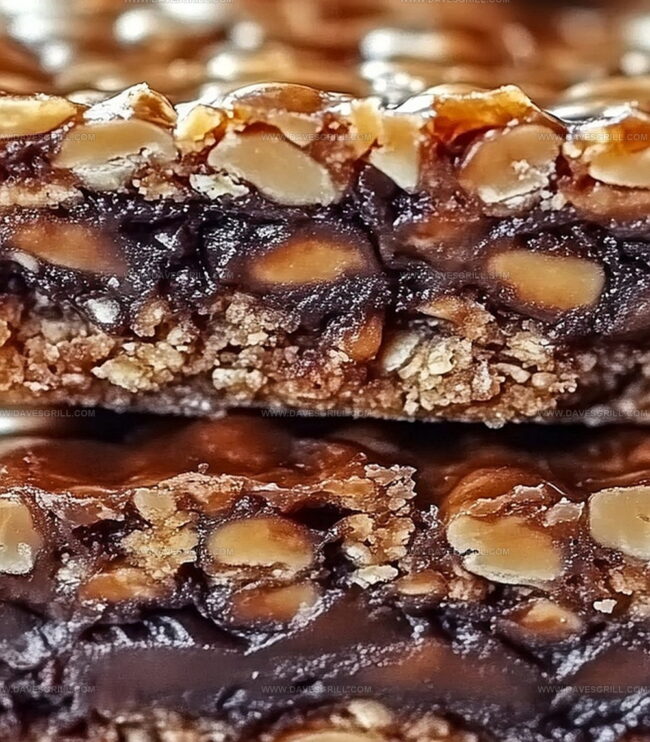
Crunchy, smooth chocolate layers promise a delectable experience that beats store-bought versions.
Get ready to impress everyone with this irresistible homemade confection that disappears faster than you can slice it.
Why Homemade Crunch Bars Recipe Is A Sweet Crunchy Favorite

Everything You Need For Homemade Crunch Bars Recipe
Chocolate Base:Crunch Element:Optional Extras:Simple Instructions For Homemade Crunch Bars Recipe
Step 1: Melt Chocolate Magic
Grab a microwave-safe bowl and transform your chocolate chips into liquid gold. Zap them in short bursts, stirring between each 30-second interval. If you’re feeling adventurous, add a splash of coconut oil to create an extra silky texture. Keep stirring until the chocolate becomes a smooth, glossy river of deliciousness.
Step 2: Create Crispy Chocolate Mixture
Introduce your crispy rice cereal to the melted chocolate party. Gently fold the cereal into the chocolate, ensuring each piece gets a luxurious chocolate coating. The goal is to create a perfect balance where every crunch is wrapped in chocolatey goodness.
Step 3: Prepare Chocolate Canvas
Line an 8×8-inch baking pan with parchment paper. This will be your chocolate masterpiece’s stage. Pour the chocolate-cereal mixture into the pan, using a spatula to spread it evenly. Make sure the surface looks smooth and inviting.
Step 4: Chill and Set
Slide the pan into the refrigerator and let the magic happen. Give your creation at least an hour to firm up. This is the perfect time to clean up your kitchen or enjoy a quick break.
Step 5: Slice and Celebrate
Once the bars are completely set, lift the parchment paper to remove the entire batch. Slice into squares or rectangular bars using a sharp knife. For the ultimate texture, keep these treats chilled until you’re ready to devour them.
Tips For Better Homemade Crunch Bars Recipe Results
How To Store Homemade Crunch Bars Recipe Safely
What To Pair With Homemade Crunch Bars Recipe
Homemade Crunch Bars Recipe Twists To Try
Common Questions On Homemade Crunch Bars Recipe
Rice Krispies or any crispy rice cereal are perfect because they provide the ideal light, crispy texture that makes these bars so delicious. The cereal creates that signature crunch everyone loves.
Absolutely! You can use milk, dark, or semi-sweet chocolate chips depending on your preference. Each type will give a slightly different flavor profile to your homemade crunch bars.
Always melt chocolate in short intervals and stir frequently. Using coconut oil helps create a smoother consistency and prevents burning. Microwave in 30-second bursts, stirring between each interval until smooth and fully melted.
They can be if you use gluten-free crispy rice cereal. Always check the cereal package to confirm it’s certified gluten-free if you have dietary restrictions.
Print
Homemade Crunch Bars Recipe
- Total Time: 1 hour 10 minutes
- Yield: 12 1x
Description
Chocolate and crispy rice meld perfectly in these homemade crunch bars, creating an irresistible sweet treat. Crunchy, rich, and simple to prepare, these bars bring professional bakery flavor straight to home kitchens with minimal effort.
Ingredients
Chocolate:
- 2 cups (340 grams) semisweet or milk chocolate chips
Cereal:
- 2 cups (50 grams) crispy rice cereal (like Rice Krispies)
Optional Ingredients:
- 1 tablespoon (15 milliliters) coconut oil or unsalted butter
- ¼ teaspoon (1.25 grams) salt
Instructions
- Prepare a parchment-lined baking pan, ensuring complete coverage of the bottom and sides for easy chocolate removal.
- Create a double boiler or use a microwave-safe bowl to gently melt chocolate chips with coconut oil, stirring periodically to achieve a silky, uniform consistency without scorching.
- Remove melted chocolate from heat source and allow it to cool slightly, preventing potential cereal sogginess.
- Carefully incorporate crispy rice cereal into the melted chocolate, using a spatula to ensure each grain receives an even chocolate coating without crushing the delicate texture.
- Transfer the chocolate-cereal mixture into the prepared pan, using smooth, deliberate motions to distribute the blend evenly and eliminate air pockets.
- Tap the pan gently against the countertop to release any trapped bubbles and create a level surface.
- Place the pan in the refrigerator, allowing the chocolate to set completely, which typically requires approximately 60-90 minutes.
- Once fully hardened, lift the chocolate slab from the pan using the parchment paper edges as handles.
- Slice into uniform squares or rectangular bars using a sharp knife, wiping the blade clean between cuts for precise edges.
- Store the crunch bars in an airtight container within the refrigerator to maintain their crisp texture and prevent melting.
Notes
- Select high-quality chocolate for a rich, luxurious taste that elevates the entire dessert experience.
- Use gluten-free crispy rice cereal to make this treat suitable for those with gluten sensitivities.
- Experiment with different chocolate types like dark, milk, or white to create unique flavor variations.
- Add a sprinkle of sea salt on top before chilling to enhance the chocolate’s depth and create a gourmet touch.
- Prep Time: 10 minutes
- Cook Time: 1 hour
- Category: Snacks, Desserts
- Method: Mixing
- Cuisine: American
Nutrition
- Serving Size: 12
- Calories: 157
- Sugar: 13 g
- Sodium: 25 mg
- Fat: 7 g
- Saturated Fat: 4 g
- Unsaturated Fat: 2 g
- Trans Fat: 0 g
- Carbohydrates: 22 g
- Fiber: 0 g
- Protein: 1 g
- Cholesterol: 0 mg
Dave Mitchell
Founder & Chief Recipe Developer
Expertise
Education
Asheville-Buncombe Technical Community College
Associate of Applied Science in Culinary Arts
Focus: Comprehensive training in culinary techniques, kitchen management, and menu planning, with a special emphasis on grilling and outdoor cooking.
Dave Mitchell is the heart behind Daves Grill, a cook, writer, and lover of all things grilled. He studied Culinary Arts at Asheville-Buncombe Technical Community College and spent years cooking, testing, and sharing recipes that actually work.
Dave started Daves Grill to keep things simple: one great recipe at a time. His food is bold, easy to follow, and made for real people with regular kitchens. From juicy steaks to quick sides, Dave’s recipes bring the heat without the hassle.