
Sweet Decadence: Irresistible Boston Cream Pie Fudge Recipe
Creamy layers of decadence dance together in this irresistible boston cream pie fudge that promises pure dessert bliss.
Sweet memories of classic bakery treats inspired this innovative confection.
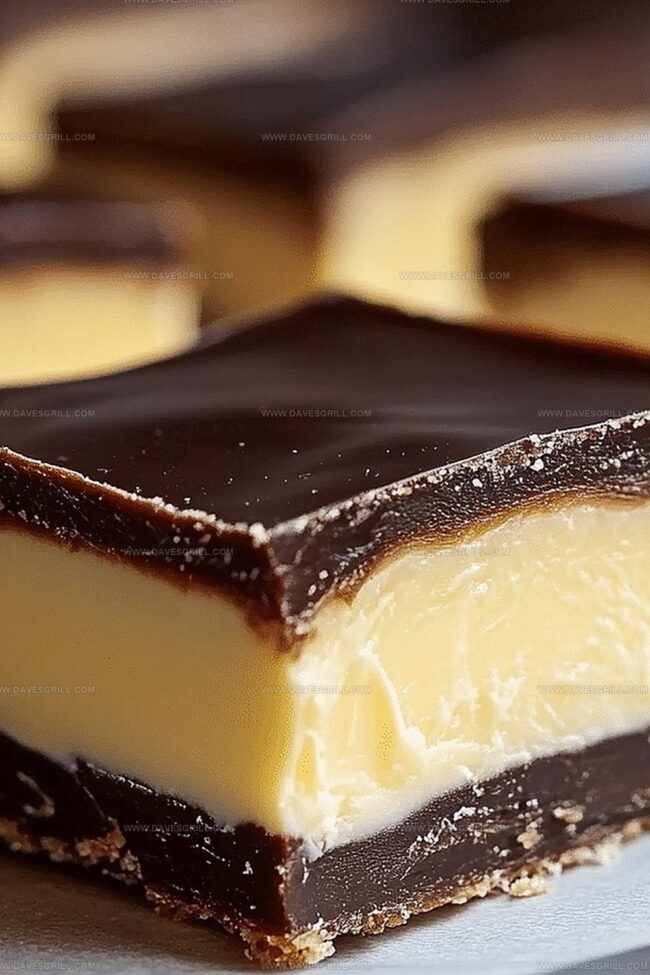
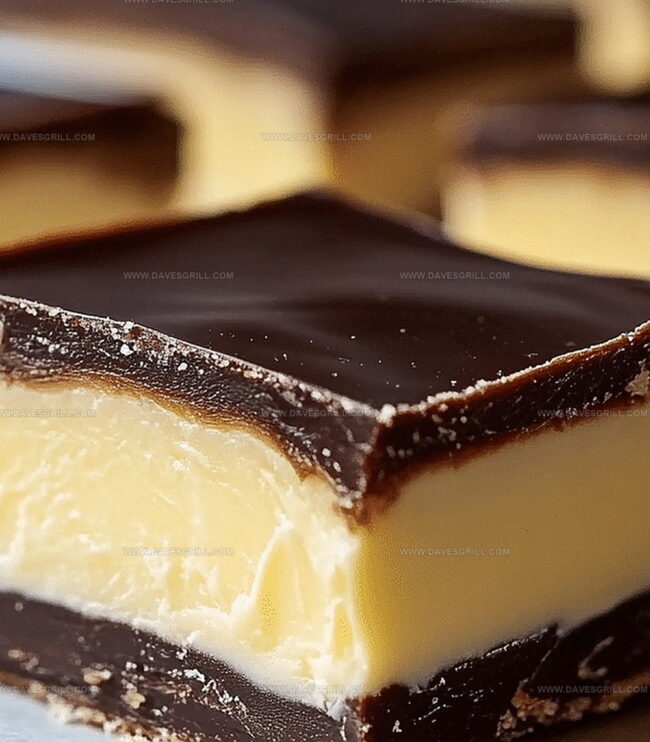
Silky smooth vanilla custard meets rich chocolate in a melt-in-your-mouth experience.
Nostalgic flavors combine with modern twists, creating a dessert that feels both familiar and exciting.
Each bite delivers a perfect balance of creamy, sweet, and luxurious textures.
Chocolate lovers and dessert enthusiasts will fall head over heels for this simple yet stunning treat.
Prepare to embark on a culinary journey that transforms an ordinary moment into something extraordinary.
Quick Recipe Overview
Boston Cream Pie Fudge Ingredient Rundown
For Base Layer:For Chocolate Topping:For Pan Preparation:Tools That Help You Prepare Boston Cream Pie Fudge Neatly
Make Boston Cream Pie Fudge with Silky Layers
Create a cozy home for your fudge by lining a square pan with parchment paper, letting the edges hang over like a soft blanket for easy lifting.
Melt white chocolate chips with sweetened condensed milk in a gentle dance of heat, stirring until silky smooth. Whisk in vanilla extract and pudding mix, blending until perfectly combined. Pour the dreamy mixture into your prepared pan, spreading it evenly like a creamy canvas.
Combine semi-sweet chocolate chips and heavy cream in a microwave-safe bowl. Zap in short bursts, stirring between each, until the chocolate transforms into a glossy, flowing river. Drizzle and spread the chocolate over the vanilla layer, creating a luxurious finish.
Tuck your fudge into the refrigerator for a few hours, allowing it to firm up and develop its rich, decadent personality.
Lift the fudge from its pan using the parchment paper handles. Slice into bite-sized pieces that reveal layers of creamy vanilla and rich chocolate, ready to melt in your mouth.
Tips That Keep This Fudge Smooth and Flavorful
Serve Boston Cream Fudge as Squares or Gifts
Store Fudge for Later with Perfect Texture
FAQs
The key flavors are vanilla from the pudding mix and white chocolate base, complemented by a rich semi-sweet chocolate topping that mimics the classic Boston Cream Pie taste.
You’ll need a saucepan, microwave or double boiler, 8×8-inch baking dish, parchment paper, and basic measuring tools. No specialized equipment is required.
Yes, this fudge recipe is very simple. It involves basic melting and mixing techniques, making it perfect for novice bakers who want an easy dessert with impressive results.
You can use milk chocolate instead of semi-sweet, and if you’re out of heavy cream, whole milk might work. However, stick to the recipe as closely as possible for best results.
Print
Indulgent Boston Cream Pie Fudge Recipe
- Total Time: 2 hours 15 minutes
- Yield: 13 1x
Description
Delectable Boston Cream Pie Fudge blends classic dessert flavors into a creamy confection. Silky layers of vanilla custard and chocolate ganache create an irresistible sweet treat you’ll crave again and again.
Ingredients
- 1 can (397 g / 14 oz) sweetened condensed milk
- 2 cups (340 g) white chocolate chips
- 1 cup (170 g) semi-sweet chocolate chips
- ½ cup (120 ml) heavy cream
- 1 package (92 g / 3.4 oz) instant vanilla pudding mix
- 1 tsp vanilla extract
Instructions
- Vessel Preparation: Line an 8×8-inch dish with parchment paper, allowing excess paper to overhang for easy removal.
- Vanilla Base Creation: Melt sweetened condensed milk and white chocolate chips in a medium saucepan, stirring continuously until smooth. Remove from heat and whisk in vanilla extract and vanilla pudding mix until fully incorporated and uniform.
- Base Layer Placement: Pour the velvety mixture into the prepared pan, spreading evenly and smoothing the surface. Let rest while preparing the chocolate topping.
- Chocolate Topping Development: Combine semi-sweet chocolate chips and heavy cream in a microwave-safe container. Melt through short intervals, stirring between each to prevent scorching, until a glossy chocolate mixture forms.
- Layering and Finishing: Drizzle the chocolate topping over the vanilla base, using a spatula to ensure complete and even coverage. Refrigerate for 2-3 hours until the fudge sets completely and becomes firm.
- Serving Preparation: Extract the fudge from the pan using parchment paper handles. Slice into precise cubes or rectangular segments, ready to delight dessert enthusiasts.
Notes
- Precise Chocolate Melting: Use short microwave intervals and stir frequently to prevent chocolate from burning or seizing, ensuring a smooth, glossy chocolate layer.
- Temperature Control: Allow vanilla layer to cool slightly before adding chocolate topping to prevent unwanted mixing and maintain distinct flavor layers.
- Smooth Surface Technique: Gently tap the pan after pouring each layer to release air bubbles and create a perfectly even, professional-looking fudge texture.
- Storage Strategy: Store fudge in an airtight container in the refrigerator for up to 5 days, separating layers with parchment paper to prevent sticking and maintain optimal texture.
- Prep Time: 15 minutes
- Cook Time: 2 hours
- Category: Desserts, Snacks
- Method: Blending
- Cuisine: American
Nutrition
- Serving Size: 13
- Calories: 243
- Sugar: 22 g
- Sodium: 50 mg
- Fat: 14 g
- Saturated Fat: 8 g
- Unsaturated Fat: 6 g
- Trans Fat: 0 g
- Carbohydrates: 28 g
- Fiber: 0 g
- Protein: 2 g
- Cholesterol: 36 mg
Emily Lawson
Content Creator & Culinary Specialist
Expertise
Education
Oregon Culinary Institute
Diploma in Culinary Arts
Focus: Emphasis on farm-to-table cooking, sustainable practices, and the fusion of global flavors with traditional grilling methods.
Emily Lawson is the content creator at Daves Grill, turning tasty ideas into clear, easy recipes. Based in Portland, she trained at the Oregon Culinary Institute and loves cooking with fresh, seasonal ingredients, especially grilled veggies and global flavors.
Emily mixes food writing with hands-on cooking to bring you recipes that feel fun, not stressful. Her goal is to make every dish simple, flavorful, and worth coming back to. Together, she and Dave serve up real food, one recipe at a time.