
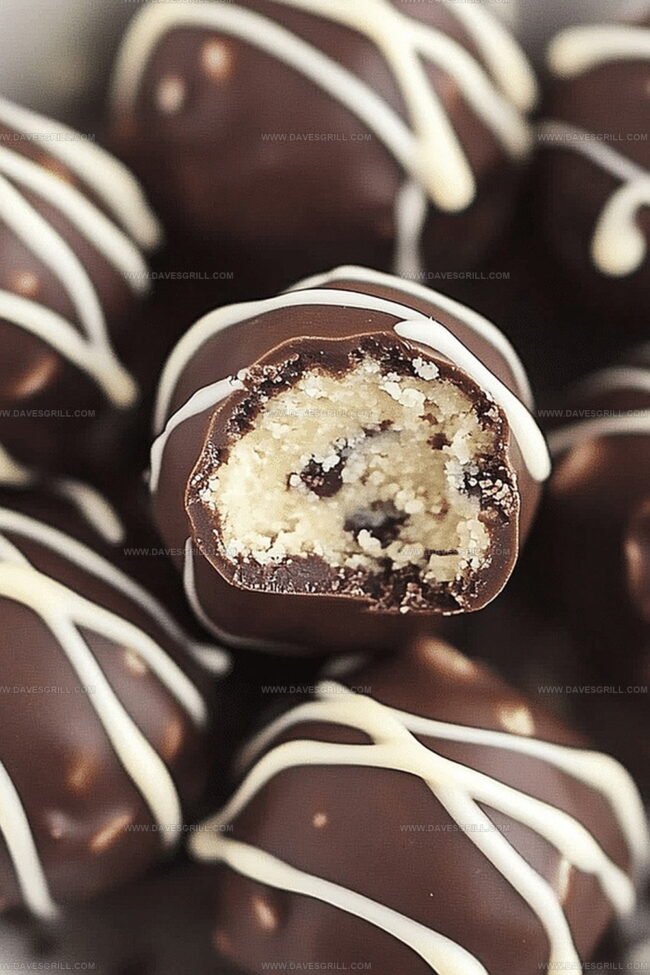
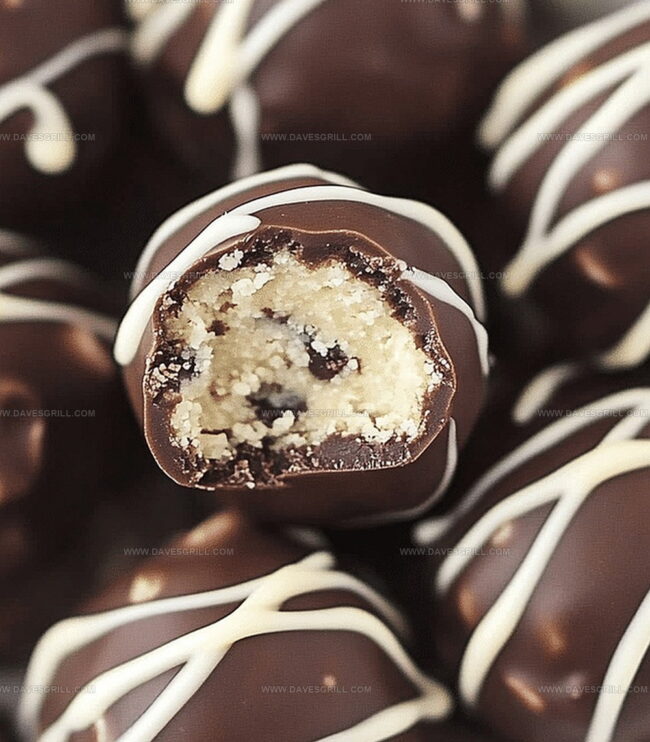
Dreamy Cookie Dough Truffles Recipe: Bite-Sized Joy Bombs
Chocolate chips melt into pure bliss with these irresistible cookie dough truffles that promise decadent satisfaction.
No baking required for this sinful treat.
These truffles capture the nostalgic essence of sneaking raw cookie dough straight from the mixing bowl.
Each bite delivers a creamy, rich experience that dances between dessert and pure indulgence.
Smooth chocolate coating adds a luxurious layer to the soft, velvety centers.
The recipe transforms simple ingredients into an elegant confection that feels like a gourmet dessert.
You’ll want to share these delightful morsels with everyone you know.
Prepare to fall in love with the ultimate sweet temptation.
Quick Recipe Overview
Cookie Dough Truffle Ingredient Checklist
For Cookie Base:For Dry Ingredients:For Coating and Decoration:Must-Have Tools for Dough-Based Truffles
Roll Cookie Dough Truffles in No Time
Mix soft butter with sweet sugars until fluffy and light. Splash in milk and vanilla for richness. Gently fold in flour and chocolate chips to create a delectable mixture.
Roll the dough into cute little spheres and place them on a parchment-lined tray. Pop into the freezer to firm up and get perfectly chilled.
Gently heat chocolate in short bursts, stirring until silky smooth. Add a touch of coconut oil for an extra glossy finish that’ll make your truffles shine.
Use a fork to carefully dip each cold dough ball into the melted chocolate. Let excess drip off and place back on the tray. Make sure each truffle gets a full chocolate bath.
While chocolate is still wet, sprinkle with colorful decorations or drizzle with white chocolate for a fancy look. Let your creativity run wild.
Allow truffles to set at room temperature or in the fridge. Once hardened, serve these delightful bites of heaven and watch everyone’s eyes light up with joy.
Coating Ideas That Add Crunch or Shine
Serve Truffles for Dessert Platters
Store Dough Truffles in a Snap
FAQs
Yes, this recipe uses heat-treated flour to eliminate potential bacteria, making the cookie dough safe for consumption.
You can freeze the dough balls for up to 2 weeks in an airtight container, making them perfect for advance preparation.
Absolutely! You can use milk, dark, or white chocolate to coat the truffles based on your preference and create different flavor profiles.
No special equipment is required – just basic baking tools like a mixing bowl, baking sheet, fork or dipping tool, and parchment paper will work perfectly.
Print
Indulgent Cookie Dough Truffles Recipe
- Total Time: 50 minutes
- Yield: 25 1x
Description
Indulgent cookie dough truffles blend nostalgic childhood flavors with sophisticated chocolate coating. Sweet morsels offer a playful twist on classic desserts, promising delightful moments of pure culinary pleasure.
Ingredients
- 1 ¼ cups (157 g) all-purpose flour (heat-treated, if desired)
- ½ cup (113 g) unsalted butter, softened
- ½ cup (100 g) brown sugar, packed
- ½ cup (85 g) mini chocolate chips
- ¼ cup (50 g) granulated sugar
- 2 tbsps (30 ml) milk
- 1 tsp vanilla extract
- ¼ tsp salt
- 2 cups (340 g) semi-sweet or milk chocolate chips
- 1 tbsp (14 g) coconut oil or shortening (optional)
- Sprinkles
- White chocolate drizzle
Instructions
- Creaming: Amalgamate butter with both sugars in a spacious mixing bowl, whisking until the mixture achieves a cloud-like, ethereal texture.
- Liquid Integration: Pour milk and vanilla extract, blending comprehensively to create a harmonious, silky foundation.
- Dry Ingredient Fusion: Gradually incorporate flour and salt, stirring methodically until the mixture transforms into a cohesive dough. Tenderly fold mini chocolate chips throughout, ensuring even distribution.
- Portioning: Craft uniform spherical dough portions using a small scoop, arranging them meticulously on a parchment-lined tray. Freeze for 25 minutes to solidify the structures completely.
- Chocolate Coating: Melt chocolate chips in a microwave-safe vessel, intermittently stirring to prevent burning. Optional: Enhance chocolate’s luster by incorporating coconut oil. Submerge each frozen dough ball entirely, utilizing a dipping tool or fork for precise chocolate coverage.
- Decorative Finishing: Gently tap off excess chocolate, positioning each truffle back onto the parchment. While chocolate remains fluid, adorn with playful sprinkles or artistic white chocolate drizzles.
- Setting and Serving: Allow truffles to stabilize at room temperature or expedite the process through refrigeration for 15-20 minutes. Present chilled or at moderate room temperature to optimize flavor and textural experience.
Notes
- Chill Dough Thoroughly: Freeze cookie dough balls for exactly 25 minutes to prevent melting during chocolate coating and maintain structural integrity.
- Temper Chocolate Carefully: Melt chocolate in short 30-second microwave intervals, stirring consistently to avoid burning and achieve smooth, glossy coating.
- Control Chocolate Consistency: Add a teaspoon of coconut oil to melted chocolate for enhanced shine and easier dipping, preventing clumping and creating professional-looking truffles.
- Customize Dietary Options: Substitute regular flour with gluten-free alternatives, use dairy-free chocolate, and replace butter with plant-based versions to accommodate various dietary restrictions without compromising taste.
- Prep Time: 20 minutes
- Cook Time: 30 minutes
- Category: Desserts, Snacks
- Method: Blending
- Cuisine: American
Nutrition
- Serving Size: 25
- Calories: 150
- Sugar: 10 g
- Sodium: 50 mg
- Fat: 9 g
- Saturated Fat: 5 g
- Unsaturated Fat: 4 g
- Trans Fat: 0 g
- Carbohydrates: 17 g
- Fiber: 1 g
- Protein: 2 g
- Cholesterol: 15 mg
Emily Lawson
Content Creator & Culinary Specialist
Expertise
Education
Oregon Culinary Institute
Diploma in Culinary Arts
Focus: Emphasis on farm-to-table cooking, sustainable practices, and the fusion of global flavors with traditional grilling methods.
Emily Lawson is the content creator at Daves Grill, turning tasty ideas into clear, easy recipes. Based in Portland, she trained at the Oregon Culinary Institute and loves cooking with fresh, seasonal ingredients, especially grilled veggies and global flavors.
Emily mixes food writing with hands-on cooking to bring you recipes that feel fun, not stressful. Her goal is to make every dish simple, flavorful, and worth coming back to. Together, she and Dave serve up real food, one recipe at a time.