Gooey Peanut Butter & Cookie Dough Fudge Bars Recipe: A Sweet Treat
Creamy peanut butter swirls through decadent cookie dough fudge bars that melt hearts and satisfy sweet cravings.
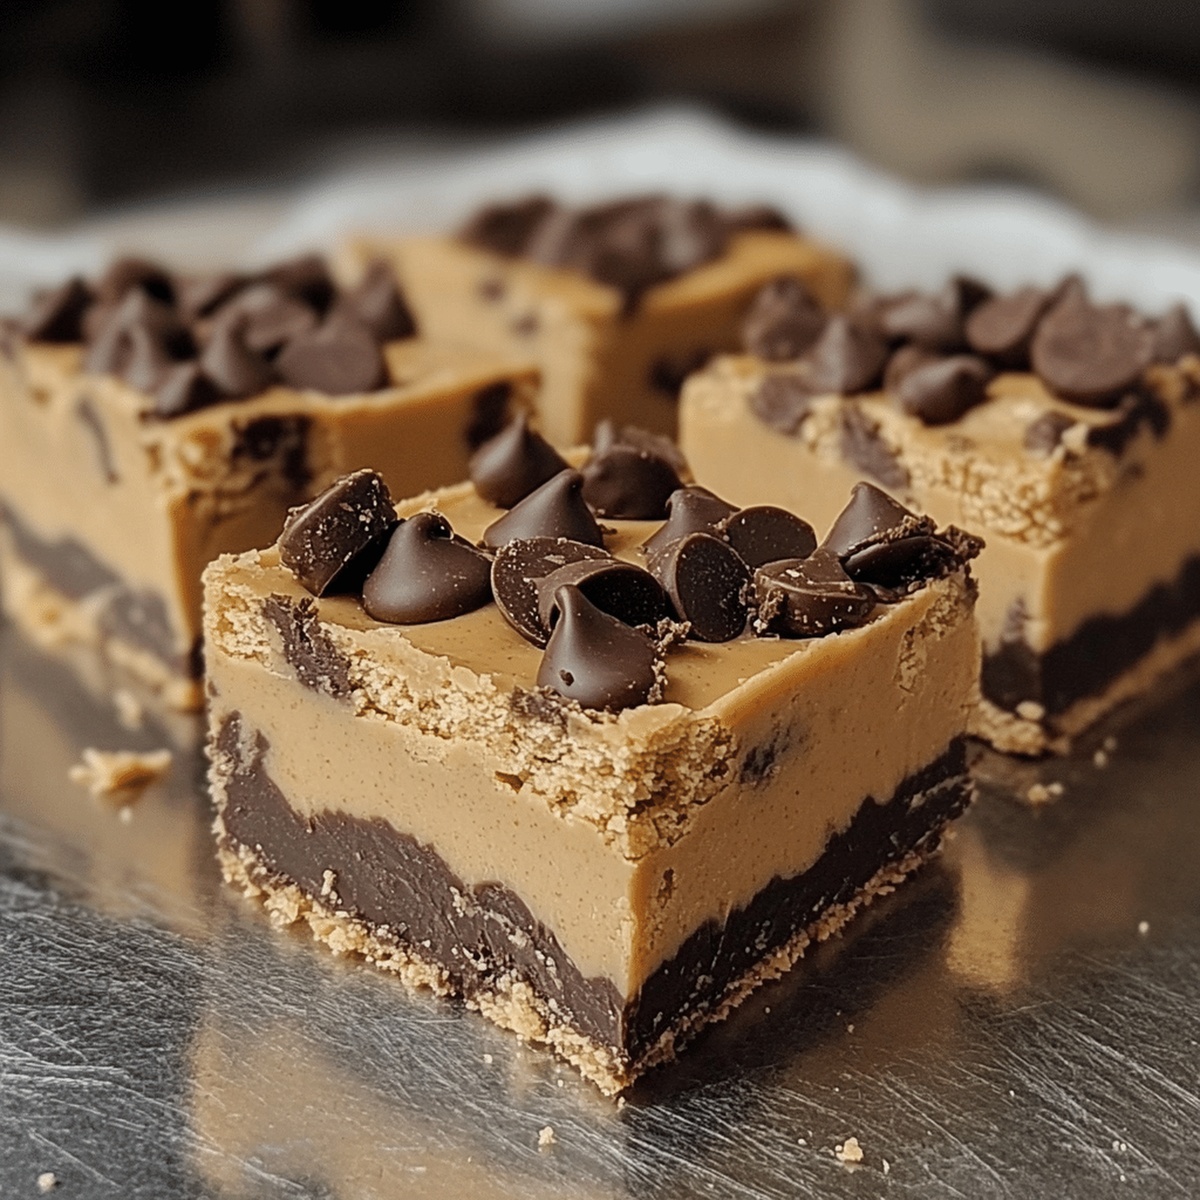
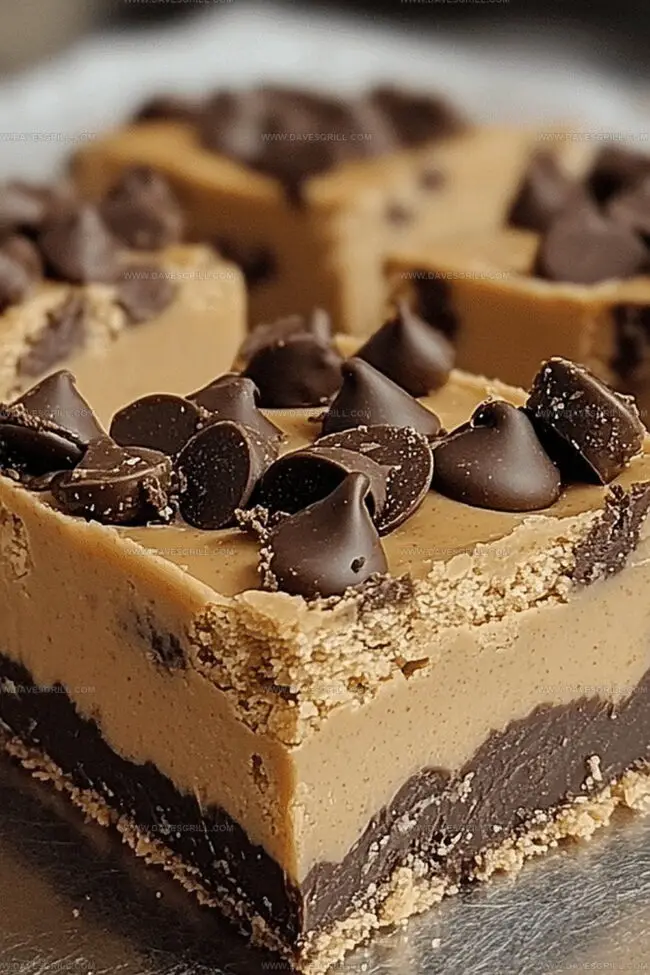
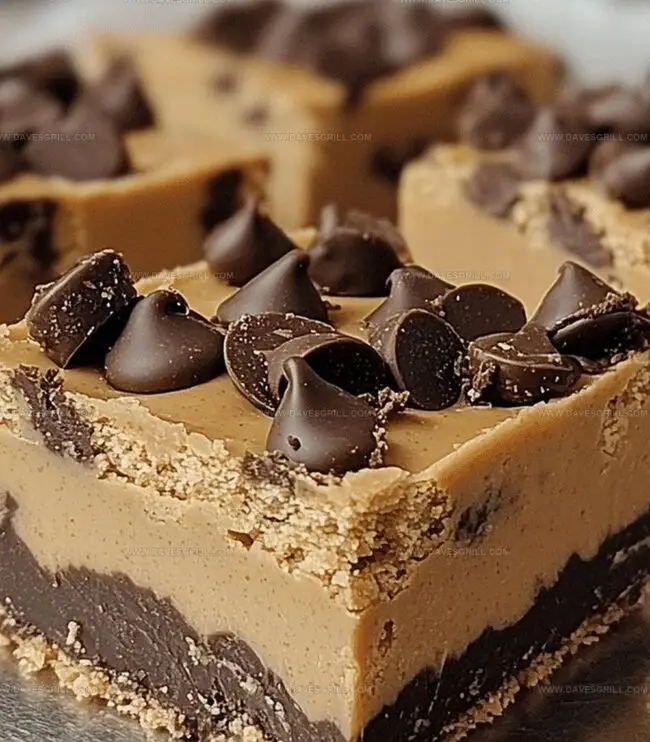
Layers of rich chocolate and smooth peanut butter create an irresistible dessert experience.
The combination of classic flavors promises pure bliss in every single bite.
Soft, crumbly cookie dough mingles with silky fudge for a treat that feels like pure comfort.
No baking required means you can whip up these delightful bars in minutes.
Each square delivers a perfect balance of sweetness and texture that will have everyone asking for seconds.
Treat yourself to this simple yet stunning dessert that transforms ordinary moments into delicious memories.
Quick Recipe Overview
Fudge Bar Ingredient Rundown
For Peanut Butter Fudge Layer:For Cookie Dough Layer:For Topping and Finishing:Tools to Craft Cookie Dough Fudge Bars
Layer Fudge Bars with Peanut Butter Goodness
Melt peanut butter, sweetened condensed milk, and butter in a saucepan over low heat. Stir continuously until silky smooth and perfectly blended. Pour the luxurious mixture into a lined pan, spreading it evenly to create a creamy base. Pop the pan into the refrigerator to set while preparing the next layer.
Beat softened butter with brown and granulated sugars until fluffy and light. Splash in vanilla extract and milk, mixing thoroughly. Gently fold in heat-treated flour and mini chocolate chips, creating a delectable cookie dough layer that will make taste buds dance.
Retrieve the chilled fudge foundation from the refrigerator. Carefully spread the cookie dough on top, ensuring an even coating. For an extra touch of indulgence, drizzle melted chocolate and sprinkle a pinch of sea salt across the surface.
Refrigerate the bars for at least two hours until completely firm. Once set, lift the entire creation out using the parchment paper. Slice into tempting squares or bars, ready to be devoured.
Serve these decadent bars chilled or at room temperature. Store any leftovers in an airtight container in the refrigerator for up to a week – if they last that long!
Tips for Perfectly Set Dessert Squares
Serve Cold with Extra Chips on Top
Store Bars in the Fridge for Best Texture
FAQs
The heat-treated flour and sweetened condensed milk ensure food safety by eliminating potential bacteria risks in the recipe.
Natural or creamy peanut butter works best. Avoid using very oily or separated peanut butter as it might affect the fudge’s texture.
You’ll need a basic 8×8-inch baking pan, parchment paper, mixing bowls, and standard kitchen tools like a spatula and measuring cups.
Spread flour on a baking sheet and bake at 350°F for 5-7 minutes, stirring once, to kill potential bacteria and make it safe for no-bake recipes.
Print
Indulgent Peanut Butter & Cookie Dough Fudge Bars Recipe
- Total Time: 2 hours 20 minutes
- Yield: 17 1x
Description
Peanut butter lovers will adore these cookie dough fudge bars that blend rich chocolate and smooth peanut butter. Rich layers of sweet indulgence create a delectable dessert you cannot resist.
Ingredients
- 1 cup (250 g) creamy peanut butter
- ½ cup (120 g) unsalted butter
- ½ cup (120 g) unsalted butter, softened
- 1 cup (125 g) all-purpose flour (heat-treated for safety)
- ⅓ cup (65 g) brown sugar, packed
- ¼ cup (50 g) granulated sugar
- ½ cup (90 g) mini chocolate chips
- ¼ cup (45 g) chocolate chips, melted
- ½ cup (120 ml) sweetened condensed milk
- 2 tbsps milk (or cream)
- 1 tsp vanilla extract
- Pinch of sea salt
Instructions
- Fudge Foundation: Melt peanut butter, sweetened condensed milk, and butter in a saucepan, stirring until smooth and glossy, then pour into a parchment-lined pan, creating an even surface.
- Cookie Dough Preparation: Cream softened butter with brown and granulated sugars until light and fluffy, then blend in vanilla extract and milk, folding in heat-treated flour and mini chocolate chips until well combined.
- Layer Assembly: Carefully spread the cookie dough over the chilled peanut butter fudge base, ensuring uniform coverage and a consistent thickness.
- Optional Garnish: Embellish the dessert with a delicate chocolate drizzle and a light sprinkle of sea salt for added flavor complexity.
- Chilling and Setting: Refrigerate the layered bars for a minimum of two hours to allow complete solidification and flavor melding.
- Serving: Remove from refrigerator, lift out using parchment paper edges, slice into precise geometric squares or rectangular bars, and serve chilled. Store any remaining portions in a sealed container in the refrigerator for up to one week.
Notes
- Precision Melting: Use low heat and constant stirring when melting peanut butter mixture to prevent burning or separation, ensuring a smooth, glossy texture.
- Heat-Treat Flour Safely: Always heat-treat flour in the oven at 350°F for 5-7 minutes to eliminate potential bacteria, making the cookie dough layer safe to consume.
- Consistent Layering: Use an offset spatula or back of a spoon to spread layers evenly, creating clean, professional-looking bars with balanced flavor distribution.
- Chill for Perfect Texture: Patience is key – allow minimum two-hour refrigeration to achieve ideal firm yet creamy consistency that holds shape when sliced.
- Prep Time: 20 minutes
- Cook Time: 2 hours
- Category: Desserts, Snacks
- Method: Blending
- Cuisine: American
Nutrition
- Serving Size: 17
- Calories: 229
- Sugar: 16 g
- Sodium: 94 mg
- Fat: 14 g
- Saturated Fat: 6 g
- Unsaturated Fat: 8 g
- Trans Fat: 0 g
- Carbohydrates: 22 g
- Fiber: 1 g
- Protein: 4 g
- Cholesterol: 18 mg
Emily Lawson
Content Creator & Culinary Specialist
Expertise
Education
Oregon Culinary Institute
Diploma in Culinary Arts
Focus: Emphasis on farm-to-table cooking, sustainable practices, and the fusion of global flavors with traditional grilling methods.
Emily Lawson is the content creator at Daves Grill, turning tasty ideas into clear, easy recipes. Based in Portland, she trained at the Oregon Culinary Institute and loves cooking with fresh, seasonal ingredients, especially grilled veggies and global flavors.
Emily mixes food writing with hands-on cooking to bring you recipes that feel fun, not stressful. Her goal is to make every dish simple, flavorful, and worth coming back to. Together, she and Dave serve up real food, one recipe at a time.