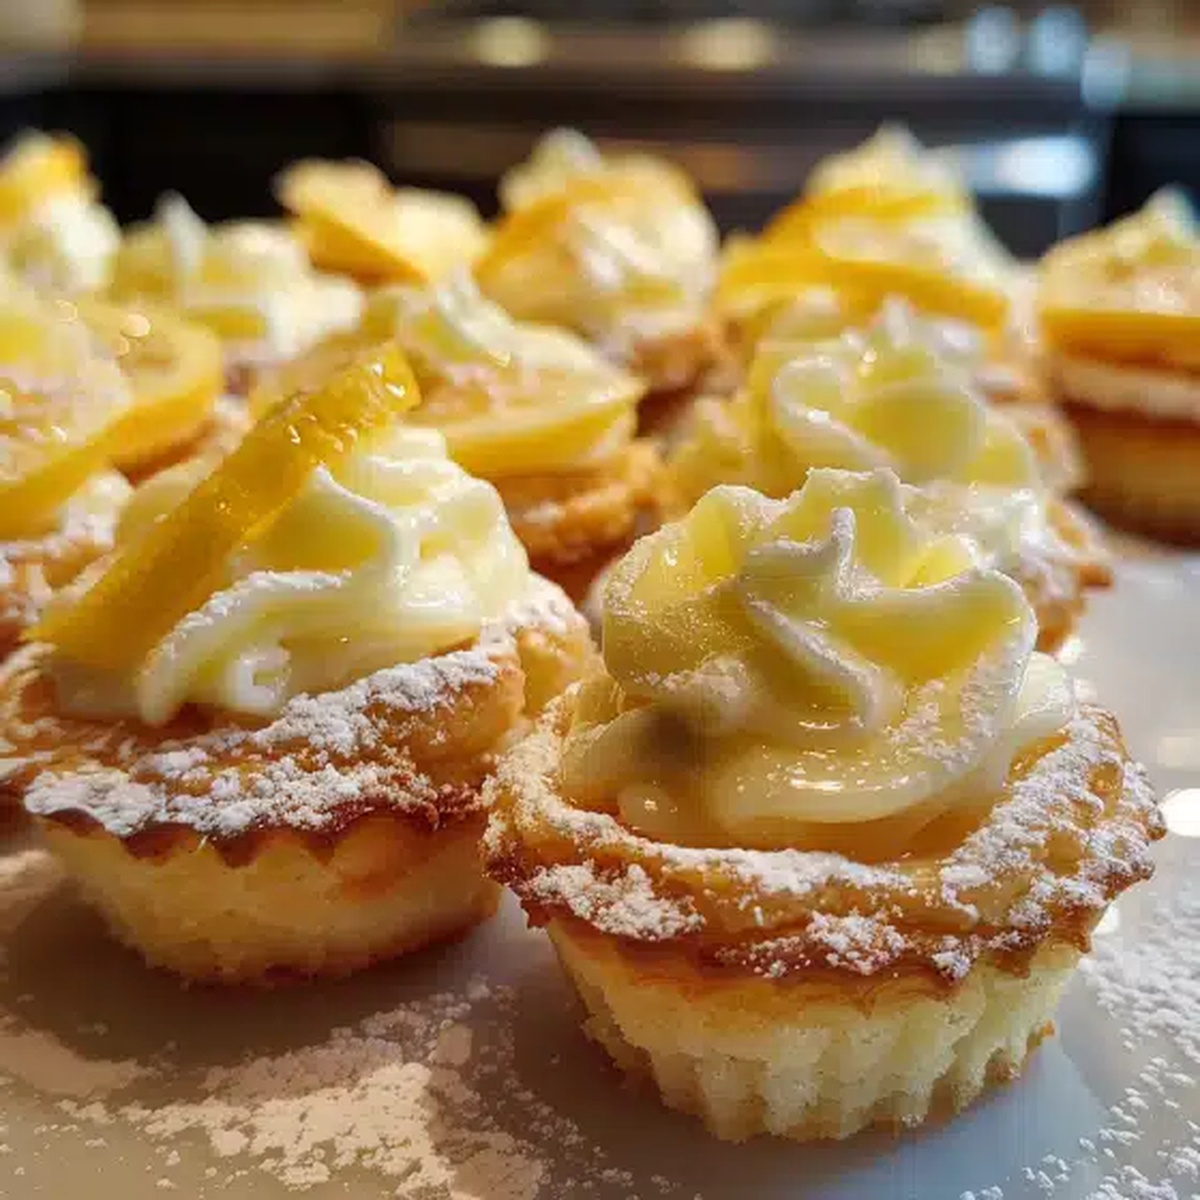
Quick & Sweet Lemon Bar Cookie Cups Recipe for Sunny Treats
Crisp, buttery crusts holding creamy lemon bar cookie cups always spark joy in my kitchen.
Sunshine-bright flavors dance through each delicate bite, promising pure delight.
My grandmother’s secret technique involves perfecting the delicate balance between tangy filling and tender pastry.
Soft, pillowy edges contrast with zesty lemon’s sharp whisper, creating a symphony of taste.
Quick to assemble and impossible to resist, these miniature treats will become your new favorite dessert.
Delicate yet bold, these cookie cups invite you to savor every moment of sweet-tart bliss.
Eager bakers and dessert enthusiasts, this recipe promises to delight even the most discerning palate.
What Makes Lemon Bar Cookie Cups Zesty
Ingredients List for Lemon Bar Cookie Cups
Cookie Base:Lemon Filling:Finishing Touch:How to Make Lemon Bar Cookie Cups in One Go
Step 1: Prepare Oven Space
Heat the oven to 350F (175C). Coat a muffin tin with cooking spray or butter to prevent sticking.
Step 2: Create Cookie Dough
In a mixing bowl, blend:Whip until fluffy and light. Add egg and vanilla, mixing thoroughly.
In another bowl, combine:Slowly incorporate dry ingredients into wet mixture until just combined.
Step 3: Form Cookie Bases
Roll dough into small balls. Press each ball into muffin cups, creating a smooth inner shell. Push dough up sides and bottom to form cup shape.
Bake for 10-12 minutes until edges turn golden. If centers puff up, gently press down with spoon.
Step 4: Craft Zesty Filling
Whisk together in a bowl:Blend until silky smooth.
Step 5: Complete Cookie Cups
Pour lemon mixture into each cookie shell, filling just below rim.
Bake an additional 10-12 minutes until filling sets completely.
Step 6: Finish and Serve
Allow cookie cups to cool entirely in pan. Sprinkle powdered sugar on top before serving. Enjoy chilled or at room temperature.
Tips for Golden Lemon Bar Cookie Cups
Storing Lemon Bar Cookie Cups Without Mess
Tasty Toppings for Lemon Bar Cookie Cups
Lemon Bar Cookie Cups With a Twist
Print
Lemon Bar Cookie Cups Recipe
- Total Time: 40 minutes
- Yield: 12 1x
Description
Zesty lemon bar cookie cups bring sunshine to dessert tables with a playful twist on classic citrus treats. Creamy filling nestled in buttery cookie shells creates a mouthwatering experience you’ll want to savor until the last delightful bite.
Ingredients
Main Ingredients:
- ½ cup (115g) unsalted butter, softened
- 1 ¼ cups (160g) all-purpose flour
- ½ cup (100g) granulated sugar (for cookie base)
- ½ cup (120ml) fresh lemon juice
- 2 large eggs
- ½ cup (100g) granulated sugar (for lemon filling)
Secondary Ingredients:
- 1 large egg (for cookie base)
- 1 tsp vanilla extract
- ½ tsp baking powder
- ¼ tsp salt
Finishing Ingredient:
- ¼ cup (30g) all-purpose flour (for lemon filling)
- 1 tablespoon lemon zest
- Powdered sugar (for dusting)
Instructions
- Craft the foundation for these delicate dessert vessels by heating the oven to 350F (175C), meticulously preparing a 12-cup muffin tin with a light coating of grease.
- Create the cookie base by whipping softened butter and sugar until airy and voluminous, then incorporate egg and vanilla, blending until harmonious.
- Sift flour, baking powder, and salt in a separate vessel, gradually folding these dry elements into the creamy mixture until just integrated.
- Transform the dough into petite spheres, gently nestling each into the muffin wells, pressing to form delicate cups with centered indentations.
- Dispatch the muffin tin to the oven, allowing the cookie shells to transform for 10-12 minutes until edges acquire a golden hue, using a spoon to delicately flatten any unexpected rising.
- Meanwhile, compose the vibrant lemon filling by whisking together zesty lemon juice, fragrant zest, sugar, eggs, and flour until achieving a silky, uniform consistency.
- Carefully ladle the citrusy mixture into each golden cookie shell, filling just shy of the rim.
- Return to the oven for an additional 10-12 minutes, awaiting the moment when the filling sets with a gentle wobble.
- Allow the cookie cups to cool completely within the tin, then crown with a delicate snowfall of powdered sugar before presenting these luminous treats.
Notes
- Ensure butter is at room temperature for smooth creaming, preventing lumpy dough and ensuring even mixing.
- Use fresh lemon juice and zest for the most vibrant, bright citrus flavor that makes these cookie cups sing.
- When pressing dough into muffin cups, use the back of a rounded measuring spoon to create uniform, neat wells without tearing the delicate cookie base.
- For gluten-free variation, swap all-purpose flour with a one-to-one gluten-free baking blend, maintaining the same tender texture and delicious taste.
- Prep Time: 15 minutes
- Cook Time: 25 minutes
- Category: Desserts, Snacks
- Method: Baking
- Cuisine: American
Nutrition
- Serving Size: 12
- Calories: 200
- Sugar: 15g
- Sodium: 80mg
- Fat: 9g
- Saturated Fat: 5g
- Unsaturated Fat: 3g
- Trans Fat: 0g
- Carbohydrates: 27g
- Fiber: 1g
- Protein: 3g
- Cholesterol: 40mg
Dave Mitchell
Founder & Chief Recipe Developer
Expertise
Education
Asheville-Buncombe Technical Community College
Associate of Applied Science in Culinary Arts
Focus: Comprehensive training in culinary techniques, kitchen management, and menu planning, with a special emphasis on grilling and outdoor cooking.
Dave Mitchell is the heart behind Daves Grill, a cook, writer, and lover of all things grilled. He studied Culinary Arts at Asheville-Buncombe Technical Community College and spent years cooking, testing, and sharing recipes that actually work.
Dave started Daves Grill to keep things simple: one great recipe at a time. His food is bold, easy to follow, and made for real people with regular kitchens. From juicy steaks to quick sides, Dave’s recipes bring the heat without the hassle.