
Dreamy Lemon Cream Cheese Bars Recipe for Zesty Indulgence
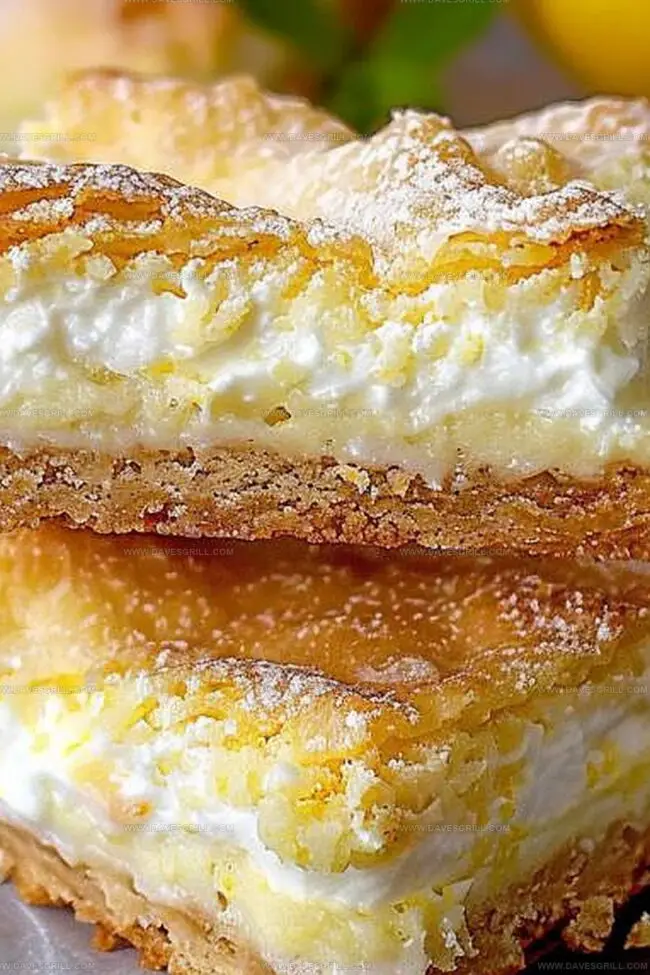
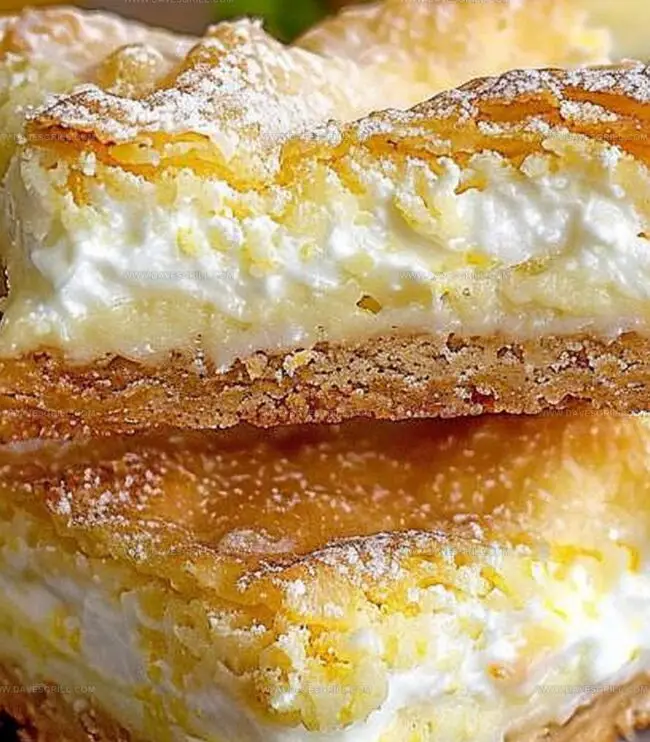
These delectable lemon cream cheese bars offer a zesty twist on classic dessert favorites.
Creamy textures blend perfectly with bright citrus notes that dance across your palate.
Tangy cream cheese provides a luxurious base for the vibrant lemon flavor.
Home bakers will adore how simple ingredients combine to create something extraordinary.
Each bite promises a delightful balance of sweetness and subtle tartness.
The recipe delivers a refreshing treat that feels both elegant and comforting.
Your next gathering deserves these irresistible bars that spark conversation and delight taste buds.
Why Lemon Cream Cheese Bars Are Bright and Buttery
What Goes Into These Tangy Sweet Bars
Crust Ingredients:Filling Ingredients:Topping Ingredients:Steps to Bake Lemon Bars With Cream Cheese Filling
Step 1: Prepare the Baking Foundation
Preheat the oven to 350°F (175°C). Select a 9×13-inch baking pan and prepare it by either greasing the surface thoroughly or lining it completely with parchment paper to ensure smooth bar removal later.
Step 2: Mix the Crust Ingredients
Combine in a mixing bowl:Press the mixture firmly and evenly across the bottom of the prepared pan, creating a compact base for your bars.
Step 3: Create the Creamy Filling
In a large mixing bowl, blend together:Whisk until the mixture becomes smooth and completely integrated, with no visible lumps.
Step 4: Incorporate Eggs
Crack eggs into the cream cheese mixture, beating gently until the filling becomes silky and well-combined.
Step 5: Bake to Perfection
Pour the lemon cream cheese mixture over the prepared crust. Spread evenly using a spatula. Slide the pan into the preheated oven and bake for 25-30 minutes until the edges are slightly golden and the center is set but still slightly jiggly.
Step 6: Cool and Chill
Remove from the oven and let the bars cool completely at room temperature. Once cooled, refrigerate for at least 2 hours to allow the bars to firm up and develop rich, tangy flavors.
Step 7: Slice and Serve
After chilling, lift the bars out using the parchment paper. Cut into neat squares. Dust with powdered sugar if desired. Serve chilled and enjoy the zesty, creamy delight!
Pro Tips for, Lemony Perfection
Storing Lemon Bars Without Losing That Zing
Pairing These Bars With the Right Drinks or Snacks
Creative Flavors to Try in Your Next Lemon Bar Batch
Print
Lemon Cream Cheese Bars Recipe
- Total Time: 1 hour
- Yield: 16 1x
Description
Zesty lemon cream cheese bars blend tangy citrus with rich, creamy sweetness for a delightful dessert. Silky smooth filling nestled on a buttery graham cracker crust promises refreshing indulgence that will satisfy your dessert cravings.
Ingredients
Main Ingredients:
- 1 ½ cups (375 ml) all-purpose flour
- 8 ounces (226 grams) cream cheese, softened
- 1 cup (200 grams) granulated sugar
- ¾ cup (170 grams) unsalted butter, softened
- 2 large eggs
Citrus Ingredients:
- ⅓ cup (80 ml) fresh lemon juice (about 2 lemons)
- 1 tablespoon (15 ml) lemon zest
Secondary Ingredients:
- ½ cup (60 grams) powdered sugar
- ¼ cup (30 grams) all-purpose flour
- Powdered sugar (for optional dusting)
Instructions
- Warm the oven to a precise 350°F, creating an ideal baking environment for the delicate dessert.
- Prepare the rectangular baking vessel by thoroughly coating with cooking spray or crafting a parchment paper sling to ensure effortless bar extraction.
- Combine the crust ingredients, mixing until the mixture resembles coarse, sandy granules that will form a sturdy foundation for the creamy topping.
- Press the crumbly crust mixture firmly and evenly into the prepared pan, creating a compact base that will support the luscious cream cheese layer.
- Blend the cream cheese filling ingredients using an electric mixer, whipping until the mixture achieves a silky-smooth consistency without any lumps.
- Gently pour the velvety cream cheese mixture over the prepared crust, using a spatula to spread it evenly and eliminate any potential air pockets.
- Carefully transfer the pan to the preheated oven, allowing the bars to bake until the edges turn golden and the center sets with a subtle jiggle.
- Remove from the oven and let the bars cool completely at room temperature, which allows the filling to firm up and develop a perfect texture.
- Once cooled, refrigerate the bars for at least two hours to enhance their structure and intensify the tangy lemon flavor.
- Slice into precise squares, wiping the knife clean between cuts to ensure neat, professional-looking dessert bars.
- Garnish with optional lemon zest or a light dusting of powdered sugar to elevate the visual appeal and add a final burst of citrusy brightness.
Notes
- Softening cream cheese beforehand ensures smooth, lump-free mixing and a creamy texture in every bite.
- Zest lemons before juicing to maximize flavor extraction and add bright, citrusy notes throughout the bars.
- Use room temperature ingredients like eggs and cream cheese to guarantee even blending and consistent baking results.
- For a gluten-free version, swap regular flour with almond or coconut flour, maintaining the delicate balance of sweet and tangy flavors.
- Prep Time: 15 minutes
- Cook Time: 40-45 minutes
- Category: Desserts, Snacks
- Method: Baking
- Cuisine: American
Nutrition
- Serving Size: 16
- Calories: 250
- Sugar: 21 g
- Sodium: 150 mg
- Fat: 15 g
- Saturated Fat: 9 g
- Unsaturated Fat: 5 g
- Trans Fat: 0 g
- Carbohydrates: 30 g
- Fiber: 0 g
- Protein: 3 g
- Cholesterol: 55 mg
Dave Mitchell
Founder & Chief Recipe Developer
Expertise
Education
Asheville-Buncombe Technical Community College
Associate of Applied Science in Culinary Arts
Focus: Comprehensive training in culinary techniques, kitchen management, and menu planning, with a special emphasis on grilling and outdoor cooking.
Dave Mitchell is the heart behind Daves Grill, a cook, writer, and lover of all things grilled. He studied Culinary Arts at Asheville-Buncombe Technical Community College and spent years cooking, testing, and sharing recipes that actually work.
Dave started Daves Grill to keep things simple: one great recipe at a time. His food is bold, easy to follow, and made for real people with regular kitchens. From juicy steaks to quick sides, Dave’s recipes bring the heat without the hassle.