Easy Garlic Parmesan Chicken Sliders on Hawaiian Rolls Recipe
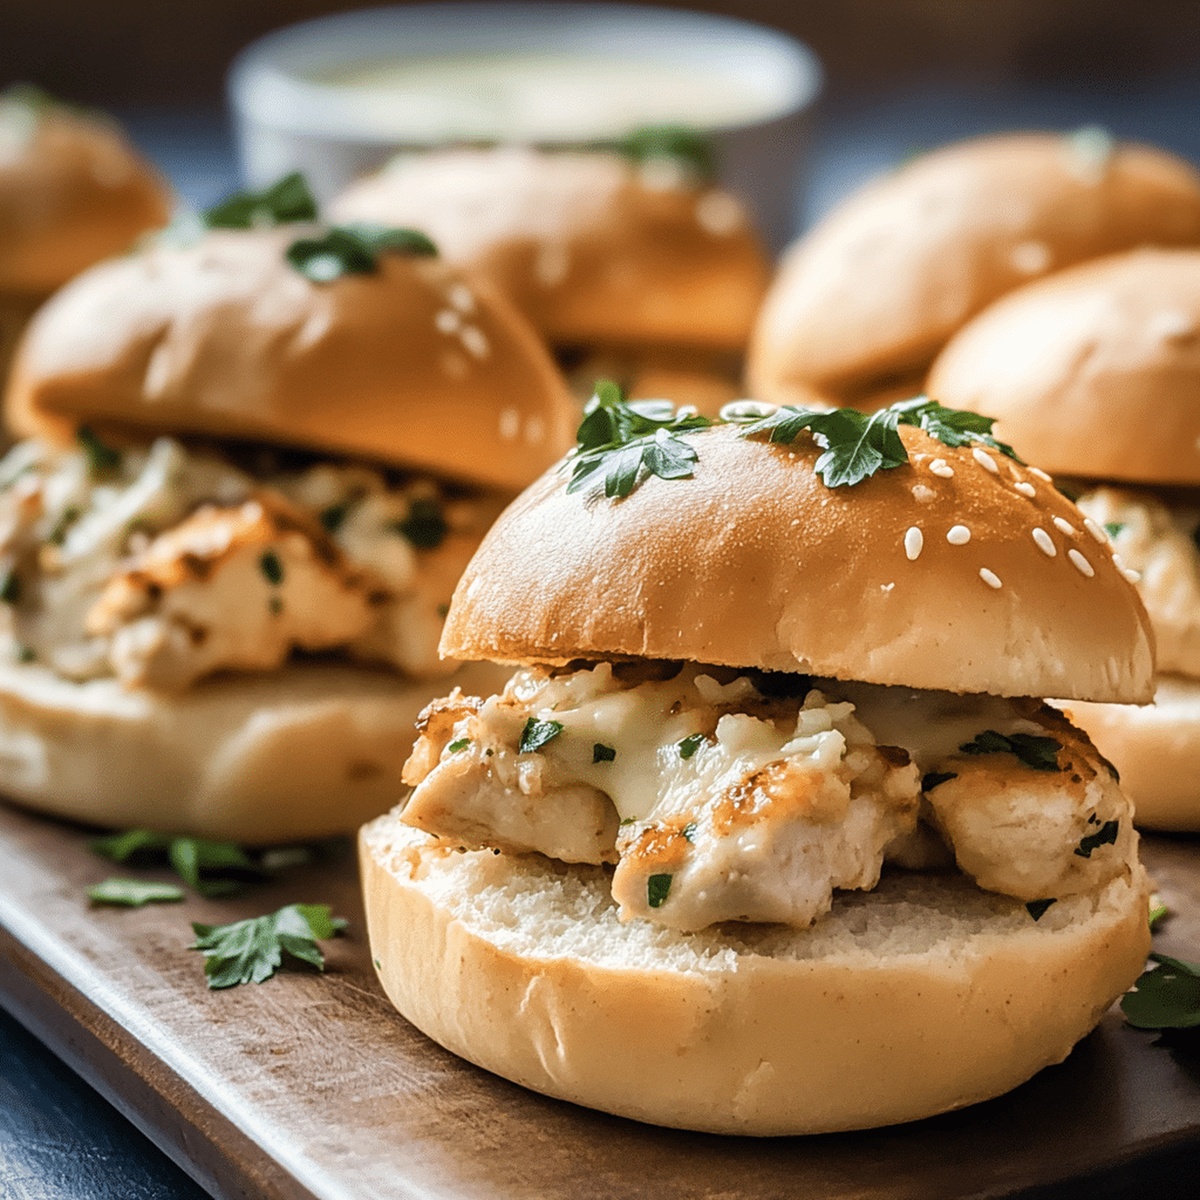
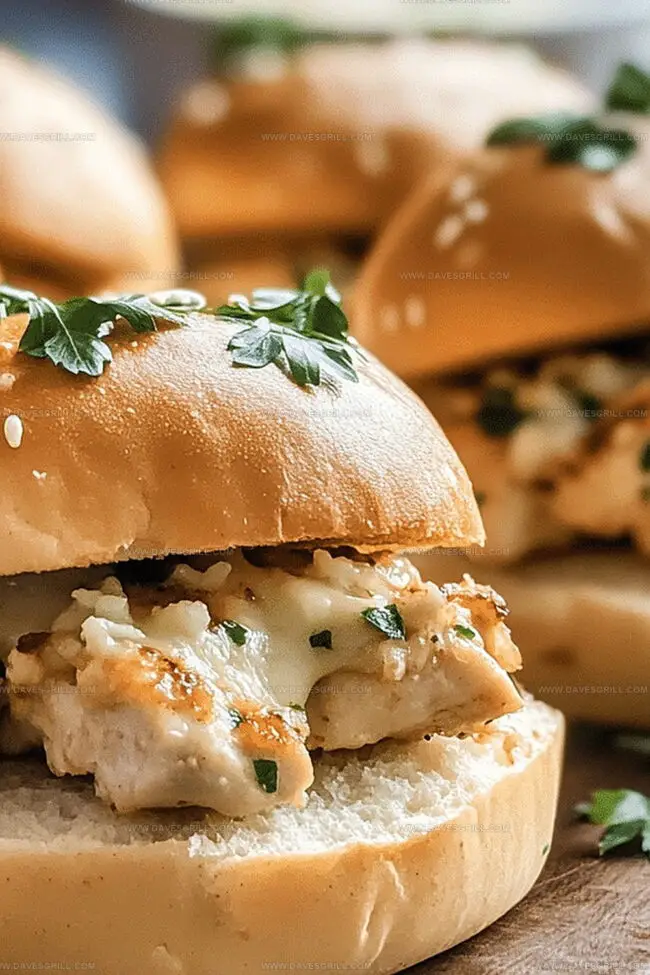
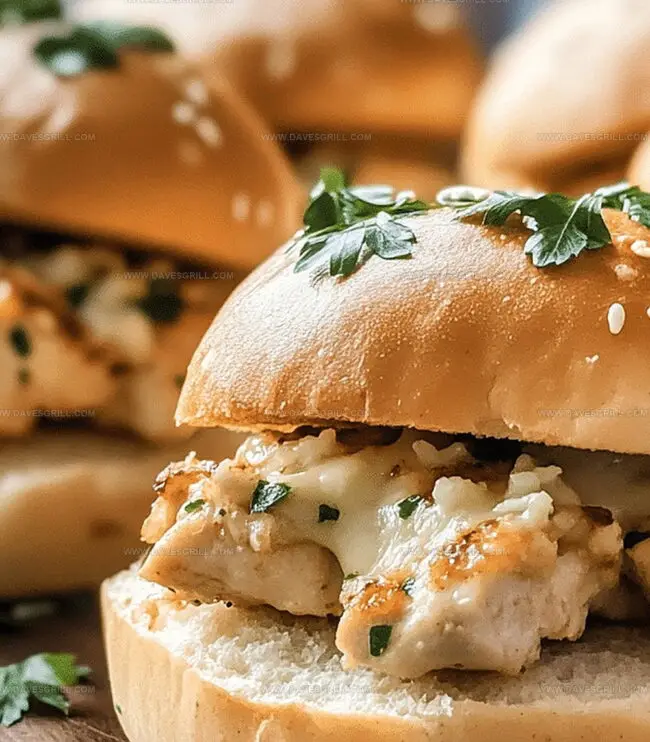
Sliders burst with flavor when loaded with garlic parmesan chicken nestled between soft Hawaiian rolls.
Weekend gatherings call for these delectable mini sandwiches that pack serious taste in every bite.
The combination of savory herbs, melted cheese, and tender chicken creates an irresistible sensation.
Perfectly seasoned meat brings everyone around the table, eager to devour these compact delights.
Quick to assemble and even faster to disappear, these sliders transform ordinary meals into memorable experiences.
Guests will crave these handheld treats that balance rich, creamy textures with zesty seasonings.
Prepare to elevate your next meal with these crowd-pleasing garlic parmesan chicken sliders.
Quick Recipe Overview
Garlic Chicken Sliders Ingredient Snapshot
For Chicken Filling:For Slider Base:For Topping:What You’ll Need for Chicken Sliders on Hawaiian Rolls
Prep and Bake Garlic Chicken Sliders Easily
Crank your oven to a cozy 350F and get a baking dish ready with a quick spray or parchment paper.
Toss shredded chicken with creamy mayo, zesty Parmesan, garlic kick, onion, Italian herbs, salt, and pepper. Blend everything until it’s a delicious harmony.
Slice Hawaiian rolls horizontally without breaking them apart. Nestle the bottom half in your prepared dish. Spread the chicken mixture generously, then rain down some mozzarella for extra yumminess. Crown with the top roll halves.
Melt butter and dance in some minced garlic, fresh parsley, and extra Parmesan. Brush this liquid gold all over the roll tops.
Cover with foil and let the oven work its for 15 minutes. Uncover and bake another 10 minutes until the tops turn a gorgeous golden brown and cheese melts seductively.
Let the sliders rest for a quick 5 minutes, then slice into individual portions. Serve hot and watch everyone’s eyes light up!
Slider Tips That Pack in More Flavor
Serve Garlic Chicken Sliders the Crowd-Pleaser Way
Store Garlic Chicken Sliders with No Fuss
FAQs
Yes, rotisserie chicken works perfectly and saves time. Simply shred the chicken meat and mix it with the other ingredients as directed.
You can prepare the sliders up to the point of baking, cover them tightly with plastic wrap, and refrigerate for up to 24 hours before baking. Just add a few extra minutes to the baking time.
Regular dinner rolls or brioche rolls can be substituted. The texture and slight sweetness might be slightly different, but the sliders will still taste delicious.
These sliders freeze well. After baking, let them cool completely, wrap tightly in foil, and freeze for up to 3 months. Thaw in the refrigerator overnight and reheat in the oven until warmed through.
Print
Mouthwatering Garlic Parmesan Chicken Sliders On Hawaiian Rolls Recipe
- Total Time: 40 minutes
- Yield: 13 1x
Description
Irresistible garlic parmesan chicken sliders on Hawaiian rolls blend savory chicken with creamy cheese and zesty seasonings. Guests will savor these mini sandwiches that promise bold flavors and simple preparation for casual dining experiences.
Ingredients
- 2 cups (about 1 lb / 450 g) cooked, shredded chicken (rotisserie works great)
- 1 cup (100 g) shredded mozzarella cheese
- ½ cup (50 g) grated Parmesan cheese
- 2 tbsps grated Parmesan cheese
- 12 Hawaiian rolls (1 package)
- ½ cup (120 ml) mayonnaise
- 4 tbsps (60 g) unsalted butter, melted
- 1 tsp garlic powder
- ½ tsp onion powder
- 1 tsp Italian seasoning
- 2 cloves garlic, minced
- Salt and pepper, to taste
- 1 tbsp chopped parsley (optional)
Instructions
- Preparation: Preheat oven to 350°F and lightly grease a 9×13-inch baking dish, ensuring easy slider removal.
- Chicken Blend: Thoroughly mix shredded chicken with mayonnaise, Parmesan, garlic powder, onion powder, Italian seasoning, salt, and pepper to create a harmonious flavor profile.
- Roll Assembly: Carefully slice Hawaiian rolls horizontally while keeping them connected, positioning the bottom layer in the prepared baking dish.
- Layering: Spread the seasoned chicken mixture evenly across the roll base, then generously top with mozzarella cheese for a rich, melty texture.
- Topping Preparation: Whisk melted butter with minced garlic, chopped parsley, and additional Parmesan to create a fragrant and flavorful glaze.
- Final Touches: Brush the butter mixture generously over the roll tops, then cover with aluminum foil and bake for 15 minutes to marry the flavors.
- Finishing Bake: Remove foil and continue baking for 10 minutes until rolls achieve a golden-brown hue and cheese becomes irresistibly bubbly.
- Serving: Rest sliders for 5 minutes post-baking, then slice and serve warm, offering a delectable appetizer or casual dining experience.
Notes
- Optimize Chicken Texture: Use rotisserie chicken or freshly shredded chicken for maximum moisture and tenderness, preventing dry slider filling.
- Cheese Melting Technique: Grate fresh mozzarella instead of pre-shredded cheese for smoother, more even melting and richer flavor profile.
- Butter Coating Pro Tip: Ensure garlic is finely minced to distribute evenly and prevent bitter, overwhelming garlic chunks on roll tops.
- Dietary Adaptation Hack: Swap regular rolls for gluten-free Hawaiian-style rolls and use lactose-free cheese options to accommodate dietary restrictions without compromising taste.
- Prep Time: 15 minutes
- Cook Time: 25 minutes
- Category: Lunch, Appetizer, Snacks
- Method: Baking
- Cuisine: American
Nutrition
- Serving Size: 13
- Calories: 267
- Sugar: 2 g
- Sodium: 552 mg
- Fat: 17 g
- Saturated Fat: 8 g
- Unsaturated Fat: 9 g
- Trans Fat: 0 g
- Carbohydrates: 20 g
- Fiber: 1 g
- Protein: 14 g
- Cholesterol: 52 mg
Emily Lawson
Content Creator & Culinary Specialist
Expertise
Education
Oregon Culinary Institute
Diploma in Culinary Arts
Focus: Emphasis on farm-to-table cooking, sustainable practices, and the fusion of global flavors with traditional grilling methods.
Emily Lawson is the content creator at Daves Grill, turning tasty ideas into clear, easy recipes. Based in Portland, she trained at the Oregon Culinary Institute and loves cooking with fresh, seasonal ingredients, especially grilled veggies and global flavors.
Emily mixes food writing with hands-on cooking to bring you recipes that feel fun, not stressful. Her goal is to make every dish simple, flavorful, and worth coming back to. Together, she and Dave serve up real food, one recipe at a time.