
Heavenly Rosemary Garlic Pull Apart Bread Recipe To Savor
Bread lovers drool over this rosemary garlic pull apart bread that promises pure comfort and flavor explosion.
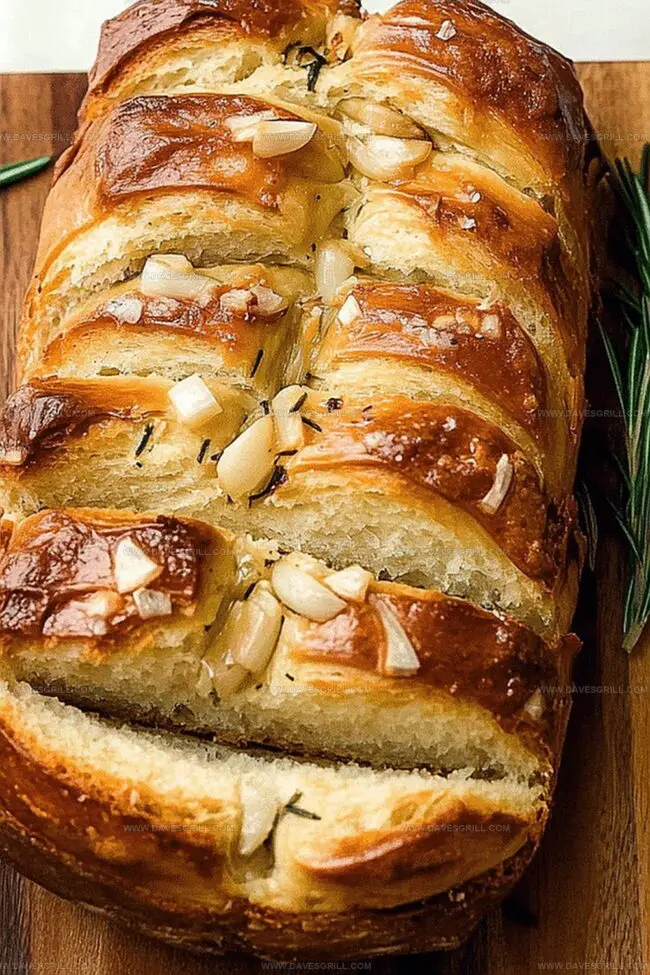
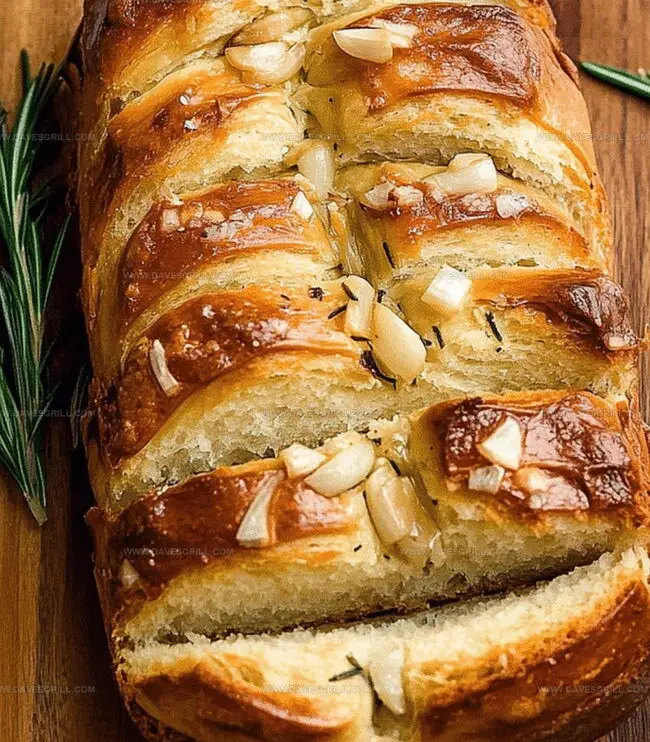
Aromatic herbs and robust garlic dance through every soft, pillowy layer of this irresistible creation.
Each golden-brown piece tears away with delightful ease, revealing steaming pockets of herbal goodness.
The recipe combines simple ingredients that blend into something extraordinary.
Fragrant rosemary weaves its magic, complementing the deep, earthy notes of roasted garlic.
Warm from the oven, this bread beckons everyone to the table with its inviting aroma.
You won’t be able to resist breaking off piece after piece of this delectable treat that transforms an ordinary meal into a memorable culinary experience.
Quick Recipe Overview
What’s Inside Rosemary Garlic Pull-Apart Bread
For Bread Base:For Moisture and Binding:For Flavor Boost:Tools You’ll Want for Pull-Apart Bread
Make Rosemary Garlic Bread: Step-by-step Guidance
Grab your mixing bowl and blend flour, sugar, yeast, and salt together, creating a tantalizing dry ingredient foundation for your bread adventure.
Whisk warm milk, melted butter, and a fresh egg until smoothly combined, then gently pour this liquid treasure into your dry ingredients, stirring until a soft, pillowy dough emerges.
Transfer your dough onto a lightly floured surface and massage it lovingly for 5-7 minutes. Watch as it becomes silky smooth and stretchy, developing incredible texture and character.
Nestle your dough into a greased bowl, drape a soft cloth over it, and place in a cozy, warm corner. Allow it to grow and expand for about an hour, doubling in size and developing rich, complex flavors.
While the dough rises, mince fresh rosemary and garlic, creating an aromatic blend that will infuse your bread with irresistible Mediterranean charm.
Gently punch down the risen dough, roll it into small balls, and layer them with rosemary garlic mixture in a baking pan, creating a rustic, pull-apart masterpiece.
Slide the pan into a preheated oven and bake until the bread turns a gorgeous golden brown, filling your kitchen with an intoxicating aroma that promises deliciousness.
Bread Tweaks That Add More Flavor
Present Rosemary Pull-Apart Bread Like a Pro
Saving and Planning Ahead With Garlic Bread
Print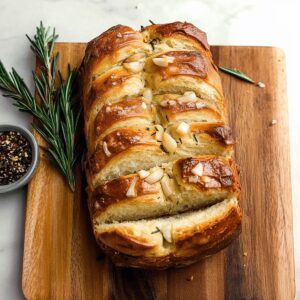
Mouthwatering Rosemary Garlic Pull Apart Bread
- Total Time: 50 minutes
- Yield: 13 1x
Description
Rosemary garlic pull apart bread delivers a sensational journey through herbal aromas and rustic Italian flavors. Warm, golden layers invite delightful sharing among friends with each irresistible, herb-infused morsel.
Ingredients
- 3 cups (720 ml) all-purpose flour
- 1 large egg
- 2.25 tsp (11.25 ml) active dry yeast (1 packet)
- ¾ cup (180 ml) warm milk
- 5 tbsps (75 ml) unsalted butter, melted
- 3 cloves garlic, minced
- 1 tbsp (15 ml) fresh rosemary, finely chopped
- 1 tbsp (15 ml) granulated sugar
- 1.5 tsp (7.5 ml) salt
- 0.5 tsp (2.5 ml) black pepper
- Extra rosemary, chopped
- Grated Parmesan cheese
Instructions
- Dough Preparation: Merge dry ingredients in a large mixing bowl, creating a uniform foundation for the bread’s structure, then whisk warm milk, melted butter, and egg in a separate vessel until thoroughly blended.
- Kneading Process: Gradually combine liquid and dry mixtures, stirring continuously to develop a soft, cohesive dough. Transfer to a lightly floured surface and knead vigorously for 6-7 minutes, achieving a smooth, elastic consistency.
- First Fermentation: Place dough in a greased bowl, cover with a damp cloth, and let rest in a warm, draft-free location for 60 minutes until volume doubles and texture becomes light and puffy.
- Flavor Infusion: Gently deflate the risen dough and roll out into a rectangular shape. Evenly distribute minced garlic and finely chopped rosemary across the surface, pressing herbs to ensure adherence.
- Shaping and Second Proofing: Cut dough into individual portions and arrange strategically in a prepared baking vessel, allowing for a final 30-minute rise to maximize volume and airiness.
- Baking: Preheat oven to the specified temperature, creating an optimal environment for achieving a golden-brown exterior and tender interior. Bake until bread is perfectly cooked and aromatic.
Notes
- Control Moisture Precision: Adjust liquid ratios carefully to prevent overly sticky or dry dough, ensuring perfect elasticity and texture.
- Herb Infusion Technique: Finely chop rosemary and gently crush garlic to release maximum flavor without overwhelming the bread’s delicate structure.
- Temperature Management: Maintain consistent warm environment during proofing, ideally between 75-80°F, to activate yeast without killing its delicate cultures.
- Gluten Development Strategy: Knead thoroughly but gently, stretching dough to develop strong protein networks that create light, airy bread texture.
- Prep Time: 20 minutes
- Cook Time: 30 minutes
- Category: Breakfast, Snacks, Appetizer
- Method: Baking
- Cuisine: Italian
Nutrition
- Serving Size: 13
- Calories: 194
- Sugar: 1.5 g
- Sodium: 135 mg
- Fat: 7 g
- Saturated Fat: 4 g
- Unsaturated Fat: 2 g
- Trans Fat: 0 g
- Carbohydrates: 27 g
- Fiber: 1 g
- Protein: 5 g
- Cholesterol: 23 mg
Emily Lawson
Content Creator & Culinary Specialist
Expertise
Education
Oregon Culinary Institute
Diploma in Culinary Arts
Focus: Emphasis on farm-to-table cooking, sustainable practices, and the fusion of global flavors with traditional grilling methods.
Emily Lawson is the content creator at Daves Grill, turning tasty ideas into clear, easy recipes. Based in Portland, she trained at the Oregon Culinary Institute and loves cooking with fresh, seasonal ingredients, especially grilled veggies and global flavors.
Emily mixes food writing with hands-on cooking to bring you recipes that feel fun, not stressful. Her goal is to make every dish simple, flavorful, and worth coming back to. Together, she and Dave serve up real food, one recipe at a time.