
Tangy No Bake Lemon Pie Recipe: Bright, Fresh & Foolproof!
Creamy lemon pie brings a burst of sunshine to your dessert table without firing up the oven.
Cool kitchen vibes mean zero baking stress when you whip up this zesty treat.
Tangy citrus notes dance through a silky smooth filling that melts in your mouth.
Graham cracker crusts provide the perfect crisp foundation for this refreshing creation.
Chilled and light, this dessert promises to become your go-to summer favorite.
Simple ingredients come together in minutes, letting you spend more time enjoying and less time cooking.
You’ll love how effortlessly this pie impresses everyone at the table.
Chill, slice, and savor every delightful bite of this no-fuss lemony delight.
Why No Bake Lemon Pie Is a Fresh Favorite
What Goes Into No Bake Lemon Pie
Crust Ingredients:Filling Ingredients:Garnish Ingredients:How to Assemble No Bake Lemon Pie With Ease
Step 1: Craft The Crunchy Crust
Combine all ingredients in a mixing bowl, stirring until the mixture resembles wet sand. Press firmly into a pie dish, covering bottom and sides completely. Slide the crust into the refrigerator and let it chill for half an hour to become firm and solid.
Step 2: Whip Up The Zesty Filling
Soften cream cheese and beat until silky smooth. Add condensed milk, lemon juice, and zest, mixing until perfectly blended. In a separate bowl, whip cold heavy cream until it forms stiff, fluffy peaks. Gently fold whipped cream into the lemony mixture, creating a light and airy filling.
Step 3: Assemble The Dreamy Dessert
Carefully pour the luscious lemon filling into the chilled crust. Use a spatula to spread evenly and create a perfectly smooth surface. Return the pie to the refrigerator and let it set for a minimum of 4 hours until the filling becomes firm and stable.
Step 4: Serve With Flair
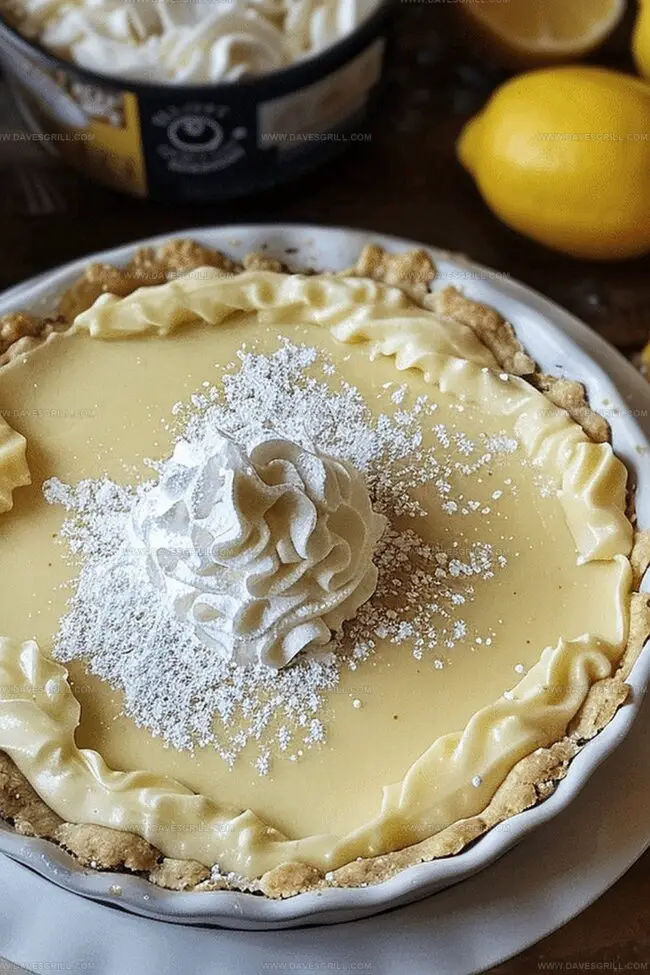
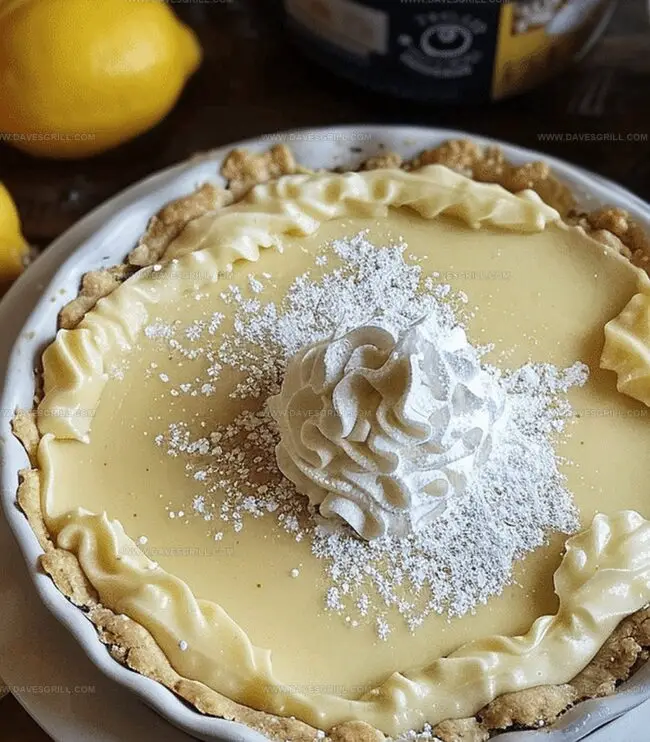
Enhance the pie with optional toppings like dollops of whipped cream, delicate lemon slice curls, or a sprinkle of fresh lemon zest. Slice with a sharp knife and serve immediately while cold for maximum flavor and texture.
Tips to Get No Bake Lemon Pie Just Right
How to Keep No Bake Lemon Pie Firm and Fresh
What to Serve With No Bake Lemon Pie
Twists on Classic No Bake Lemon Pie
Print
No Bake Lemon Pie Recipe
- Total Time: 4 hours 15 minutes
- Yield: 8 1x
Description
Creamy lemon pie delivers a zesty escape without turning on the oven, promising pure dessert bliss. Cool, tangy layers melt seamlessly, inviting you to savor each refreshing bite of this simple summer treat.
Ingredients
Crust:
- 1 ½ cups (150 grams) graham cracker crumbs
- ¼ cup (50 grams) granulated sugar
- ½ cup (115 grams) unsalted butter, melted
Filling:
- 1 (14 ounces) can sweetened condensed milk
- 8 ounces (225 grams) cream cheese, softened
- ½ cup (120 milliliters) fresh lemon juice (about 2–3 lemons)
- 1 tablespoon lemon zest
Topping (Optional):
- 1 cup (240 milliliters) heavy whipping cream, cold
- Lemon slices
- Lemon zest
- Whipped cream
Instructions
- Craft the foundation by blending graham cracker crumbs with sugar and melted butter until uniformly moistened.
- Transfer the crumbly mixture into a pie dish, methodically pressing along the bottom and sides to create a compact, even layer.
- Refrigerate the crust for approximately half an hour to solidify its structure and enhance stability.
- Whip the cream cheese in a spacious mixing vessel until achieving a velvety, lump-free consistency.
- Incorporate sweetened condensed milk, freshly squeezed lemon juice, and fragrant lemon zest into the cream cheese, stirring until the mixture transforms into a harmonious, silky blend.
- In a separate container, vigorously whip the chilled heavy cream until it develops sturdy, defined peaks.
- Delicately integrate the whipped cream into the lemon mixture, using gentle folding motions to maintain the airy texture.
- Transfer the luxurious lemon filling into the chilled crust, ensuring an even distribution across the surface.
- Allow the pie to rest in the refrigerator for a minimum of four hours, permitting the filling to set and flavors to meld.
- When ready to serve, optionally embellish with additional whipped cream, thin lemon slices, or a sprinkle of lemon zest for an elegant presentation.
- Slice and present the pie while maintaining its cool temperature for optimal enjoyment.
Notes
- Swap graham crackers with gluten-free alternatives like almond flour or oat crackers for a celiac-friendly version.
- Use full-fat cream cheese to ensure a rich, creamy texture and prevent the filling from becoming too runny.
- Zest lemons carefully to avoid the bitter white pith, focusing only on the bright yellow outer layer for maximum flavor.
- Chill the pie for at least 6 hours for the most stable and sliceable consistency, allowing the filling to set completely.
- Prep Time: 15 minutes
- Cook Time: 4 hours
- Category: Desserts, Snacks
- Method: Blending
- Cuisine: American
Nutrition
- Serving Size: 8
- Calories: 400
- Sugar: 22g
- Sodium: 180mg
- Fat: 30g
- Saturated Fat: 18g
- Unsaturated Fat: 10g
- Trans Fat: 0g
- Carbohydrates: 34g
- Fiber: 1g
- Protein: 4g
- Cholesterol: 80mg
Dave Mitchell
Founder & Chief Recipe Developer
Expertise
Education
Asheville-Buncombe Technical Community College
Associate of Applied Science in Culinary Arts
Focus: Comprehensive training in culinary techniques, kitchen management, and menu planning, with a special emphasis on grilling and outdoor cooking.
Dave Mitchell is the heart behind Daves Grill, a cook, writer, and lover of all things grilled. He studied Culinary Arts at Asheville-Buncombe Technical Community College and spent years cooking, testing, and sharing recipes that actually work.
Dave started Daves Grill to keep things simple: one great recipe at a time. His food is bold, easy to follow, and made for real people with regular kitchens. From juicy steaks to quick sides, Dave’s recipes bring the heat without the hassle.