No-Bake Funfetti Oreo Icebox Cake Recipe for Pure Joy
Whipping up a no-bake funfetti oreo icebox cake brings pure childhood magic into your kitchen.
Sweet memories flood back with every colorful layer you create.
Creamy textures and playful sprinkles dance together in this delightful dessert.
Our simple recipe turns basic ingredients into something spectacular without switching on the oven.
Cool, crisp layers promise a delectable treat that feels like a celebration.
Grab your mixing bowl and let excitement guide you toward this irresistible confection.
You’ll absolutely love how quickly this dessert comes together with minimal effort.
Why You’ll Love No-Bake Funfetti Oreo Icebox Cake
What Goes Into No-Bake Funfetti Oreo Icebox Cake
Dairy Base:Cookie Layer:Cake and Decoration:Preparation Notes:How to Build a No-Bake Funfetti Oreo Icebox Cake
Step 1: Create Dreamy Whipped Cream Base
Grab a large mixing bowl and whip the cream, sugar, and vanilla until soft, fluffy peaks emerge. Gently fold in the Funfetti cake mix until the mixture looks thick and luxurious.
Step 2: Begin Layering Magic
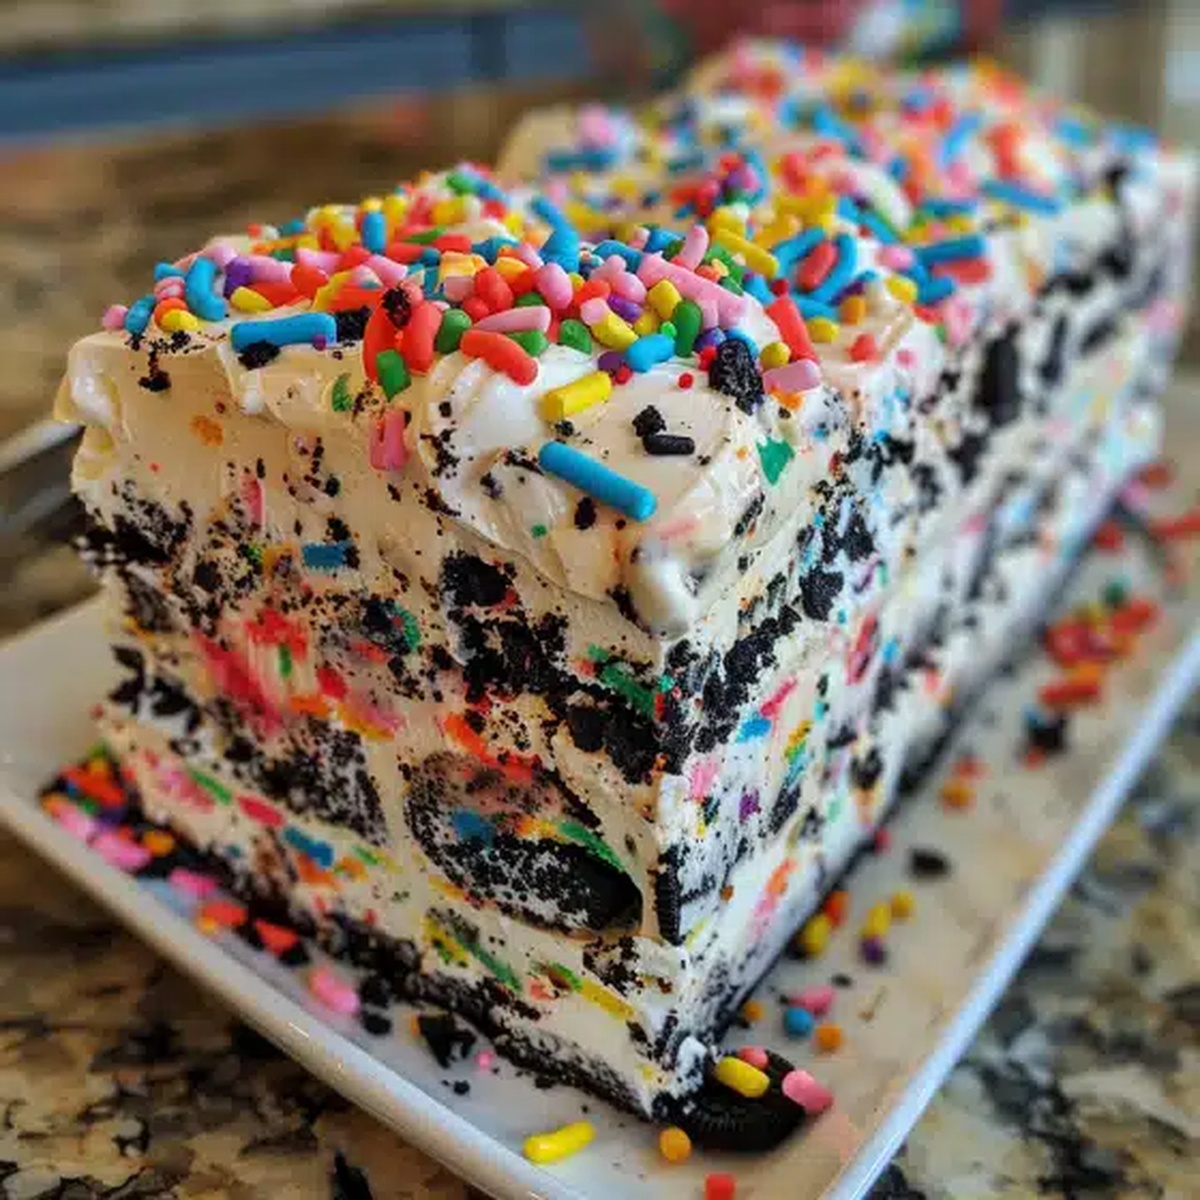
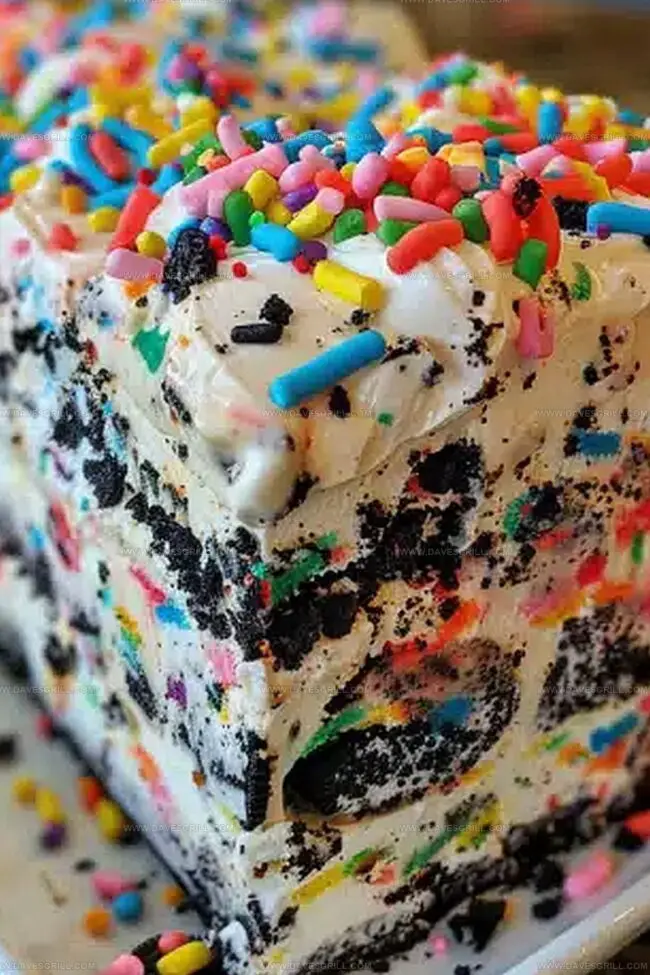
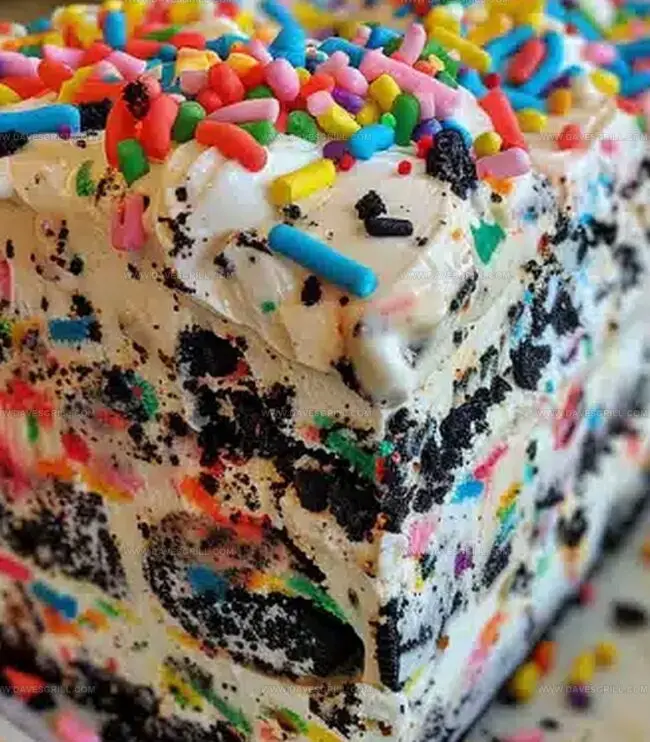
Spread a thin cream layer across the bottom of a 9×9-inch baking dish. Carefully place Golden Oreos in a single, neat row. Cover cookies with another cream layer and shower with sprinkles.
Step 3: Build Delicious Towers
Repeat the Oreo and cream layering process, alternating between cookies and cream. Continue stacking until you reach the dish’s top. Finish with a generous cream layer and a spectacular sprinkle shower.
Step 4: Chill and Set
Wrap the dish completely in plastic wrap. Slide into the refrigerator and let it rest for 4-6 hours or overnight. This resting time allows cookies to soften and flavors to mingle beautifully.
Step 5: Slice and Celebrate
Pull out the chilled cake and cut into perfect squares. Serve immediately and watch everyone’s eyes light up with joy. Optional: Sprinkle extra confetti on top for extra pizzazz.
Tips for Perfecting No-Bake Funfetti Oreo Icebox Cake
How to Chill and Slice No-Bake Funfetti Oreo Icebox Cake
Party Pairings for No-Bake Funfetti Oreo Icebox Cake
No-Bake Funfetti Oreo Icebox Cake Flavors to Explore
Print
No-Bake Funfetti Oreo Icebox Cake Recipe
- Total Time: 4 hours 15 minutes
- Yield: 8 1x
Description
Colorful no-bake funfetti oreo icebox cake brings summer celebration right to your dessert table. Sweet layers of creamy goodness and playful sprinkles create a delightful treat perfect for cooling down with friends and family.
Ingredients
Main Ingredients:
- 1 package (14.3 ounces/406 grams) Golden Oreos (or Birthday Cake Oreos)
- 2 cups (480 milliliters) heavy whipping cream
- 1 ½ cups (180 grams) Funfetti cake mix, dry (do not prepare as a batter)
Sweeteners and Flavorings:
- ½ cup (60 grams) powdered sugar
- 1 teaspoon vanilla extract
Decorative Ingredients:
- ¼ cup (40 grams) sprinkles (plus extra for garnish)
Instructions
- Craft a velvety Funfetti whipped cream by vigorously whipping heavy cream with powdered sugar and vanilla extract until soft, billowy peaks develop.
- Gently incorporate the dry Funfetti cake mix into the whipped cream, creating a luscious, speckled mixture that’s thick and luxuriously creamy.
- Establish the foundation of your icebox cake by spreading a delicate layer of the Funfetti cream across the bottom of a rectangular dish.
- Systematically arrange Golden Oreos in a precise, single layer atop the initial cream base, ensuring complete coverage.
- Generously drape another stratum of Funfetti cream over the cookie layer, meticulously sprinkling colorful confetti sprinkles for visual and textural intrigue.
- Repeat the layering process, alternating between Oreos and Funfetti cream, building height and complexity with each successive tier.
- Conclude the architectural construction with a final lavish spread of whipped cream, adorning the summit with an abundant cascade of vibrant sprinkles.
- Securely encase the assembled dessert in plastic wrap, allowing it to rest and meld in the refrigerator for a minimum of four hours, preferably overnight.
- When ready to serve, carefully slice the chilled icebox cake, revealing its stunning stratified interior, and present cold for maximum textural delight.
Notes
- Customize the cake mix by using different flavored cake mixes like chocolate or strawberry for unique variations.
- Ensure the whipped cream is whipped to soft peaks for the perfect texture, avoiding over-beating which can make it grainy.
- Swap Golden Oreos with regular Oreos or gluten-free alternatives to accommodate dietary restrictions.
- Chill the mixing bowl and whisk before whipping cream to help it reach maximum volume and stability.
- Add a splash of flavored extract like almond or coconut to enhance the whipped cream’s taste profile.
- Prepare this dessert a day ahead for the best texture, allowing cookies to soften completely in the creamy layers.
- Prep Time: 15 minutes
- Cook Time: 4 hours (or overnight)
- Category: Desserts, Snacks
- Method: None
- Cuisine: American
Nutrition
- Serving Size: 8
- Calories: 390
- Sugar: 24g
- Sodium: 180mg
- Fat: 24g
- Saturated Fat: 14g
- Unsaturated Fat: 8g
- Trans Fat: 0g
- Carbohydrates: 38g
- Fiber: 1g
- Protein: 4g
- Cholesterol: 80mg
Dave Mitchell
Founder & Chief Recipe Developer
Expertise
Education
Asheville-Buncombe Technical Community College
Associate of Applied Science in Culinary Arts
Focus: Comprehensive training in culinary techniques, kitchen management, and menu planning, with a special emphasis on grilling and outdoor cooking.
Dave Mitchell is the heart behind Daves Grill, a cook, writer, and lover of all things grilled. He studied Culinary Arts at Asheville-Buncombe Technical Community College and spent years cooking, testing, and sharing recipes that actually work.
Dave started Daves Grill to keep things simple: one great recipe at a time. His food is bold, easy to follow, and made for real people with regular kitchens. From juicy steaks to quick sides, Dave’s recipes bring the heat without the hassle.