
Quick & Crispy No-Bake Homemade Crunch Bars Recipe
Chocolate lovers adore these homemade crunch bars that deliver serious sweet satisfaction without turning on the oven.
Nothing beats this simple treat that combines rich chocolate with crispy textures in minutes.
The magic happens when melted chocolate meets crunchy ingredients, creating a delightful snack you cannot resist.
Random pantry staples transform into a decadent dessert that impresses everyone.
Each bite provides a perfect balance of smooth chocolate and satisfying crackle.
No complicated techniques or special skills required – just basic mixing and chilling.
You can whip up these irresistible bars faster than driving to the store for packaged versions.
Indulge in this quick, delicious recipe that promises pure chocolate bliss.
Why We Love No-Bake Homemade Crunch Bars

Everything You Need for No-Bake Homemade Crunch Bars
Chocolate Base:Crunchy Elements:Optional Flavor Enhancers:Quick and Simple Guide to No-Bake Homemade Crunch Bars

Step 1: Melt Chocolate Base
Grab a microwave-safe bowl and toss in your chocolate chips. If you’re feeling nutty, add a dollop of peanut butter for extra richness. Zap the mixture in short 20-second bursts, giving it a good stir between each interval. Keep nuking until the chocolate transforms into a silky, glossy pool of deliciousness. Pro tip: For precision melters, use the double boiler technique by setting a heatproof bowl over a pot of gently simmering water.
Step 2: Create Crunchy Texture
Pour in your crispy rice cereal and fold it gently into the molten chocolate. Ensure every single piece gets a luxurious chocolate coating. The key is creating a perfect balance where each cereal morsel is enrobed but not drowning.
Step 3: Shape Your Bars
Line a square baking pan with parchment paper, letting the edges hang over for easy removal. Spread your chocolate-covered cereal mixture evenly, pressing down with a spatula to create a smooth, compact layer.
Step 4: Chill and Set
Pop the pan into the refrigerator and let the magic happen. Wait patiently for about 30 minutes until the bars become firm and set. The cooler transforms your mixture into a crisp, breakable treat.
Step 5: Cut and Serve
Remove the pan from the refrigerator. Using the parchment paper edges, lift the entire chocolate slab out. Slice into perfect rectangles or bite-sized squares. Watch as your friends and family marvel at your no-bake confectionery skills.
Tricks for Perfect No-Bake Homemade Crunch Bars
How to Store No-Bake Homemade Crunch Bars Like a Pro
No-Bake Homemade Crunch Bars and What to Pair Them With
Fresh Ways to Make No-Bake Homemade Crunch Bars Exciting
Print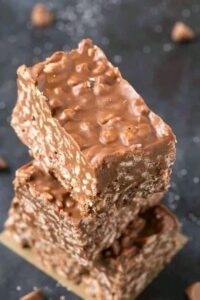
No-Bake Homemade Crunch Bars Recipe
- Total Time: 2 hours 10 minutes
- Yield: 12 1x
Description
Irresistible homemade Crunch Bars offer a delightful chocolate-crispy fusion that promises pure indulgence. Sweet memories and crunchy textures collide, inviting you to savor each luxurious bite of this simple, heavenly treat.
Ingredients
Chocolate Base:
- 2 cups (340 grams) semi-sweet chocolate chips
- ½ cup (125 grams) peanut butter
Crunch Ingredient:
- 2 cups (50 grams) crispy rice cereal (Rice Krispies)
Instructions
- Prepare a lined baking dish by covering the bottom and sides with parchment paper, ensuring complete coverage for easy removal later.
- Create a smooth, glossy chocolate base by gently melting chocolate chips with peanut butter using either microwave technique or traditional double boiler method.
- Stir the melted mixture thoroughly to achieve a uniform, silky consistency without any unincorporated chocolate chunks.
- Pour the liquid chocolate mixture into the prepared parchment-lined dish, using a spatula to spread evenly across the surface.
- Sprinkle crispy rice cereal over the liquid chocolate layer, carefully distributing the cereal to create a consistent crunch throughout the entire bar.
- Gently press the cereal into the chocolate layer using a clean spatula or the back of a spoon to ensure proper adherence and a compact texture.
- Transfer the prepared dish to the refrigerator and allow the bars to set completely, which typically takes approximately 30-45 minutes.
- Once solidified, lift the parchment paper to remove the entire chocolate slab from the dish.
- Use a sharp knife to slice the chocolate into uniform rectangular bars or desired serving sizes.
- Store the crunch bars in an airtight container within the refrigerator to maintain their crisp texture and prevent melting.
Notes
- Opt for high-quality chocolate chips to enhance the overall flavor and texture of your crunch bars.
- Stir melted chocolate gently to prevent air bubbles and ensure a smooth, glossy finish.
- For a healthier version, substitute dark chocolate and use natural peanut butter with no added sugars.
- Line your pan with parchment paper for easy removal and clean cutting of the bars, preventing sticking and crumbling.
- Prep Time: 10 minutes
- Cook Time: 1-2 hours
- Category: Snacks, Desserts
- Method: Blending
- Cuisine: American
Nutrition
- Serving Size: 12
- Calories: 170
- Sugar: 10 g
- Sodium: 70 mg
- Fat: 8 g
- Saturated Fat: 3.5 g
- Unsaturated Fat: 4.5 g
- Trans Fat: 0 g
- Carbohydrates: 23 g
- Fiber: 1 g
- Protein: 2 g
- Cholesterol: 0 mg
Dave Mitchell
Founder & Chief Recipe Developer
Expertise
Education
Asheville-Buncombe Technical Community College
Associate of Applied Science in Culinary Arts
Focus: Comprehensive training in culinary techniques, kitchen management, and menu planning, with a special emphasis on grilling and outdoor cooking.
Dave Mitchell is the heart behind Daves Grill, a cook, writer, and lover of all things grilled. He studied Culinary Arts at Asheville-Buncombe Technical Community College and spent years cooking, testing, and sharing recipes that actually work.
Dave started Daves Grill to keep things simple: one great recipe at a time. His food is bold, easy to follow, and made for real people with regular kitchens. From juicy steaks to quick sides, Dave’s recipes bring the heat without the hassle.