
Peanut Butter Blossoms Recipe for Sweet Smiles
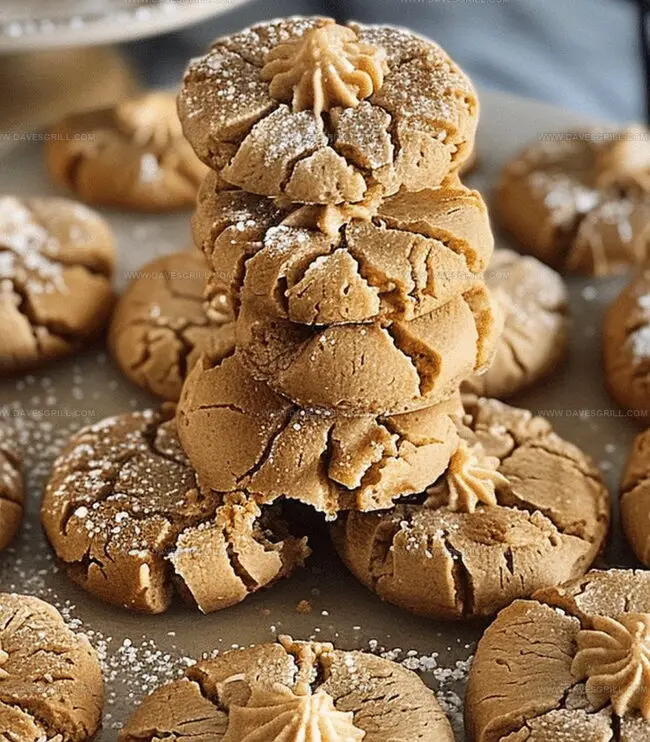
Freshly baked peanut butter blossoms spark memories of childhood kitchens and sweet afternoon treats.
These classic cookies combine soft, rich textures with smooth peanut butter and perfect chocolate centers.
Mom’s favorite holiday recipe always brought smiles around our kitchen table.
Warm cookie aromas drift through the house, promising delectable moments of pure comfort.
Chocolate kisses nestled atop pillowy peanut butter dough create visual magic that delights both kids and adults.
Simple ingredients and quick preparation make these cookies a delightful weekend baking project.
You’ll love how these little treats turn an ordinary afternoon into something magical and memorable.
Why Peanut Butter Blossoms Will Never Go Out of Style

Everything You Need for Peanut Butter Blossoms
Fats and Base Ingredients:Sweeteners:Dry Ingredients:Flavor Enhancers:Topping:How to Bake Peanut Butter Blossoms to Perfection
Step 1: Warm Up The Oven
Crank the oven to 375F (190C). Lay out baking sheets with parchment paper or silicone mats.
Step 2: Mix Cookie Base
Gather ingredients:Combine butter, peanut butter, and sugars in a bowl. Whip until fluffy and light. Pour in egg, milk, and vanilla. Stir until everything blends smoothly. In another bowl, mix flour, baking soda, and salt. Slowly fold dry ingredients into wet mixture until dough forms.
Step 3: Shape Sweet Treats
Scoop dough into small balls. Roll each ball in sugar until fully coated. Place cookies on prepared sheets, spacing them two inches apart.
Step 4: Bake To Perfection
Slide sheets into the oven. Bake 8-10 minutes until edges look set but centers remain soft. Pull from oven and quickly press a chocolate kiss into each cookie’s center. Let cookies crack naturally around the kiss.
Step 5: Cool And Celebrate
Allow cookies to rest on baking sheet for five minutes. Transfer to wire rack and let cool completely. Enjoy your delightful peanut butter kiss cookies!
Tips for Chewy Peanut Butter Blossoms
How to Store Peanut Butter Blossoms for Days
Best Bites to Enjoy With Peanut Butter Blossoms
Fun Spins on Classic Peanut Butter Blossoms
Print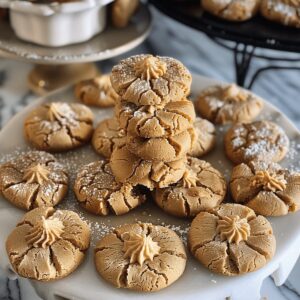
Peanut Butter Blossoms Recipe
- Total Time: 25 minutes
- Yield: 24 1x
Description
Irresistible peanut butter blossoms bring classic American cookie magic to dessert tables, creating sweet memories with each chocolate-kissed bite. Chocolate-studded cookies deliver nostalgic comfort that delights and satisfies cookie enthusiasts with their perfect balance of nutty richness and chocolate sweetness.
Ingredients
Main Ingredients:
- ½ cup (115g) unsalted butter, softened
- ½ cup (120g) creamy peanut butter
- 1 large egg
- 1 ¾ cups (220g) all-purpose flour
Sweeteners:
- ½ cup (100g) granulated sugar (plus extra for rolling)
- ½ cup (110g) brown sugar, packed
Flavor and Binding Ingredients:
- 2 tablespoons milk
- 1 teaspoon vanilla extract
- 1 teaspoon baking soda
- ½ teaspoon salt
- 24–30 Hershey’s Kisses, unwrapped
Instructions
- Organize baking workspace and equipment, ensuring all ingredients are measured and ready for smooth preparation.
- Thoroughly blend butter, peanut butter, and sugars in a spacious mixing vessel until the mixture achieves a pillowy, aerated consistency.
- Incorporate liquid components – egg, milk, and vanilla extract – stirring until the mixture appears uniform and glossy.
- Sift together dry ingredients in a separate container, creating a lightweight flour mixture with evenly distributed leavening agents.
- Gently fold dry ingredients into the wet mixture, stirring carefully to prevent overmixing and maintain a tender cookie texture.
- Craft uniform dough spheres using a precise measuring tool, rolling each between palms to create smooth, consistent rounds.
- Delicately coat each dough ball in granulated sugar, creating a sparkling exterior that will caramelize during baking.
- Arrange cookie spheres on lined baking sheets, allowing sufficient space between each for proper spreading and even heat circulation.
- Slide trays into a preheated oven, baking until cookie edges transform to a golden-tan hue while centers remain soft and yielding.
- Swiftly embed a Hersheys Kiss into the center of each hot cookie, allowing the chocolate to slightly melt and adhere.
- Allow cookies to rest momentarily on baking sheets, then transfer to a cooling rack, permitting complete temperature stabilization before serving.
Notes
- Swap traditional peanut butter for almond or sunflower seed butter to accommodate nut allergies while maintaining a similar rich, creamy texture.
- Use gluten-free flour blend as a direct substitute for all-purpose flour to make these cookies celiac-friendly without compromising taste or structure.
- Chill the dough for 30 minutes before shaping to prevent excessive spreading and create more uniform, picture-perfect cookies with crisp edges.
- Replace Hershey’s Kisses with dairy-free chocolate buttons or vegan chocolate drops for a plant-based version that’s equally delicious and inclusive.
- Prep Time: 15 minutes
- Cook Time: 10 minutes
- Category: Desserts, Snacks
- Method: Baking
- Cuisine: American
Nutrition
- Serving Size: 24
- Calories: 150
- Sugar: 10g
- Sodium: 90mg
- Fat: 7g
- Saturated Fat: 3.5g
- Unsaturated Fat: 3.5g
- Trans Fat: 0g
- Carbohydrates: 19g
- Fiber: 1g
- Protein: 3g
- Cholesterol: 15mg
Dave Mitchell
Founder & Chief Recipe Developer
Expertise
Education
Asheville-Buncombe Technical Community College
Associate of Applied Science in Culinary Arts
Focus: Comprehensive training in culinary techniques, kitchen management, and menu planning, with a special emphasis on grilling and outdoor cooking.
Dave Mitchell is the heart behind Daves Grill, a cook, writer, and lover of all things grilled. He studied Culinary Arts at Asheville-Buncombe Technical Community College and spent years cooking, testing, and sharing recipes that actually work.
Dave started Daves Grill to keep things simple: one great recipe at a time. His food is bold, easy to follow, and made for real people with regular kitchens. From juicy steaks to quick sides, Dave’s recipes bring the heat without the hassle.