Homemade Peppermint Oreo Balls Recipe: Snackable Joy
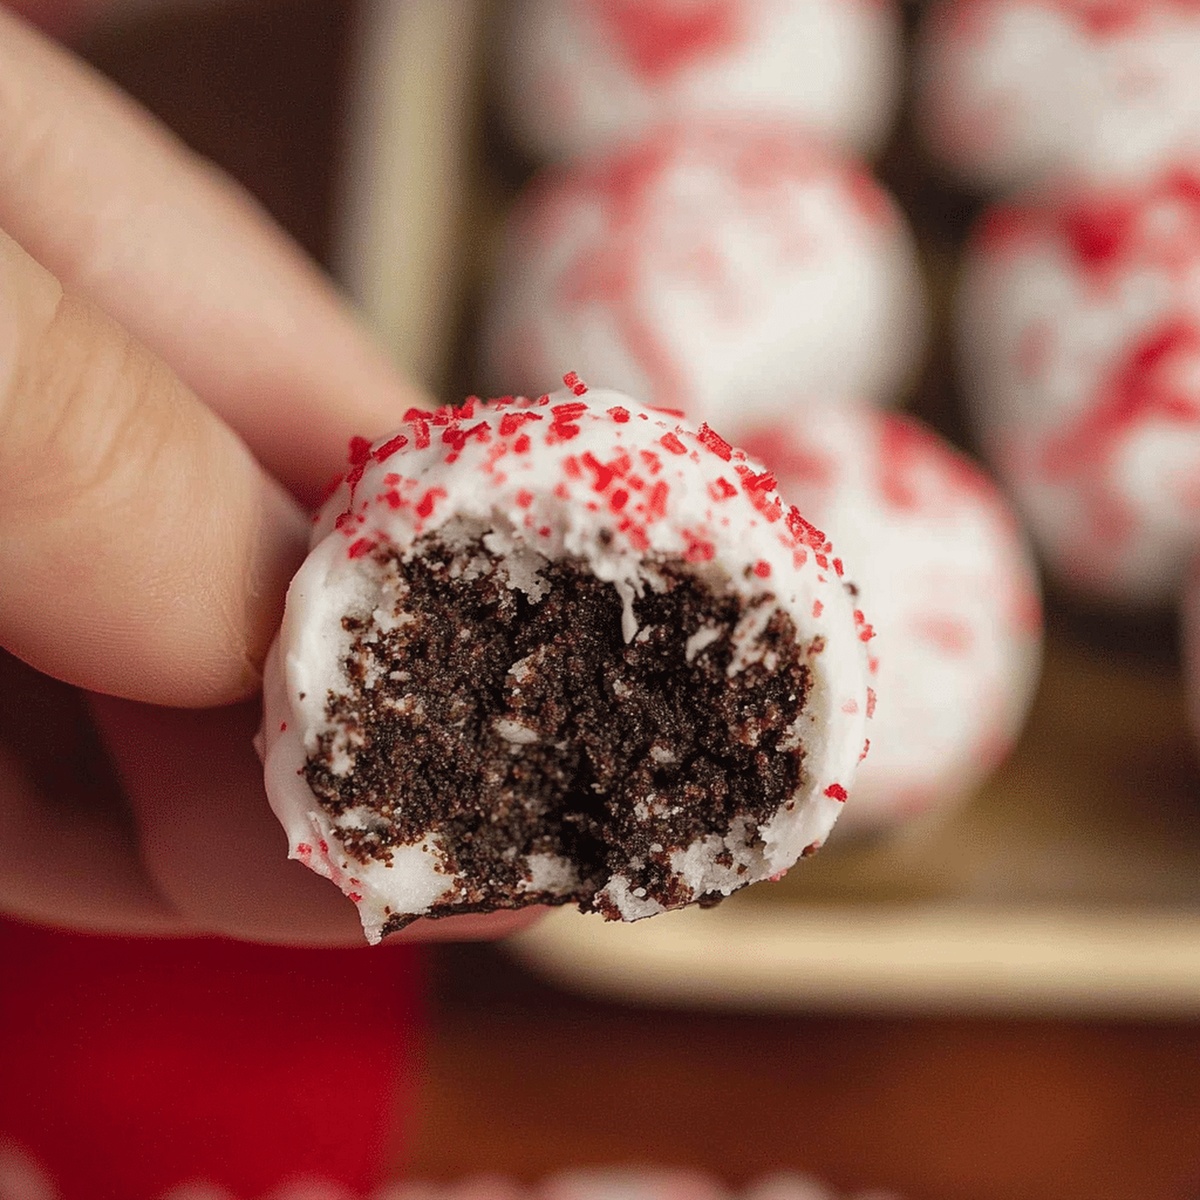
Sweet chocolate dreams meet cool minty peppermint oreo balls in this irresistible holiday treat.
Crushed cookies blend with cream cheese to create tiny spheres of deliciousness.
No baking skills required means anyone can master this simple dessert.
Rich chocolate coatings add a luxurious finish to each bite-sized delight.
Winter celebrations sparkle with these festive little confections that melt in your mouth.
Cold nights call for something special, and these peppermint oreo balls deliver pure indulgence.
Prepare to impress everyone at your next gathering with these magical morsels that combine classic flavor combinations.
Roll into action and let the deliciousness begin!
What’s to Love About Peppermint Oreo Balls
Everything That Goes Into Peppermint Oreo Balls
Base Ingredients:Coating and Topping Ingredients:Optional Supporting Ingredients:Peppermint Oreo Balls: Simple Instructions

Step 1: Crush Cookie Base
Toss Oreo cookies into a food processor. Pulse until cookies transform into fine, dusty crumbs. Ensure no large chunks remain.
Step 2: Blend Creamy Mixture
Add softened cream cheese and peppermint extract into the food processor. Blend ingredients until a smooth, consistent texture develops. The mixture should look like rich, dark chocolate frosting.
Step 3: Shape Delightful Spheres
Grab a baking sheet and cover with parchment paper. Scoop small portions of the mixture and roll between palms, creating uniform round balls. Aim for bite-sized treats that fit comfortably in one mouthful. Carefully place each truffle on the prepared sheet.
Step 4: Chill Truffle Bases
Transfer the baking sheet to the refrigerator. Allow truffles to firm up for about 30 minutes. This helps maintain their shape during chocolate coating.
Step 5: Prepare Chocolate Coating
Select a microwave-safe bowl. Melt chocolate wafers in short intervals, stirring between each session. Stir until chocolate reaches a silky, glossy consistency.
Step 6: Enrobe Truffles
Remove chilled truffles from refrigerator. Use a fork or specialized dipping tool to submerge each ball completely in melted chocolate. Gently tap to remove excess coating.
Step 7: Decorate With Festive Touches
While chocolate remains wet, sprinkle toppings:Step 8: Set and Preserve
Allow truffles to set at room temperature or accelerate process in refrigerator. Once chocolate hardens, transfer to an airtight container. Store in refrigerator until serving time.
Top Tips to Nail Your Peppermint Oreo Balls
Save and Reheat Peppermint Oreo Balls the Right Way
Sweet Pairings for Peppermint Oreo Balls
Fun Peppermint Oreo Ball Variations You’ll Enjoy
Print
Peppermint Oreo Balls Recipe
- Total Time: 50 minutes
- Yield: 36 1x
Description
Chocolate-dipped Peppermint Oreo Balls bring festive winter cheer to holiday dessert tables. Cool mint and rich chocolate combine in these bite-sized treats that deliver delightful sweetness with each perfect little sphere.
Ingredients
Main Ingredients:
- 36 Oreo cookies
- 8 ounces (226 grams) cream cheese, softened
- 16 ounces (454 grams) white or dark chocolate melting wafers
Flavoring:
- 1 teaspoon peppermint extract
Topping:
- ½ cup crushed candy canes or peppermint candies
Instructions
- Crush Oreo cookies into fine, uniform crumbs using a food processor, ensuring no large chunks remain.
- Incorporate softened cream cheese and peppermint extract into the cookie crumbs, mixing thoroughly until a cohesive, moldable consistency develops.
- Prepare a parchment-lined baking sheet as a staging area for the confections.
- Carefully shape the mixture into uniform, bite-sized spheres using gentle rolling motions between palms.
- Chill the formed balls in the refrigerator for approximately 30 minutes to enhance structural integrity.
- Melt chocolate wafers in a microwave-safe vessel, stirring periodically to achieve a smooth, glossy texture.
- Delicately immerse each chilled ball into the melted chocolate, using a fork to ensure complete coverage and allow excess to drip away.
- Return chocolate-coated balls to the parchment-lined sheet, maintaining a uniform arrangement.
- While chocolate remains liquid, generously garnish with crushed candy canes or peppermint candies for decorative flair.
- Allow chocolates to set at ambient temperature or expedite the process through refrigeration.
- Once fully hardened, transfer the peppermint Oreo balls to an airtight storage container.
- Refrigerate until serving time to maintain optimal texture and flavor.
Notes
- Ensure cream cheese is at room temperature for smoother blending and easier mixing with Oreo crumbs.
- Use a cookie scoop or small ice cream scoop for uniform-sized Oreo balls, creating consistent shape and appearance.
- Chill the mixture before forming balls to prevent sticking and make rolling easier, resulting in neater, more compact treats.
- Melt chocolate in short intervals and stir frequently to prevent burning and achieve a silky smooth coating.
- For gluten-free version, replace regular Oreos with gluten-free chocolate sandwich cookies, maintaining the same delicious flavor profile.
- Experiment with white chocolate coating for a different visual and taste experience, adding festive color variations.
- Keep Oreo balls refrigerated to maintain firm texture and prevent chocolate from melting, especially during warm weather.
- Prep Time: 20 minutes
- Cook Time: 30 minutes
- Category: Desserts, Snacks
- Method: Blending
- Cuisine: American
Nutrition
- Serving Size: 36
- Calories: 120
- Sugar: 10g
- Sodium: 50mg
- Fat: 7g
- Saturated Fat: 4g
- Unsaturated Fat: 2g
- Trans Fat: 0g
- Carbohydrates: 14g
- Fiber: 1g
- Protein: 1g
- Cholesterol: 5mg
Dave Mitchell
Founder & Chief Recipe Developer
Expertise
Education
Asheville-Buncombe Technical Community College
Associate of Applied Science in Culinary Arts
Focus: Comprehensive training in culinary techniques, kitchen management, and menu planning, with a special emphasis on grilling and outdoor cooking.
Dave Mitchell is the heart behind Daves Grill, a cook, writer, and lover of all things grilled. He studied Culinary Arts at Asheville-Buncombe Technical Community College and spent years cooking, testing, and sharing recipes that actually work.
Dave started Daves Grill to keep things simple: one great recipe at a time. His food is bold, easy to follow, and made for real people with regular kitchens. From juicy steaks to quick sides, Dave’s recipes bring the heat without the hassle.