Sweet & Tangy Rhubarb Dream Bars Recipe: A Heavenly Treat
Memories of grandma’s kitchen dance around these delightful rhubarb dream bars that promise pure nostalgia.
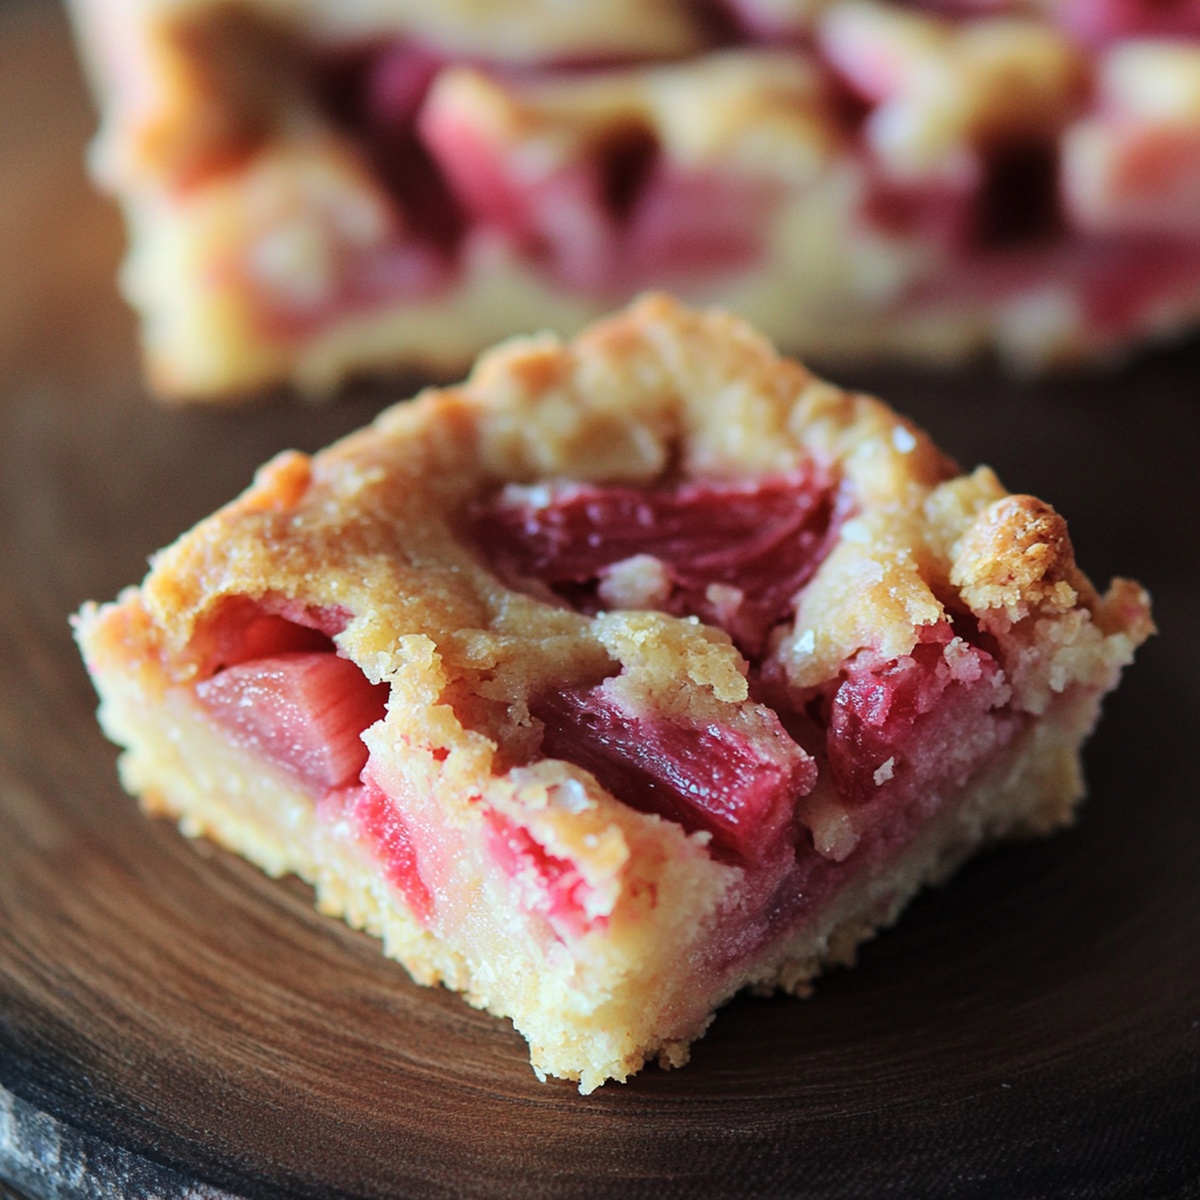
Sweet-tart rhubarb mingles with buttery layers in a dessert that whispers comfort.
Each bite carries hints of childhood summers and lazy afternoon baking sessions.
Soft crumbles and vibrant fruit create a harmony of textures that feel like a warm embrace.
Rural farmhouse traditions shine through this simple yet elegant treat that celebrates seasonal bounty.
Bakers who adore unexpected flavor combinations will find magic in these bars’ delicate balance.
You’ll want to savor every crumbly, tangy morsel of this irresistible dessert that turns humble ingredients into something extraordinary.
What Makes Rhubarb Dream Bars So Special
What Goes Into Rhubarb Dream Bars
Crust Ingredients:Filling Ingredients:Optional Topping:How To Bake Rhubarb Dream Bars With Ease
Step 1: Prepare the Oven and Pan
Warm up your oven to a cozy 350°F (175°C). Grab your 8×8-inch baking pan and give it a quick spray of cooking oil or lay down a sheet of parchment paper for easy cleanup.
Step 2: Create the Crumbly Crust
In a mixing bowl, combine:Use a pastry cutter or your fingertips to blend everything until it looks like soft, sandy crumbs. Press this magical mixture firmly into the bottom of your prepared pan, creating an even, compact base.
Step 3: Toast the Crust to Golden Perfection
Slide the pan into the preheated oven and let the crust bake until its edges turn a delicate golden brown. This should take about 12-15 minutes – your kitchen will start smelling amazing!
Step 4: Whip Up the Rhubarb Filling
In a separate bowl, whisk together:Blend until smooth, then gently fold in chopped rhubarb pieces. The mixture should look vibrant and tempting.
Step 5: Assemble and Bake the Dream Bars
Pour the rhubarb mixture over the hot crust, making sure it’s evenly spread. Return the pan to the oven and bake for 35-40 minutes. You’ll know it’s done when the top turns a light golden color and the filling sets completely.
Step 6: Cool and Slice
Let the bars cool completely in the pan. Once cooled, lift them out using the parchment paper and slice into perfect squares. Enjoy your rhubarb dream bars!
Tips For The Best Rhubarb Dream Bars
Keep Rhubarb Dream Bars Fresh The Right Way
Perfect Pairings For Rhubarb Dream Bars
Tasty Rhubarb Dream Bars Variations
Your FAQs About Rhubarb Dream Bars
Rhubarb bars combine a buttery shortbread-like crust with a tangy, sweet rhubarb filling that creates a perfect balance of flavors. The contrast between the crisp base and the soft, fruity topping makes these bars a delightful spring dessert.
No, rhubarb leaves are toxic and should never be consumed. Only the stalks are edible and safe to use in cooking. Always cut off and discard the leaves before preparing rhubarb for any recipe.
Look for firm, crisp stalks with a bright pink or red color. Avoid stalks that are soft, wilted, or have brown spots. Fresh rhubarb should feel firm and have a vibrant appearance.
Yes, you can use frozen rhubarb. Just thaw and drain the rhubarb completely before adding it to the filling to prevent excess moisture from making the bars soggy.
Print
Rhubarb Dream Bars Recipe
- Total Time: 1 hour 5 minutes
- Yield: 9 1x
Description
Rhubarb dream bars combine sweet nostalgia with tangy freshness in a delightful dessert. Buttery crumble layers and luscious rhubarb filling create a perfect balance that beckons you to savor each memorable bite.
Ingredients
Main Ingredients:
- 2 cups finely chopped fresh rhubarb
- 2 large eggs
Crust Ingredients:
- 1 cup (240 ml) all-purpose flour
- ½ cup (113 grams) unsalted butter, softened
- ¼ cup (50 grams) granulated sugar
Filling Ingredients:
- 1 cup (200 grams) granulated sugar
- ¼ cup (30 grams) all-purpose flour
- ¼ teaspoon salt
Instructions
- Prepare the foundation layer by combining flour and sugar, then incorporate softened butter until the mixture resembles coarse crumbs. Gently press the mixture into a thoroughly greased or parchment-lined 8×8-inch baking vessel, ensuring an even, compact surface.
- Transfer the prepared base to a preheated oven at 350F (175C) and allow it to transform into a delicately golden-edged canvas, approximately 12-15 minutes.
- While the crust achieves its initial golden perfection, craft the vibrant filling by whisking eggs until they become light and airy, then seamlessly blend in flour, sugar, and a subtle hint of salt.
- Carefully introduce chopped rhubarb into the silky egg mixture, folding gently to distribute the tart crimson pieces throughout the luminous base.
- Immediately after removing the crust from the oven, cascade the rhubarb-laden mixture across the hot surface, creating a harmonious layer that promises tantalizing texture and flavor.
- Return the pan to the oven, allowing the filling to set and caramelize, developing a delicate golden crown that signals its readiness after 35-40 minutes of patient baking.
- Once complete, extract the bars and permit them to cool completely, allowing the layers to stabilize and flavors to meld before slicing into delectable squares.
Notes
- Adjust rhubarb sweetness by choosing between tart or sweeter varieties, allowing you to control the overall flavor profile of the dessert.
- Swap traditional all-purpose flour with gluten-free alternatives like almond or coconut flour for those with wheat sensitivities.
- Enhance the texture by adding a sprinkle of chopped nuts like almonds or pecans to the crust for extra crunch and nutty depth.
- Experiment with mixed berries alongside rhubarb to create a more complex fruity filling, balancing tartness with additional sweetness.
- Prep Time: 15 minutes
- Cook Time: 50 minutes
- Category: Desserts, Snacks
- Method: Baking
- Cuisine: American
Nutrition
- Serving Size: 9
- Calories: 190
- Sugar: 14 g
- Sodium: 50 mg
- Fat: 8 g
- Saturated Fat: 5 g
- Unsaturated Fat: 2 g
- Trans Fat: 0 g
- Carbohydrates: 27 g
- Fiber: 1 g
- Protein: 2 g
- Cholesterol: 40 mg
Dave Mitchell
Founder & Chief Recipe Developer
Expertise
Education
Asheville-Buncombe Technical Community College
Associate of Applied Science in Culinary Arts
Focus: Comprehensive training in culinary techniques, kitchen management, and menu planning, with a special emphasis on grilling and outdoor cooking.
Dave Mitchell is the heart behind Daves Grill, a cook, writer, and lover of all things grilled. He studied Culinary Arts at Asheville-Buncombe Technical Community College and spent years cooking, testing, and sharing recipes that actually work.
Dave started Daves Grill to keep things simple: one great recipe at a time. His food is bold, easy to follow, and made for real people with regular kitchens. From juicy steaks to quick sides, Dave’s recipes bring the heat without the hassle.