Creamy and rich, this sugar free condensed milk recipe delivers a delightful dairy alternative that transforms ordinary desserts into extraordinary treats.
Crafting your own sugar free condensed milk at home requires just a few simple ingredients and minimal effort.
The process brings together heavy cream, butter, and a natural sweetener that creates a luxurious, velvety texture.
Keto and low-carb enthusiasts will love how easily this condensed milk blends into their favorite recipes.
Each spoonful offers a decadent experience without the added sugars found in traditional versions.
Drizzle this smooth, silky condensed milk over fresh berries or stir into your morning coffee for a guilt-free indulgence that satisfies every sweet craving.
Quick Recipe Overview
Prep Time: 5 minutes
Cook Time: 35 minutes
Total Time: 40 minutes
Calories: 320 kcal
Servings: 2
Sugar-Free Condensed Milk Ingredient Breakdown
For Base Ingredients:
Milk: Creamy foundation that gives the condensed milk its rich texture and authentic dairy flavor, best when using whole milk for maximum richness.
Powdered Erythritol: Zero-calorie sweetener that replaces traditional sugar, providing sweetness without affecting blood sugar levels.
Vanilla Extract: Introduces warm, aromatic complexity and rounds out the overall flavor profile, choose pure vanilla for best taste.
Salt: Subtle seasoning that balances sweetness and amplifies other ingredient nuances, use fine sea salt for even distribution.
For Preparation Support:
Fine Mesh Strainer: Essential tool for achieving silky smooth texture by removing potential ingredient solids.
Airtight Container: Critical for proper storage, keeping condensed milk fresh and preventing moisture contamination.
Tools That Help with Dairy-Free Sweetening
Medium-sized saucepan: Essential for cooking and reducing the milk mixture.
Wooden spoon or silicone spatula: Perfect for stirring ingredients and preventing sticking.
Fine mesh strainer: Helps create a smooth, silky texture by removing any solids.
Measuring cups and spoons: Accurate for measuring milk, erythritol, and other ingredients.
Airtight container: Great for storing the finished condensed milk in the refrigerator.
Spoon: Useful for checking the consistency of the mixture.
How to Make Sugar-Free Condensed Milk Easily
Create Creamy Base Grab a medium saucepan and combine milk with powdered erythritol, butter, vanilla extract, and a pinch of salt.
Warm and Dissolve Place the saucepan over medium heat, stirring constantly until erythritol melts completely and mixture becomes smooth.
Slow Simmer Bring the mixture to a gentle bubble, then reduce heat to low. Let it quietly simmer, stirring occasionally, until liquid reduces by half and transforms into a thick, luxurious sauce. This takes around 45-60 minutes.
Strain and Smooth Remove pan from heat and let it rest briefly. Pour the mixture through a fine mesh strainer into a clean container, ensuring a silky-smooth texture free from any lumps.
Chill and Preserve Allow the condensed milk to cool down completely at room temperature. Seal the container and tuck it into the refrigerator, where it will happily wait for you for up to two weeks.
Tips for Smoothness and Shelf Life
Watch the heat closely and stir frequently to prevent burning or sticking at the bottom of the pan, ensuring a smooth and creamy texture without scorching.
Swap cow’s milk with unsweetened almond milk or coconut milk for a lactose-free version that maintains a similar rich consistency and creamy mouthfeel.
Experiment with monk fruit sweetener or stevia blends as alternative sugar substitutes that provide sweetness without increasing carbohydrate content.
Add a pinch of cinnamon or a splash of almond extract to create subtle depth and complexity in your sugar-free condensed milk, making it more interesting for different dessert recipes.
Transfer the cooled condensed milk into a glass jar with a tight-fitting lid for better preservation, and always use a clean spoon when scooping to prevent bacterial contamination and extend refrigerator storage time.
How to Use It in Your Next Dessert
Sweet Dessert Drizzle: Pour this sugar-free condensed milk over warm fruit cobblers, apple pies, or berry crumbles for a decadent low-carb topping that adds creamy richness.
Coffee Companion: Stir a splash into hot coffee or cold brew as a luxurious sugar-free creamer that enhances flavor without extra carbohydrates, creating a smooth and indulgent beverage.
Baking: Use as a replacement for traditional condensed milk in cheesecake recipes, no-bake desserts, or when making homemade fudge to create deliciously creamy treats with reduced sugar content.
Smoothie Enhancer: Blend a small amount into protein smoothies or low-carb milkshakes to increase creaminess and add a subtle sweet undertone without compromising nutritional goals.
Store in the Fridge for Ongoing Use
Keep your sugar-free condensed milk in an airtight glass jar with a tight-fitting lid to maintain freshness and prevent absorption of other refrigerator odors.
Always store the condensed milk in the coldest part of your refrigerator, typically the back shelf, to extend its shelf life and maintain optimal texture.
Divide the condensed milk into small portion-sized containers before freezing. This allows you to thaw only what you need, preventing waste and maintaining quality for up to 3 months.
When ready to use frozen or refrigerated condensed milk, gently warm it in a saucepan over low heat, stirring consistently until it returns to its original smooth consistency. Avoid microwave reheating to prevent potential separation or uneven heating.
FAQs
What is powdered erythritol and why use it in this recipe?
Powdered erythritol is a zero-calorie, natural sugar substitute that provides sweetness without affecting blood sugar levels. It dissolves easily and creates a smooth texture in sugar-free recipes.
Can I substitute powdered erythritol with another sweetener?
While other sugar alternatives like stevia or monk fruit might work, powdered erythritol provides the best consistency and texture for condensed milk. Liquid sweeteners may change the recipe’s outcome.
How do I know when the condensed milk has reached the right consistency?
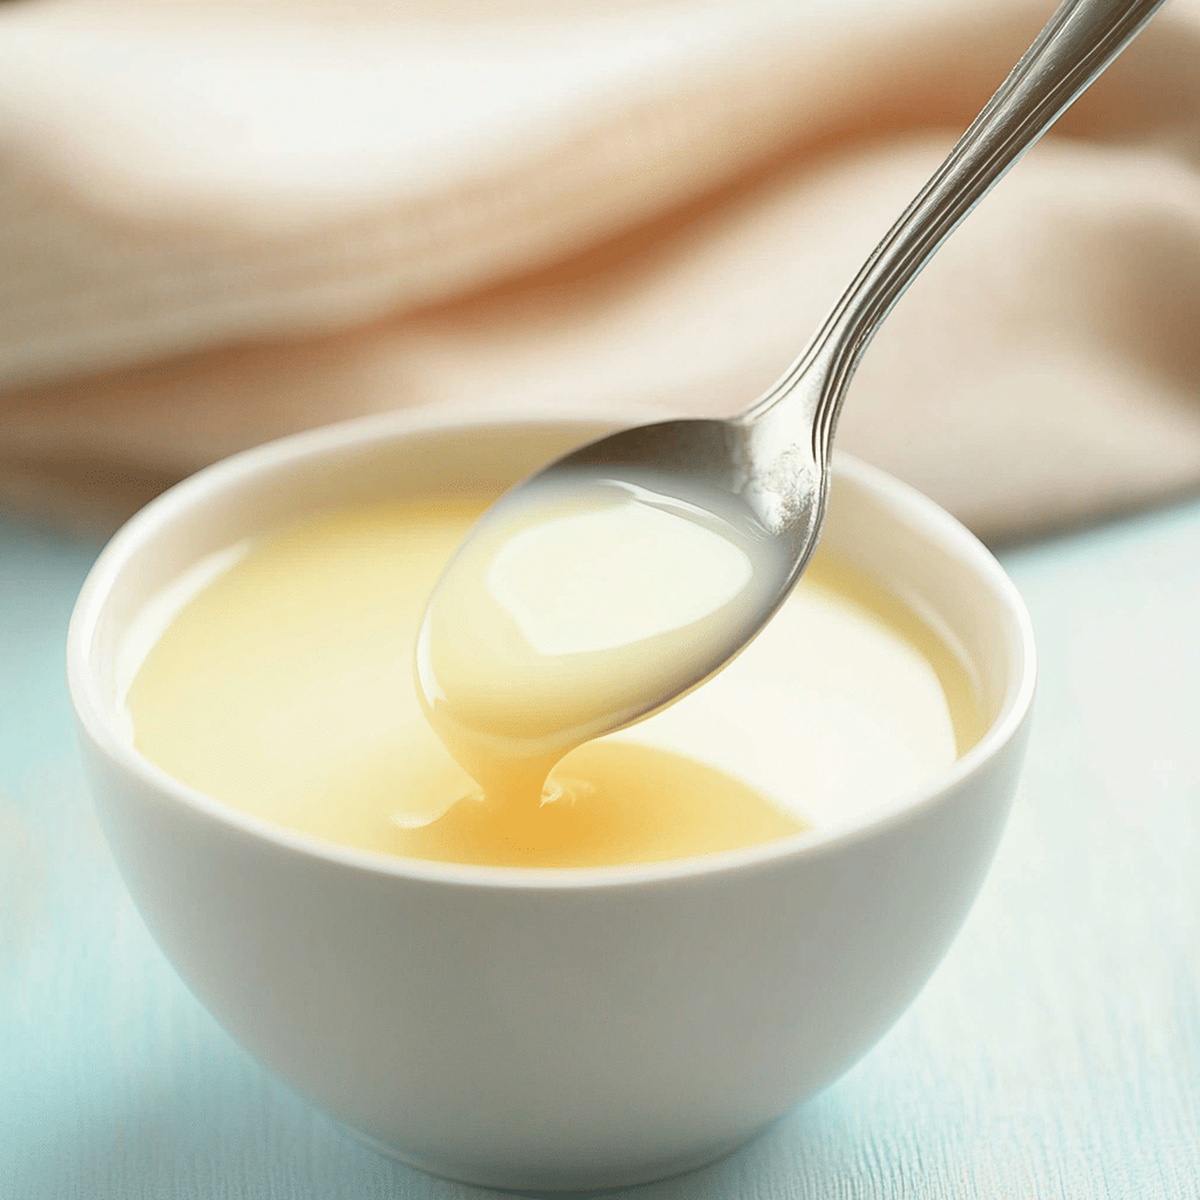
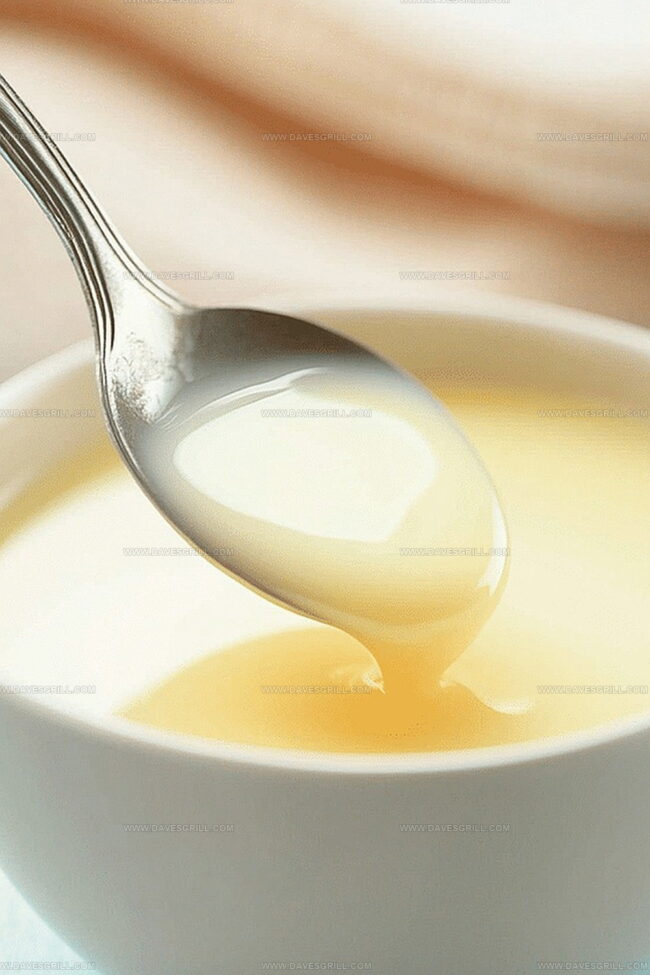
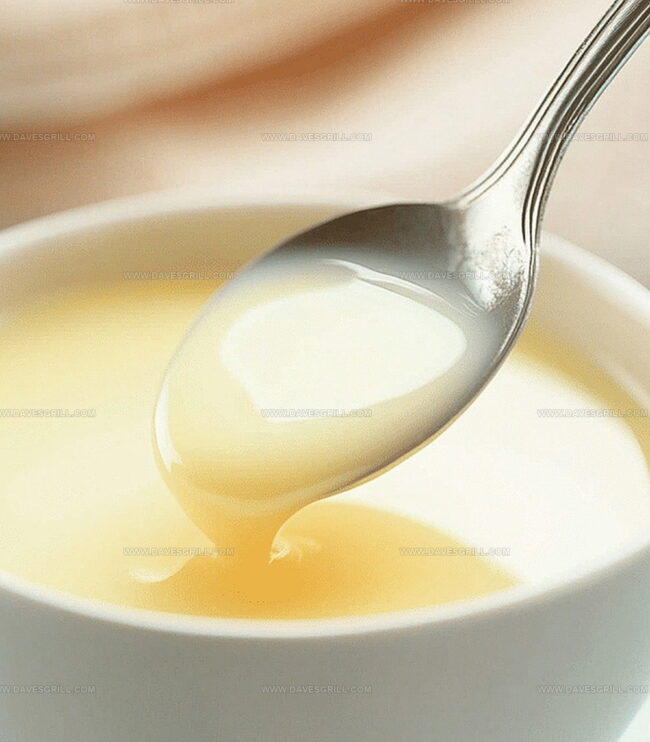
The mixture should coat the back of a spoon and leave a clear path when you run your finger through it. It will also reduce by about half its original volume during the simmering process.
Is this sugar-free condensed milk suitable for people with diabetes?
Yes, since it uses erythritol, which does not impact blood sugar levels, this condensed milk is a great option for people managing diabetes or following a low-carb diet.
Sweet homemade sugar free condensed milk offers a delightful alternative for health-conscious dessert enthusiasts. Creamy, rich, and simple to prepare, this recipe provides a guilt-free indulgence you can enjoy in multiple culinary creations.
Ingredients
Scale
2 cups/480 ml heavy cream
¼ cup/50 g granulated sugar substitute (like erythritol, allulose, or monk fruit)
2 tbsps unsalted butter
½ tsp vanilla extract (optional)
Instructions
Preparation: Combine milk, powdered erythritol, butter, vanilla extract, and salt in a medium saucepan, ensuring all ingredients are at room temperature.
Initial Heating: Place saucepan over medium heat, whisking constantly to dissolve erythritol and create a homogeneous mixture, preventing any ingredient from settling or burning.
Simmering Process: Gradually increase heat until the mixture reaches a gentle bubbling state, then reduce to low, maintaining a soft simmer while stirring frequently to prevent scorching.
Reduction Stage: Continue cooking, allowing the liquid to slowly condense and thicken, stirring periodically and watching for a rich, creamy transformation that coats the back of a wooden spoon with a smooth, thick layer.
Consistency Check: Remove from heat when the mixture has reduced by approximately half and leaves a clear path when a finger is drawn across the spoon’s surface, indicating the desired condensed milk texture.
Straining and Cooling: Strain the hot mixture through a fine mesh strainer to eliminate any potential solids, then transfer to a clean glass container and allow to cool completely at room temperature.
Storage: Once cooled, seal the container and refrigerate, where the sugar-free condensed milk will remain fresh and usable for up to two weeks.
Notes
Control Heat Carefully: Maintain a gentle simmer to prevent scorching or burning, which can ruin the smooth texture and create unwanted caramelization.
Stir Consistently: Continuous stirring prevents milk solids from sticking to the bottom and ensures even reduction and smooth consistency.
Test Thickness Strategically: Use the back of a spoon method to check readiness, ensuring the condensed milk coats the spoon and leaves a clear path when a finger is drawn through.
Store Smartly: Refrigerate in an airtight glass container and consume within two weeks for optimal flavor and texture preservation.
Oregon Culinary Institute Diploma in Culinary Arts Focus: Emphasis on farm-to-table cooking, sustainable practices, and the fusion of global flavors with traditional grilling methods.
Emily Lawson is the content creator at Daves Grill, turning tasty ideas into clear, easy recipes. Based in Portland, she trained at the Oregon Culinary Institute and loves cooking with fresh, seasonal ingredients, especially grilled veggies and global flavors.
Emily mixes food writing with hands-on cooking to bring you recipes that feel fun, not stressful. Her goal is to make every dish simple, flavorful, and worth coming back to. Together, she and Dave serve up real food, one recipe at a time.

Emily Lawson
Content Creator & Culinary Specialist
Expertise
Education
Oregon Culinary Institute
Diploma in Culinary Arts
Focus: Emphasis on farm-to-table cooking, sustainable practices, and the fusion of global flavors with traditional grilling methods.
Emily Lawson is the content creator at Daves Grill, turning tasty ideas into clear, easy recipes. Based in Portland, she trained at the Oregon Culinary Institute and loves cooking with fresh, seasonal ingredients, especially grilled veggies and global flavors.
Emily mixes food writing with hands-on cooking to bring you recipes that feel fun, not stressful. Her goal is to make every dish simple, flavorful, and worth coming back to. Together, she and Dave serve up real food, one recipe at a time.