Bright & Tangy Zesty Lemon Curd Tartlets Recipe to Dazzle
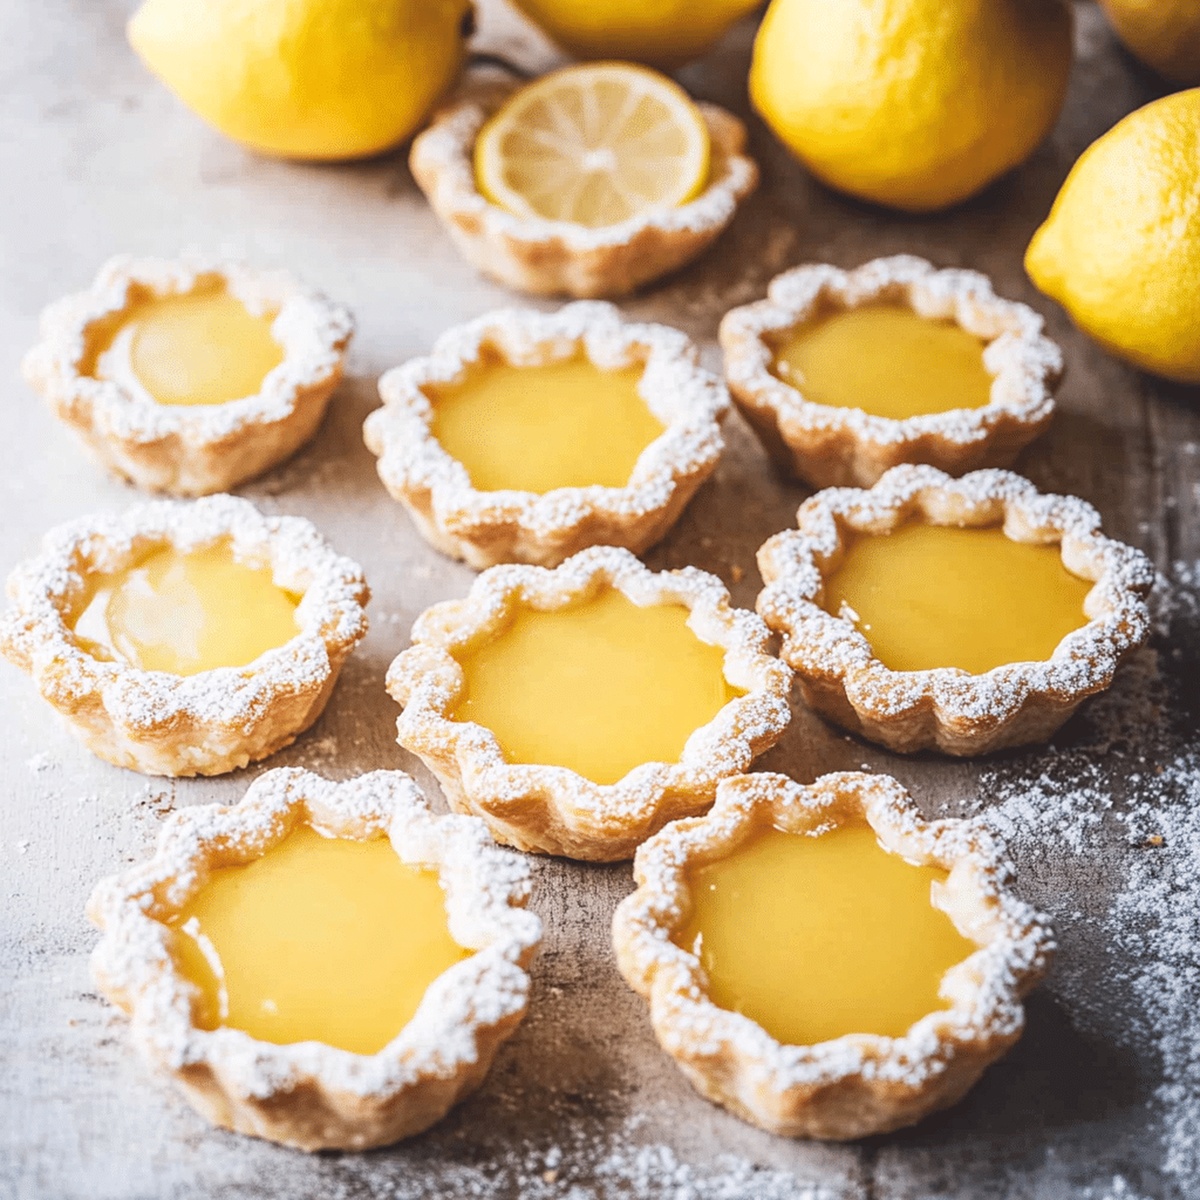
Delicate pastry shells cradle a vibrant lemon curd that dances with tangy, smooth brilliance.
Sweet and bright flavors mingle in these elegant tartlets.
Small bites pack an intense citrus punch that awakens taste buds.
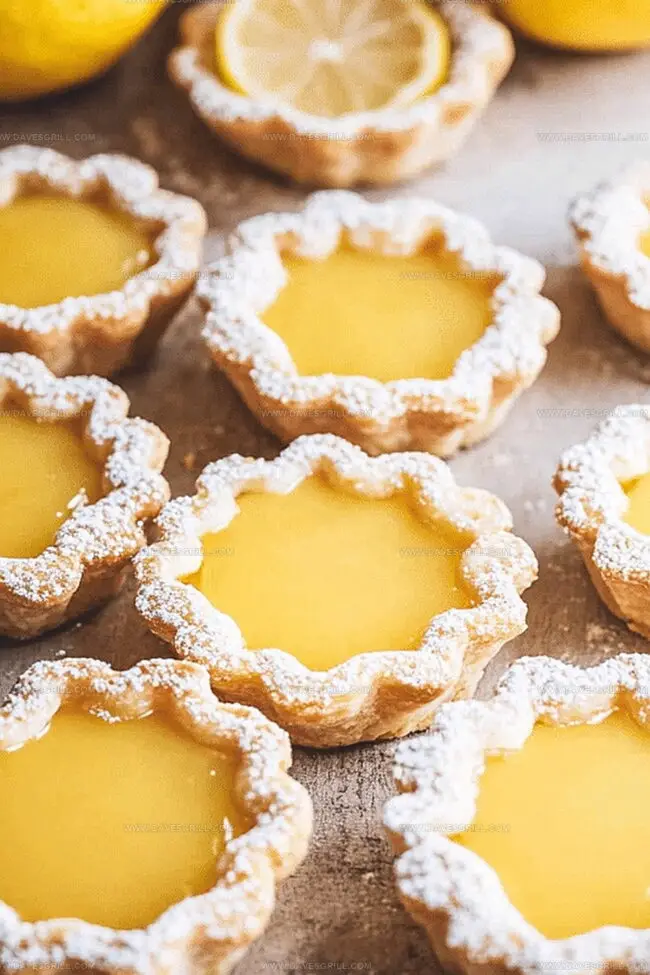
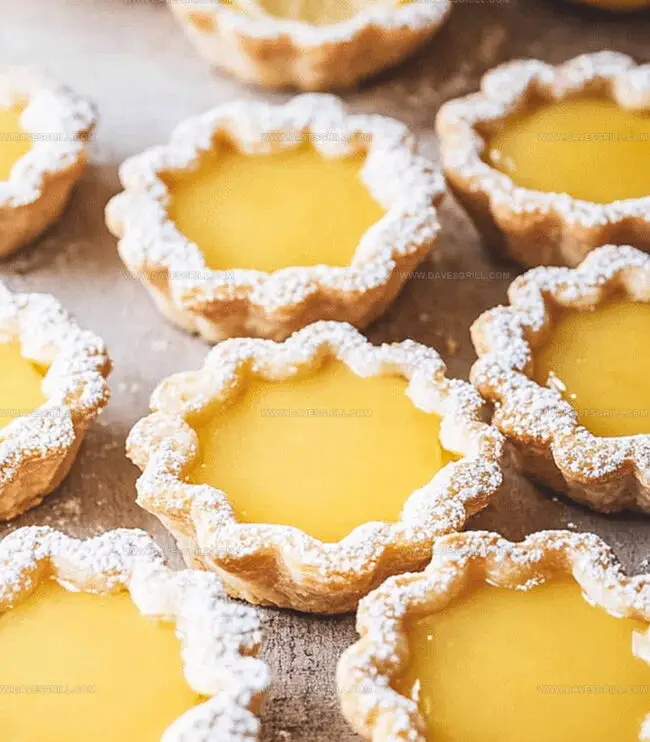
Creamy, silky curd nestles perfectly inside delicate, buttery crusts.
Soft peaks of whipped cream add a dreamy contrast to the zesty filling.
Each bite promises a delightful balance of sweet and tart sensations.
You’ll savor every delicate morsel of these irresistible tartlets that transform simple ingredients into a sublime dessert experience.
Quick Recipe Overview
Ingredients That Go Into Zesty Lemon Curd Tartlets
For Tart Shell:For Lemon Filling:For Garnish:Tools to Create Smooth Lemon Curd Tartlets Every Time
Making Lemon Curd Tartlets with Buttery Crusts
Blend flour, butter, and sugar in a food processor until it looks like rough sand. Toss in egg yolk and pulse. Drizzle ice water slowly until the mixture forms a cohesive ball.
Shape the dough into a flat disk, wrap snugly in plastic, and park in the refrigerator for half an hour to firm up.
Heat the oven to 375F. Roll out the chilled dough super thin on a flour-dusted surface. Cut circles matching your tartlet pan size. Gently press dough into pans, trimming excess edges. Poke tiny holes in the bottom with a fork.
Cover each shell with parchment paper, fill with pie weights. Bake for 10 minutes, then remove weights and continue baking 5-7 minutes until they turn a gorgeous golden color. Let shells cool completely before filling.
Whisk eggs, sugar, lemon juice, and zest in a saucepan. Cook over low heat, stirring constantly until mixture thickens. Remove from heat, stir in butter until smooth and glossy.
Spoon warm lemon curd into cooled tartlet shells. Garnish with a delicate dusting of powdered sugar or fresh berries. Chill briefly before serving for the perfect tangy-sweet dessert.
Smart Tips to Nail Lemon Curd Tartlets
When & How to Serve Lemon Curd Tartlets
Keeping Lemon Curd Tartlets Fresh Until the Last Bite
FAQs
Yes, you can prepare the tartlet shells a day in advance. After baking and cooling, store them in an airtight container at room temperature until you’re ready to fill them with lemon curd.
A food processor helps create the perfect pastry dough, but you can also make the dough by hand using a pastry cutter or two knives. Tartlet pans or mini tart molds are essential for shaping the shells.
Use pie weights or dried beans when blind baking, and make sure to chill the dough before rolling and pressing into the pans. This helps prevent the pastry from shrinking and maintains its shape.
For the flour, you can use all-purpose or pastry flour. Ensure the butter is cold and the egg yolk is fresh for the best texture. The ice water helps bind the dough without making it too wet.
Print
Zesty Lemon Curd Tartlets
- Total Time: 50 minutes
- Yield: 13 1x
Description
Delightful Lemon Curd Tartlets showcase a perfect balance of tangy and sweet flavors from traditional French pastry techniques. Crisp buttery shells cradle silky lemon curd, offering you a refined dessert experience that delights the palate.
Ingredients
- 3 large eggs
- 1 large egg yolk
- 1 cup (200 grams / 7.1 oz) granulated sugar
- 1 ¼ cups (160 grams / 5.6 oz) all-purpose flour
- ½ cup (120 ml / 4 fl oz) fresh lemon juice (about 3–4 lemons)
- 1 tbsp lemon zest
- 1 cup (226 grams / 8 oz) unsalted butter (half cold and cubed, half softened)
- 2 tbsps (30 ml / 1 fl oz) ice water
Instructions
- Dough Preparation: Utilize food processor to blend flour, butter, and sugar until transforming into coarse, sandy texture; pulse to integrate egg yolk, then incrementally introduce ice water until dough consolidates into cohesive mass.
- Dough Chilling: Form dough into compact disk, envelop with plastic wrap, and refrigerate for 30 minutes to enhance structural integrity and facilitate precise rolling.
- Shell Formation: Preheat oven to 375F (190C); roll chilled dough on flour-dusted surface to 1/8-inch thickness, strategically cutting circles matching tartlet pan dimensions and carefully pressing into molds, trimming excess edges and perforating bases with fork.
- Blind Baking: Shield pastry shells with parchment paper, weight with pie weights to prevent expansion, bake initially for 10 minutes; remove weights and continue baking 5-7 minutes until achieving delicate golden complexion.
- Cooling Phase: Allow tartlet shells to cool completely, ensuring crisp, structurally sound foundation for subsequent filling preparation.
Notes
- Chill Dough Strategically: Refrigerating the pastry for 30 minutes helps prevent shrinkage and ensures a flaky, tender crust by allowing gluten to relax and butter to solidify.
- Perfect Pastry Thickness: Roll dough precisely to 1/8-inch thickness for consistent, delicate tartlet shells that bake evenly without becoming too heavy or thick.
- Weight Management Technique: Using pie weights during initial baking prevents pastry from puffing up, creating a smooth, professional-looking base for your lemon curd filling.
- Cooling is Crucial: Allow tartlet shells to cool completely before adding filling to maintain structural integrity and prevent soggy bottoms, ensuring a crisp, elegant texture.
- Prep Time: 20 minutes
- Cook Time: 30 minutes
- Category: Desserts, Snacks
- Method: Baking
- Cuisine: British
Nutrition
- Serving Size: 13
- Calories: 220
- Sugar: 14 g
- Sodium: 40 mg
- Fat: 11 g
- Saturated Fat: 7 g
- Unsaturated Fat: 4 g
- Trans Fat: 0 g
- Carbohydrates: 30 g
- Fiber: 1 g
- Protein: 3 g
- Cholesterol: 85 mg
Emily Lawson
Content Creator & Culinary Specialist
Expertise
Education
Oregon Culinary Institute
Diploma in Culinary Arts
Focus: Emphasis on farm-to-table cooking, sustainable practices, and the fusion of global flavors with traditional grilling methods.
Emily Lawson is the content creator at Daves Grill, turning tasty ideas into clear, easy recipes. Based in Portland, she trained at the Oregon Culinary Institute and loves cooking with fresh, seasonal ingredients, especially grilled veggies and global flavors.
Emily mixes food writing with hands-on cooking to bring you recipes that feel fun, not stressful. Her goal is to make every dish simple, flavorful, and worth coming back to. Together, she and Dave serve up real food, one recipe at a time.