
Snuggly Polar Bear Cookies Recipe: Cute Treats for All Ages
Sweet and cute polar bear cookies dance across holiday baking dreams, bringing winter wonderland magic into your kitchen.
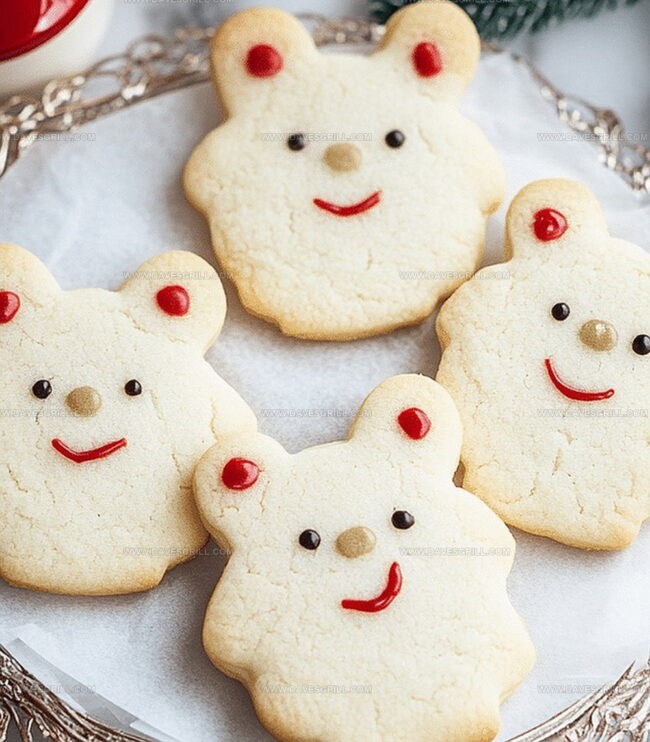
These delightful homemade polar bear cookies capture childhood whimsy with every adorable bite.
White frosting and simple decorations turn ordinary sugar cookies into charming arctic creatures that sparkle with festive cheer.
Soft and delicate, these cookies blend smooth vanilla flavor with playful design elements that delight both kids and adults.
Crafting these cute treats requires minimal baking skills and basic decorating techniques anyone can master.
Each cookie becomes a miniature edible art piece that celebrates seasonal joy and creativity.
You’ll fall in love with these delectable polar bear cookies that promise to become a cherished winter tradition.
Quick Recipe Overview

What Goes Into Polar Bear Cookies
For The Base:For The Binding And Flavor:For Decoration And Finishing:Tools That Help Build Fun Polar Bear Cookies
How to Make Polar Bear Cookies That Kids Will Love
Mix softened butter and sugar until they’re creamy and dreamy. Crack in an egg and splash of vanilla, blending until silky smooth. In another bowl, combine flour, baking powder, and a pinch of salt. Gently fold dry ingredients into the wet mixture until everything comes together nicely.
Roll dough into adorable little balls and place them on a parchment-lined baking sheet. Give each cookie a gentle press with your palm. Slide the tray into a preheated oven and bake until edges turn a delicate golden color, about 10-12 minutes.
Melt white chocolate in short bursts, stirring between each interval until it’s perfectly smooth and glossy.
Dunk each cookie into the melted white chocolate, ensuring complete coverage. While chocolate is still wet, add marshmallow ears, candy eyes, and a tiny chocolate chip nose. Get creative with optional decorative touches like sprinkles or icing details.
Let cookies rest until chocolate sets completely. For a quicker hardening process, pop them in the refrigerator for a brief chilling session. Your adorable polar bear cookies are ready to melt hearts!
Tips for Decorating and Assembling Polar Bear Cookies
Serve Polar Bear Cookies at Winter Parties
Store These Cookies in a Cool Place
FAQs
No, these polar bear cookies are beginner-friendly. They require basic baking skills and simple decorating techniques. Follow the steps carefully, and you’ll create adorable treats easily.
Use high-quality white chocolate chips or candy melts that melt smoothly. Avoid using chocolate bars, as they might not provide the right consistency for coating. Candy melts are especially good for a clean, even finish.
Yes, you can prepare the cookie dough in advance and refrigerate it for 2-3 days before baking. Once decorated, the polar bear cookies stay fresh for 3-4 days when stored in an airtight container at room temperature.
Ensure the white chocolate is melted at a low, consistent temperature. Stir frequently during melting and avoid overheating. Allow cookies to cool completely before coating, and let the chocolate set at room temperature for a smooth finish.
Print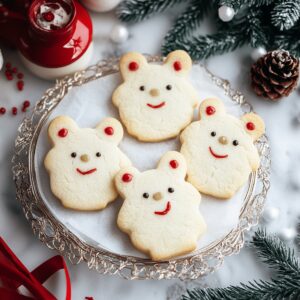
Adorable Polar Bear Cookies Recipe
- Total Time: 40 minutes
- Yield: 25 1x
Description
Classic Polar Bear Cookies invite winter magic onto your dessert plate, blending sweet chocolate and marshmallow textures. Crisp snowflake shapes and delicate white frosting bring nostalgic charm to holiday baking experiences you’ll treasure.
Ingredients
- 2 cups white chocolate chips or candy melts
- 1 ½ cups (375 ml) all-purpose flour
- ¾ cup (150 g) granulated sugar
- ½ cup (1 stick or 113 g) unsalted butter, softened
- 1 large egg
- Mini marshmallows
- Candy eyes
- 1 tsp vanilla extract
- ½ tsp baking powder
- ¼ tsp salt
- Mini chocolate chips or black edible pearls
- Optional: Red or blue sprinkles
Instructions
- Dough Preparation: Cream butter and sugar until light and fluffy, then blend in egg and vanilla until smooth and homogeneous. Separately, combine flour, baking powder, and salt, then gradually incorporate into the wet mixture to create a uniform dough.
- Cookie Formation: Preheat oven to 350F (175C) and line a baking sheet with parchment paper. Shape dough into tablespoon-sized balls, spacing them two inches apart on the sheet. Gently flatten each ball with your palm to create a slight disc shape.
- Baking Process: Slide the baking sheet into the preheated oven and bake for 10-12 minutes until edges turn delicately golden. Transfer cookies to a wire rack and allow to cool completely.
- Chocolate Coating: Melt white chocolate chips in short microwave bursts, stirring between intervals to achieve a smooth, glossy consistency. Carefully dip each cooled cookie into the melted chocolate, ensuring complete coverage.
- Decorative Detailing: While chocolate coating remains wet, attach two mini marshmallows at the top of each cookie to create bear ears. Position candy eyes and a mini chocolate chip or pearl to form the nose. Optional embellishments like sprinkles can be added for extra character.
- Finishing Touch: Let cookies rest at room temperature until the white chocolate sets completely. For quicker setting, refrigerate for 10-15 minutes before serving.
Notes
- Butter Softening Technique: Ensure butter is at room temperature but not melting for the perfect creamy base, which helps create a smoother, more uniform cookie dough.
- Chocolate Melting Precision: Use short 15-second microwave intervals and stir thoroughly between each cycle to prevent chocolate from burning or becoming grainy.
- Cookie Shaping Pro Tip: Roll dough balls consistently and flatten gently to guarantee even baking and uniform cookie appearance.
- Decorating with Patience: Work quickly when adding marshmallow ears and decorations while the white chocolate is still wet to ensure proper adhesion and a clean polar bear design.
- Prep Time: 20 minutes
- Cook Time: 20 minutes
- Category: Desserts, Snacks
- Method: Baking
- Cuisine: American
Nutrition
- Serving Size: 25
- Calories: 150
- Sugar: 10 g
- Sodium: 50 mg
- Fat: 7 g
- Saturated Fat: 4 g
- Unsaturated Fat: 2 g
- Trans Fat: 0 g
- Carbohydrates: 20 g
- Fiber: 0 g
- Protein: 1 g
- Cholesterol: 15 mg
Emily Lawson
Content Creator & Culinary Specialist
Expertise
Education
Oregon Culinary Institute
Diploma in Culinary Arts
Focus: Emphasis on farm-to-table cooking, sustainable practices, and the fusion of global flavors with traditional grilling methods.
Emily Lawson is the content creator at Daves Grill, turning tasty ideas into clear, easy recipes. Based in Portland, she trained at the Oregon Culinary Institute and loves cooking with fresh, seasonal ingredients, especially grilled veggies and global flavors.
Emily mixes food writing with hands-on cooking to bring you recipes that feel fun, not stressful. Her goal is to make every dish simple, flavorful, and worth coming back to. Together, she and Dave serve up real food, one recipe at a time.