
Playful Strawberry Santas Recipe: Jolly Holiday Treats!
Festive desserts reach new heights with these adorable strawberry santas that combine playful holiday cheer and delightful flavors.
Sweet strawberries dressed as miniature santa characters create an instant smile at any gathering.
The red and white design captures winter magic with simple ingredients and minimal effort.
Cream cheese frosting adds creamy richness to each delectable bite.
Guests will be charmed by these whimsical treats that look almost too cute to eat.
These bite-sized desserts bring pure joy to holiday celebrations and delight both children and adults alike.
Prepare to spread Christmas cheer one strawberry santa at a time.
Quick Recipe Overview
Ingredients List for Festive Strawberry Santas
For Fruit Base:For Cream and Filling:For Decorative Touches:Tools to Shape and Decorate Strawberry Santas
Instructions for Building Cute Strawberry Santas
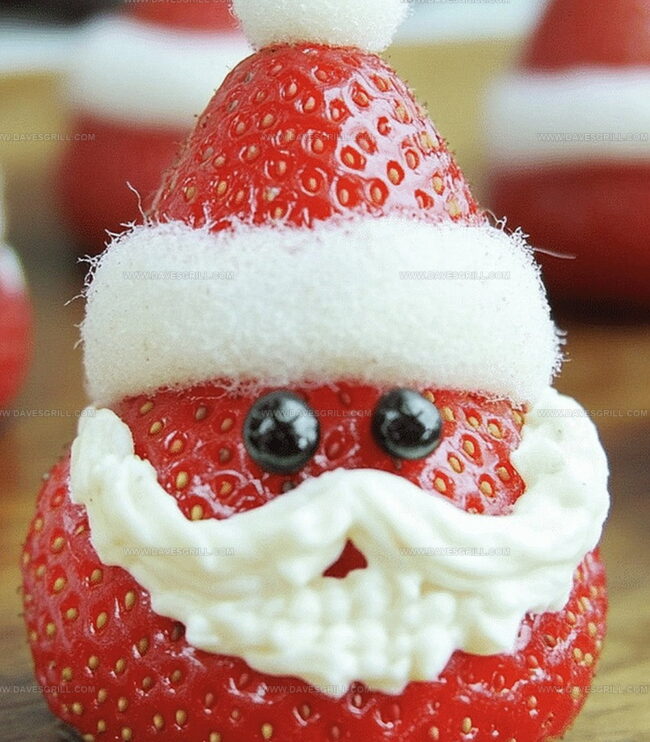
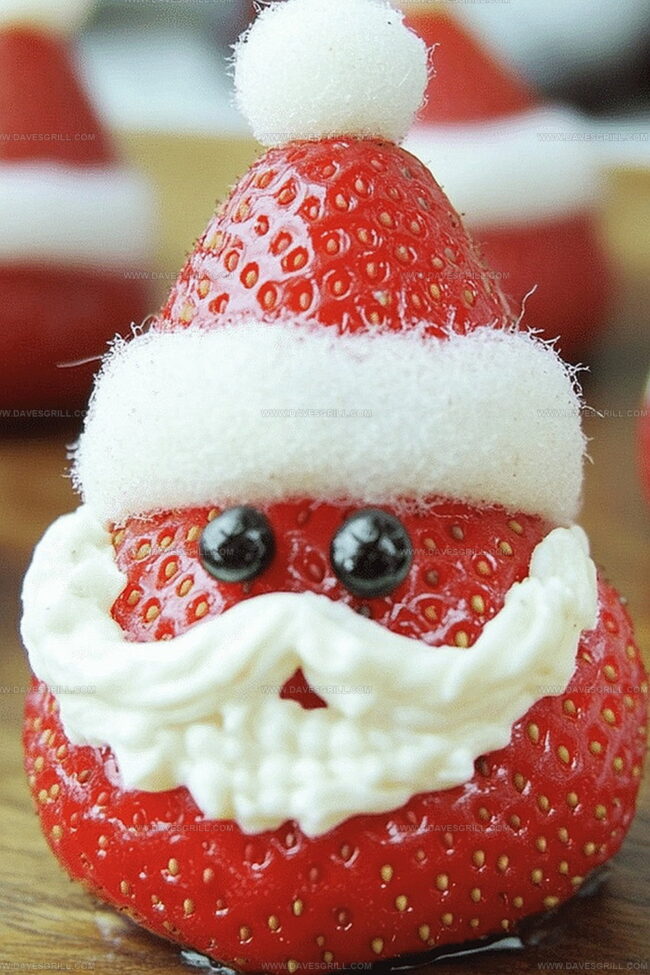
Grab plump, ripe strawberries with sturdy bases. Gently wash and dry each one. Slice off the leafy top to create a stable standing surface.
Chop the strawberry tops into cute triangular shapes. Balance these little hats perfectly atop each strawberry body, creating a whimsical silhouette.
Squeeze or spoon creamy white frosting onto the strawberry to form Santa’s signature fluffy beard. Add a small dollop on the hat’s tip for extra character.
Carefully place tiny chocolate chips as sparkling eyes. For a playful touch, add a mini red candy as a festive nose or a dot of frosting.
Sprinkle a light dusting of powdered sugar for a snowy effect. Optional: Nestle a tiny green leaf at the base for extra holiday cheer.
Arrange these charming treats on a gorgeous platter. Watch as guests smile and marvel at these adorable edible Santas.
Tricks for Sweet Detail Work on Strawberry Santas
How to Present Strawberry Santas for Holiday Charm
Best Storage Practices for Strawberry Santas
FAQs
No, they’re super easy! Even kids can help create these cute holiday treats. The process involves simple steps like cutting strawberries, adding whipped cream, and decorating with chocolate chips.
You’ll need fresh strawberries, whipped cream, mini chocolate chips, and optional extras like powdered sugar or mint leaves. Most ingredients are common and easy to find in any grocery store.
Look for large strawberries with flat tops that can stand upright. Make sure they are fresh, firm, and have a bright red color without soft spots or bruises. Uniform size helps create consistent Santa figures.
It’s best to make these just before serving. Whipped cream can get runny if left too long, and strawberries might release moisture. Prepare them close to serving time to keep them looking fresh and cute.
Print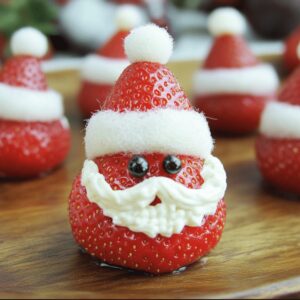
Adorable Strawberry Santas
- Total Time: 15 minutes
- Yield: 7 1x
Description
Delightful strawberry santas bring holiday cheer with whipped cream beards and chocolate chip eyes. Festive dessert delights guests with simple ingredients and charming Christmas spirit.
Ingredients
- 1 pint (500 g/17.6 oz) strawberries, fresh
- ½ cup (115 g/4 oz) cream cheese, softened
- ¼ cup (30 g/1 oz) powdered sugar, sifted
- ½ tsp vanilla extract
- mini chocolate chips (for eyes)
Instructions
- Preparation: Thoroughly cleanse strawberries, ensuring each fruit is pristine and uniformly shaped for optimal Santa creation.
- Foundation Crafting: Slice strawberry tops horizontally to establish a stable base, allowing each Santa to stand proudly on the serving platter.
- Hat Placement: Position the trimmed strawberry cap at a jaunty angle, transforming the fruit into a whimsical Santa figure.
- Cream Coating: Generously pipe whipped cream along the strawberry’s surface, crafting Santa’s iconic beard and plush suit with smooth, elegant strokes.
- Facial Features: Strategically place chocolate chips as twinkling eyes, then add a petite red candy or cream dot to represent Santa’s charming nose.
- Finishing Touches: Delicately dust the completed Strawberry Santas with powdered sugar, creating a magical snow-kissed effect, and optionally garnish with a mint or holly leaf for added festive flair.
- Presentation: Artfully arrange the completed bite-sized treats on an elegant serving dish, ready to delight guests with their playful holiday spirit.
Notes
- Select Perfect Strawberries: Choose firm, plump strawberries with uniform shape and stable base for best structural integrity and visual appeal.
- Stabilize Cutting Technique: Use a sharp, clean knife when slicing strawberry tops to ensure smooth, even cuts that allow Santas to stand perfectly upright.
- Control Cream Consistency: Whip cream to medium-stiff peaks for easier piping and better structural support when creating Santa’s beard and details.
- Temperature Matters: Chill strawberries and whipped cream beforehand to maintain firm texture and prevent melting during decoration process.
- Prep Time: 15 minutes
- Cook Time: 0 minutes
- Category: Snacks, Desserts
- Method: None
- Cuisine: American
Nutrition
- Serving Size: 7
- Calories: 74
- Sugar: 8 g
- Sodium: 50 mg
- Fat: 4 g
- Saturated Fat: 2 g
- Unsaturated Fat: 2 g
- Trans Fat: 0 g
- Carbohydrates: 9 g
- Fiber: 1 g
- Protein: 1 g
- Cholesterol: 10 mg
Emily Lawson
Content Creator & Culinary Specialist
Expertise
Education
Oregon Culinary Institute
Diploma in Culinary Arts
Focus: Emphasis on farm-to-table cooking, sustainable practices, and the fusion of global flavors with traditional grilling methods.
Emily Lawson is the content creator at Daves Grill, turning tasty ideas into clear, easy recipes. Based in Portland, she trained at the Oregon Culinary Institute and loves cooking with fresh, seasonal ingredients, especially grilled veggies and global flavors.
Emily mixes food writing with hands-on cooking to bring you recipes that feel fun, not stressful. Her goal is to make every dish simple, flavorful, and worth coming back to. Together, she and Dave serve up real food, one recipe at a time.