Festive Christmas Cherry Cheesecake Bars Recipe for Holiday Joy
Sweet memories dance through my kitchen whenever I whip up these delightful christmas cherry cheesecake bars.
Layers of creamy richness promise a festive treat that melts smoothly on your tongue.
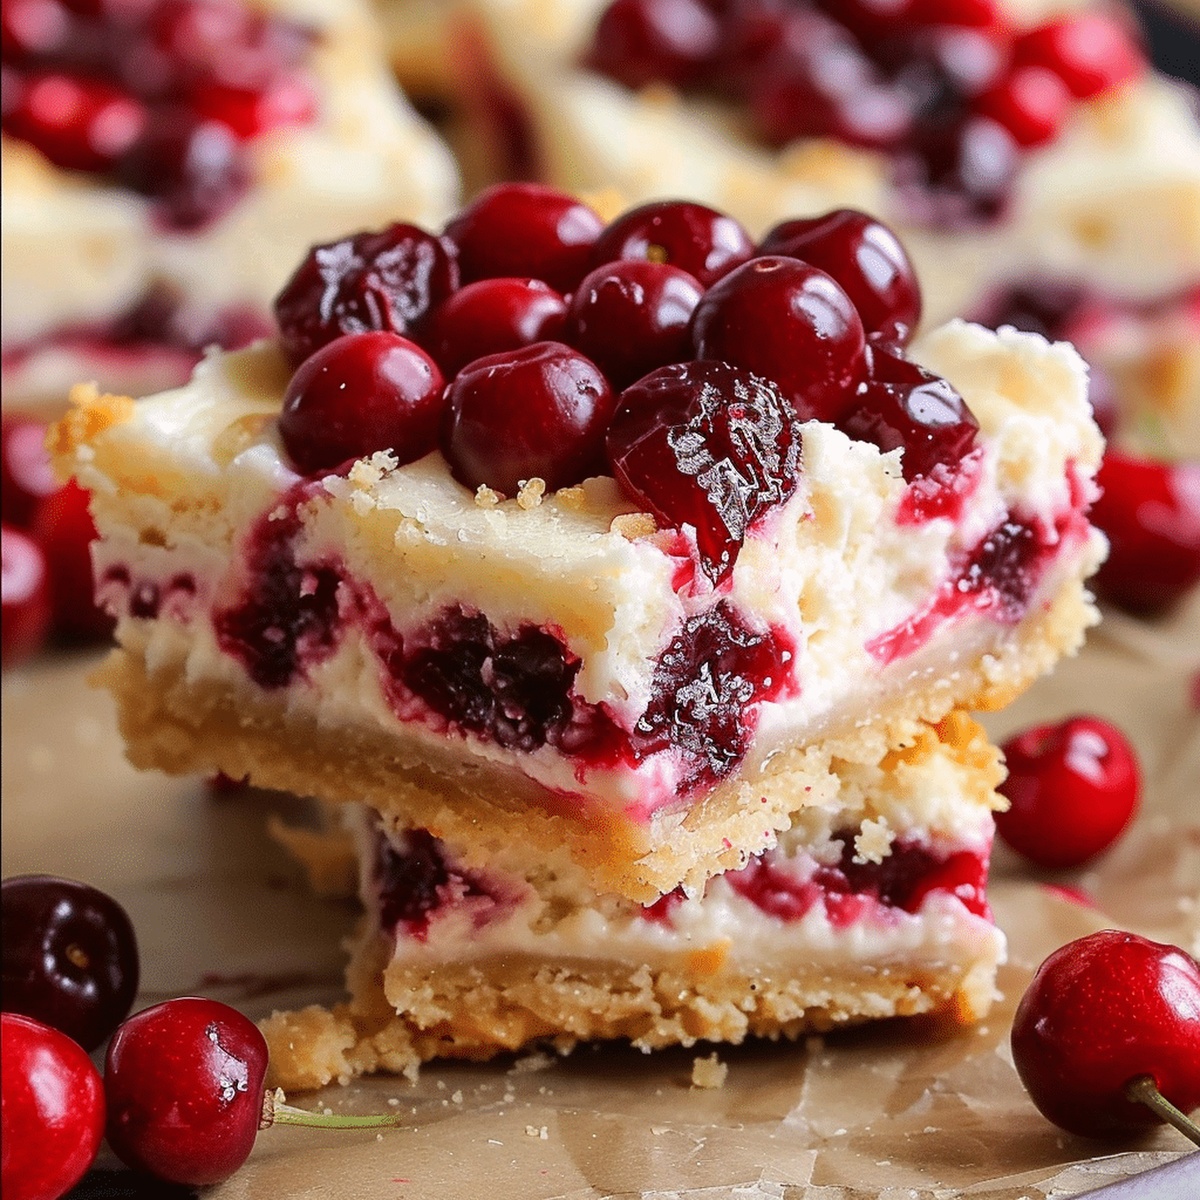
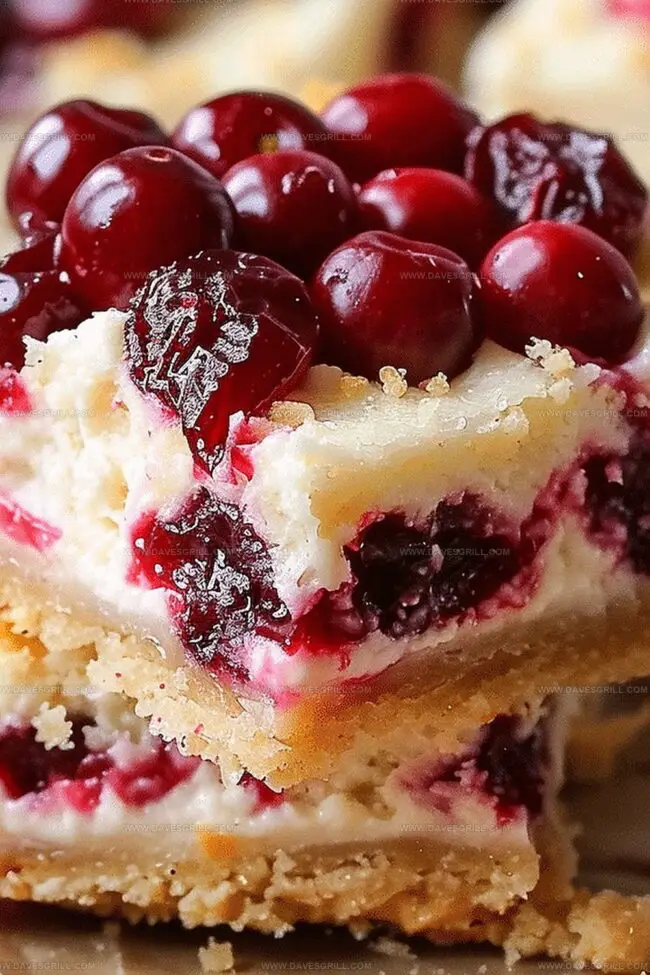
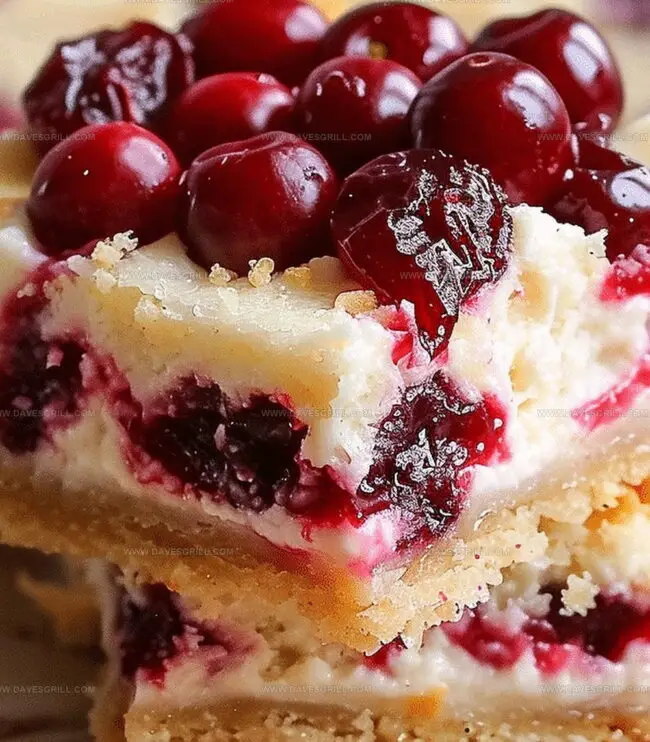
Crumbly graham cracker bases create the perfect foundation for this decadent dessert.
Bursts of bright cherries add unexpected vibrancy against the silky cream cheese backdrop.
Minimal ingredients combine to craft something truly magical for holiday gatherings.
Each slice promises a moment of pure indulgence that feels both comforting and elegant.
You’ll want to savor every single bite of this spectacular seasonal sensation.
Why You Should Try Christmas Cherry Cheesecake Bars
Ingredients for Christmas Cherry Cheesecake Bars
Crust:Cheesecake Filling:Topping:Instructions to Bake Christmas Cherry Cheesecake Bars
Step 1: Craft the Crunchy Base
Preheat oven to 350°F (175°C). Grab a 9×13-inch baking pan and line it with parchment paper. In a mixing bowl, combine:Mix until the mixture looks like damp sand. Press this golden mixture firmly into the pan, creating a smooth, even layer. Pop it in the oven and bake for 10 minutes until lightly golden. Let it cool completely.
Step 2: Whip Up Creamy Cheesecake Magic
Grab a large bowl and beat cream cheese until silky smooth. Add sugar and continue mixing. Crack eggs one by one, stirring gently after each addition. Pour in vanilla and almond extracts, blending until the mixture looks like a dreamy, cloudlike filling.
Step 3: Layer and Bake the Delightful Bars
Gently pour the creamy cheesecake mixture over the cooled crust. Use a spatula to spread it evenly, creating a perfect blanket of cheesecake goodness. Slide the pan into the oven and bake for 25-30 minutes. Look for slight golden edges and a set center.
Step 4: Crown with Cherry Glamour
Once the cheesecake has cooled completely, unleash the festive magic. Spread cherry pie filling across the top, creating a vibrant ruby-red landscape. For extra holiday cheer, sprinkle some powdered sugar and add a few fresh mint leaves.
Step 5: Chill and Slice with Excitement
Refrigerate the bars for at least 2 hours to let all the flavors mingle and set. When ready, slice into perfect squares. Each bite promises a symphony of crunchy crust, creamy filling, and sweet cherry burst.
Tips for Christmas Cherry Cheesecake Bars
Store and Reheat Christmas Cherry Cheesecake Bars Properly
What Goes Well with Christmas Cherry Cheesecake Bars
Ways to Personalize Christmas Cherry Cheesecake Bars
Print
Christmas Cherry Cheesecake Bars Recipe
- Total Time: 45 minutes
- Yield: 16 1x
Description
Sweet holiday magic unfolds with these christmas cherry cheesecake bars, blending creamy richness and festive cherry swirls. Perfectly balanced layers promise delightful indulgence you’ll savor with each delectable bite.
Ingredients
Crust Ingredients:
- 1 cup all-purpose flour
- ⅓ cup brown sugar, packed
- ⅓ cup (75 milliliters) cold salted butter, cubed
Cheesecake Filling Ingredients:
- 8 ounces (226 grams) cream cheese, softened
- ¼ cup (50 grams) granulated sugar
- 1 large egg
- 1 tablespoon lemon juice
Garnish Ingredients:
- ¼ cup (40 grams) green candied cherries, chopped
- ¼ cup (40 grams) red candied cherries, chopped
Instructions
- Craft a buttery foundation by pulverizing graham crackers with melted butter and sugar, pressing the mixture firmly into a parchment-lined baking vessel to create a crisp, golden base.
- Whip cream cheese until velvety smooth, gradually incorporating eggs and fragrant extracts to develop a silky, luxurious cheesecake batter with delicate undertones of vanilla and almond.
- Gently cascade the creamy mixture over the pre-baked crust, ensuring an even distribution that promises a uniform texture throughout the dessert.
- Slide the pan into a preheated oven, allowing the cheesecake to transform into a delicate, slightly golden landscape with a perfectly set interior that jiggles subtly when nudged.
- After cooling completely, lavish the surface with a generous blanket of vibrant cherry pie filling, creating a festive crimson canvas that promises a burst of fruity sweetness.
- Enhance the visual appeal by delicately scattering powdered sugar across the top, creating a wintry, snow-like dusting that complements the rich cherry hues.
- Refrigerate the creation for several hours, allowing the layers to meld and set, then slice into elegant squares that reveal beautiful, distinct layers of buttery crust, creamy filling, and glossy cherry topping.
Notes
- Adapt the crust by using gluten-free graham crackers for those with wheat sensitivities, ensuring everyone can enjoy this delightful dessert.
- Experiment with different fruit toppings like raspberry or blueberry to create unique seasonal variations that keep the recipe exciting and versatile.
- Create a lighter version by using reduced-fat cream cheese and replacing some sugar with a natural sweetener like stevia for a healthier alternative.
- Prevent cracking in the cheesecake layer by baking in a water bath and allowing the bars to cool gradually, which helps maintain a smooth, creamy texture.
- Prep Time: 15 minutes
- Cook Time: 30 minutes
- Category: Desserts
- Method: Baking
- Cuisine: American
Nutrition
- Serving Size: 16
- Calories: 200
- Sugar: 10 g
- Sodium: 150 mg
- Fat: 10 g
- Saturated Fat: 6 g
- Unsaturated Fat: 4 g
- Trans Fat: 0 g
- Carbohydrates: 26 g
- Fiber: 1 g
- Protein: 3 g
- Cholesterol: 30 mg
Dave Mitchell
Founder & Chief Recipe Developer
Expertise
Education
Asheville-Buncombe Technical Community College
Associate of Applied Science in Culinary Arts
Focus: Comprehensive training in culinary techniques, kitchen management, and menu planning, with a special emphasis on grilling and outdoor cooking.
Dave Mitchell is the heart behind Daves Grill, a cook, writer, and lover of all things grilled. He studied Culinary Arts at Asheville-Buncombe Technical Community College and spent years cooking, testing, and sharing recipes that actually work.
Dave started Daves Grill to keep things simple: one great recipe at a time. His food is bold, easy to follow, and made for real people with regular kitchens. From juicy steaks to quick sides, Dave’s recipes bring the heat without the hassle.