
Dreamy Butterfinger Caramel Candy Bars Recipe: Sweet Bliss
Sweet lovers crave these mouthwatering butterfinger caramel candy bars that combine rich chocolate and crunchy peanut butter in one irresistible treat.
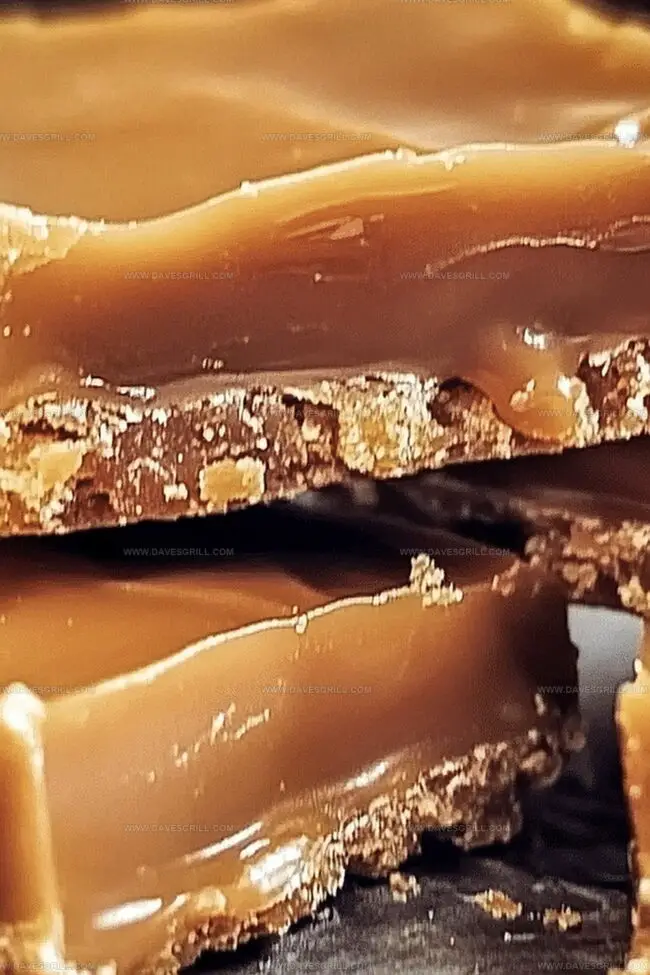
Layers of silky caramel and crushed butterfinger pieces create a perfect harmony of textures and flavors.
The homemade recipe brings together classic candy ingredients with a delightful twist.
Each bite promises a symphony of sweetness that melts perfectly on your tongue.
Chocolate enthusiasts will fall head over heels for this incredible dessert.
The combination of smooth caramel and crispy butterfinger delivers a truly indulgent experience.
Prepare to unleash a dessert that will make every chocolate and candy moment unforgettable.
Quick Recipe Overview
Butterfinger Bar Ingredient Rundown
For Crust Ingredients:For Filling Ingredients:For Topping Ingredients:Tools for Building These Caramel Candy Bars
How to Layer Candy, Caramel, and Crunch

Press graham cracker mixture firmly into baking pan, baking until golden and fragrant.
Melt butter and caramel together, stirring smoothly until blended and glossy.
Crush Butterfinger bars into delicate crumbles, scattering generously across caramel surface.
Gently melt chocolate, streaming in elegant ribbons over the layered treat.
Refrigerate candy creation until firm and perfectly sliced, allowing flavors to harmonize.
Cut into precise squares, revealing delectable layers of sweet, crunchy goodness.
Tips That Help Bars Hold Together
Serve Cut Into Squares or Bites
Store in a Cool Spot for Snappy Texture
FAQs
Press the crust mixture firmly and evenly into the pan using the back of a measuring cup or spoon. This compacts the crumbs and helps create a solid, stable base that won’t fall apart when cutting the bars.
Milk chocolate or dark chocolate work great as alternatives to semi-sweet chocolate. Just ensure you use high-quality chocolate that melts smoothly for the best results. Choose a chocolate you enjoy eating to enhance the overall flavor of the candy bars.
Use a sharp knife and cut the Butterfinger bars on a cutting board. For cleaner cuts, you can briefly chill the bars in the refrigerator first. Aim for small, consistent pieces so they distribute evenly throughout the dessert.
The caramel should turn a deep golden amber color and have a smooth, glossy appearance. When you stir it, it should coat the back of a spoon. Be careful not to burn it, as caramel can quickly go from perfect to burnt.
Print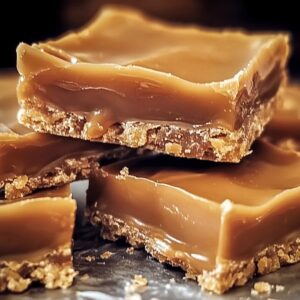
Decadent Butterfinger Caramel Candy Bars Recipe
- Total Time: 30 minutes
- Yield: 13 1x
Description
Butterfinger Caramel Candy Bars combine peanut butter crunch with silky caramel in a heavenly dessert. Sweet chocolate coating and nostalgic flavors promise a delightful treat you won’t forget.
Ingredients
- 1 ½ cups crushed butterfinger candy bars (about 6 mini bars or 3 regular-sized bars)
- 1 ½ cups semi-sweet or milk chocolate chips
- 1 cup caramel bits or soft caramels (unwrapped)
- 2 cups graham cracker crumbs
- ½ cup unsalted butter (melted)
- ¼ cup granulated sugar
- 2 tbsps heavy cream
- 1 tbsp coconut oil or vegetable oil (optional, for a shiny topping)
Instructions
- Prep Surface: Line an 8×8-inch pan with parchment paper, allowing excess to hang over edges for easy removal.
- Create Crust: Blend graham cracker crumbs with melted butter and sugar until mixture resembles damp sand, then press firmly into an even layer across the prepared pan.
- Bake Foundation: Place crust in a preheated 350°F oven for 9-10 minutes, watching for a golden transformation, then remove and cool completely.
- Develop Caramel: In a saucepan, heat butter and brown sugar, stirring continuously until the mixture becomes a smooth amber liquid. Whisk in sweetened condensed milk until the caramel achieves a silky, uniform texture.
- Layer Caramel: Pour the warm caramel evenly over the cooled graham cracker crust, ensuring complete coverage.
- Add Crunch: Crush Butterfinger candy bars into varied-sized fragments and sprinkle generously across the caramel surface.
- Chocolate Finish: Melt chocolate chips using a double boiler or microwave, stirring to prevent burning, then drizzle elegantly over the Butterfinger-studded caramel layer.
- Set and Serve: Refrigerate for 1-2 hours until completely firm, then lift from pan using parchment paper edges, slice into precise squares, and serve chilled for optimal enjoyment.
Notes
- Prevent Crumbly Crust: Press graham cracker mixture firmly and evenly to create a compact base that holds together when sliced.
- Manage Caramel Consistency: Stir continuously while heating to avoid burning and achieve smooth, silky texture without crystallization.
- Control Chocolate Melting: Use low heat or microwave in short intervals, stirring frequently to prevent chocolate from seizing or scorching.
- Optimize Chilling Time: Refrigerate for minimum 1-2 hours to ensure bars set completely, enabling clean cuts and ideal texture.
- Prep Time: 20 minutes
- Cook Time: 10 minutes
- Category: Desserts, Snacks
- Method: Baking
- Cuisine: American
Nutrition
- Serving Size: 13
- Calories: 250
- Sugar: 20 g
- Sodium: 150 mg
- Fat: 14 g
- Saturated Fat: 8 g
- Unsaturated Fat: 5 g
- Trans Fat: 0 g
- Carbohydrates: 30 g
- Fiber: 1 g
- Protein: 2 g
- Cholesterol: 30 mg
Emily Lawson
Content Creator & Culinary Specialist
Expertise
Education
Oregon Culinary Institute
Diploma in Culinary Arts
Focus: Emphasis on farm-to-table cooking, sustainable practices, and the fusion of global flavors with traditional grilling methods.
Emily Lawson is the content creator at Daves Grill, turning tasty ideas into clear, easy recipes. Based in Portland, she trained at the Oregon Culinary Institute and loves cooking with fresh, seasonal ingredients, especially grilled veggies and global flavors.
Emily mixes food writing with hands-on cooking to bring you recipes that feel fun, not stressful. Her goal is to make every dish simple, flavorful, and worth coming back to. Together, she and Dave serve up real food, one recipe at a time.