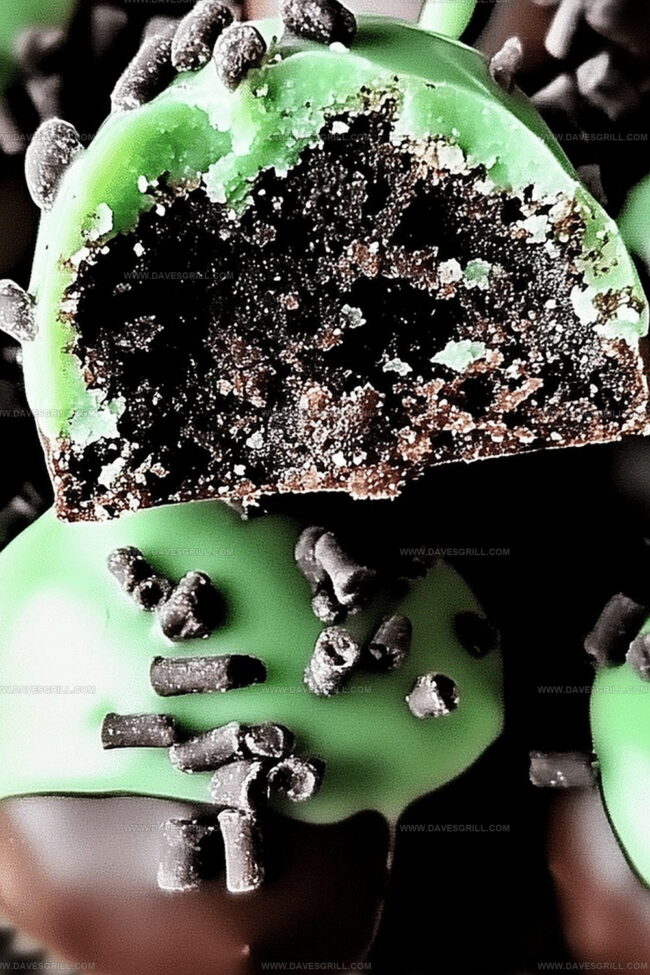
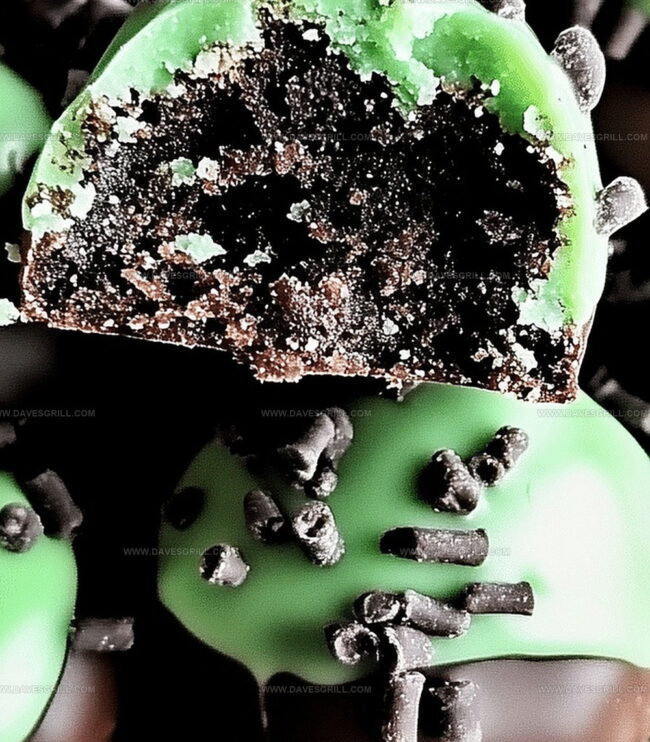
Sweet chocolate and mint combine in these irresistible Thin Mint cookie truffles that promise pure indulgence.
Crushed Girl Scout cookies meld perfectly with rich cream cheese to create an decadent no-bake treat.
The classic flavor combination delivers a delightful dessert bite that melts in your mouth.
Each truffle packs a punch of minty chocolate goodness that will satisfy any sweet craving.
These bite-sized delights come together quickly with just a few simple ingredients.
Chocolate lovers and mint enthusiasts will rejoice in this easy, crowd-pleasing recipe that transforms ordinary cookies into an extraordinary dessert.
Prepare to delight your taste buds with these heavenly truffles that are sure to impress.
Quick Recipe Overview
Prep Time: 15 minutes
Cook Time: 50 minutes
Total Time: 1 hour 5 minutes
Calories: 170 kcal
Servings: 16
Ingredients Checklist for Thin Mint Cookie Truffles
For Cookie Base:
Thin Mint Cookies: Crisp chocolate mint cookies that create the rich, decadent foundation of these truffles with their signature flavor and crunchy texture.
For Binding and Texture:
Cream Cheese: Smooth, tangy dairy ingredient that helps bind the cookie crumbs together and adds a luxurious, creamy consistency to the truffles.
For Coating and Decoration:
Chocolate Chips: High-quality melting chocolate that provides a glossy, smooth exterior and enhances the overall chocolate mint experience of the truffles.
Reserved Cookie Crumbs: Sprinkled on top for a delightful visual contrast and extra crunch, adding a professional finishing touch to the truffles.
Tools to Craft No-Bake Thin Mint Cookie Truffles
Food Processor: Essential for crushing cookies into fine crumbs quickly and evenly.
Mixing Bowl: Needed to combine cookie crumbs with cream cheese for truffle mixture.
Spatula: Helps mix ingredients thoroughly and scrape sides of the bowl.
Baking Sheet: Provides a flat surface for truffles to chill and set.
Parchment Paper: Prevents truffles from sticking and makes cleanup easier.
Small Plate: Used for rolling reserved cookie crumbs for garnish.
Instructions for Making Thin Mint Cookie Truffles
Crush Thin Mint Cookies Create a fine, sandy texture by pulsing the cookies in a food processor until they break down completely into uniform crumbs.
Mix Cream Cheese Blend softened cream cheese with the cookie crumbs until a smooth, consistent dough forms that can be easily shaped.
Roll Truffle Balls Scoop small portions of the mixture and roll between your palms to create uniform round truffle shapes, placing them on a parchment-lined tray.
Chill Truffles Place the rolled truffles in the refrigerator for about 15 minutes to firm up and help them maintain their shape.
Melt Chocolate Carefully melt chocolate in short intervals, stirring between each to ensure a smooth, glossy consistency without burning.
Dip Truffles Gently drop each chilled truffle into the melted chocolate, using a fork to lift and tap off excess coating, then place back on the parchment.
Decorate Sprinkle reserved cookie crumbs over the chocolate-covered truffles while the coating is still wet for an elegant finishing touch.
Set Chocolate Allow truffles to rest at room temperature until the chocolate hardens completely, creating a crisp outer shell.
Flavor Tips for No-Bake Thin Mint Cookie Truffles
Save a small portion of cookie crumbs for a gorgeous topping that adds texture and visual appeal to your truffles.
Refrigerate truffles for at least 30 minutes before serving to help them set perfectly and develop a delightful firm consistency.
Swap regular cream cheese with dairy-free cream cheese alternative to make these truffles suitable for lactose-intolerant or vegan guests.
These truffles can be stored in an airtight container in the freezer for up to 2 months, making them an excellent make-ahead dessert for unexpected gatherings or sudden sweet cravings.
Experiment with different chocolate coatings like white chocolate or dark chocolate to create unique flavor profiles and add personal flair to the classic Thin Mint truffle recipe.
Serve Thin Mint Cookie Truffles with Flair
Chocolate Mint Lover’s Delight: Serve these truffles on a elegant dessert platter with fresh mint leaves scattered around for a sophisticated presentation.
Chilled Party Treat: Place truffles in mini cupcake liners and arrange on a tiered serving tray for a stunning dessert buffet centerpiece that will impress guests.
Coffee Pairing Paradise: Accompany these truffles with a steaming espresso or cold brew coffee to enhance the rich chocolate and mint flavor profile, creating a delightful after-dinner indulgence.
Gifting Gourmet Option: Package these truffles in clear cellophane bags tied with green ribbon, perfect as a homemade sweet gift for friends, teachers, or holiday gatherings.
How to Store Thin Mint Cookie Truffles Like a Pro
Sprinkle the reserved 2 tablespoons of crushed Thin Mint cookie crumbs on top of the truffles for a beautiful, professional-looking finish that adds extra crunch and flavor.
Keep truffles in an airtight container in the refrigerator for up to 5 days, ensuring they maintain their perfect texture and taste. Place wax paper between layers to prevent sticking.
These truffles can be frozen for up to 3 months. Wrap them individually in plastic wrap, then store in a freezer-safe container. Thaw in the refrigerator for 2-3 hours before serving.
Prepare the truffles up to 2 days in advance, giving you stress-free time for entertaining. Simply store in the refrigerator and bring to room temperature 15 minutes before serving for the best flavor and texture.
FAQs
Are Thin Mint Cookie Truffles suitable for kids to make?
These truffles are super easy for kids to help with, especially for mixing and rolling the truffle balls. Adult supervision is recommended for using the food processor and handling melted chocolate.
Can I use a different type of cookie if I don’t have Thin Mints?
Absolutely! Oreo cookies or chocolate wafer cookies work great as substitutes. The flavor will be slightly different, but the texture will remain similar.
How long do these truffles stay fresh?
When stored in an airtight container in the refrigerator, these truffles can last up to 5-7 days. Just make sure to keep them chilled to maintain their shape and texture.
Do I need any special equipment to make these truffles?
A food processor is helpful but not mandatory. You can also crush the cookies in a zip-top bag using a rolling pin or the bottom of a heavy skillet if you don’t have a food processor.
Delightful No-Bake Thin Mint Cookie Truffles merge classic Girl Scout cookie flavors with creamy chocolate ganache. Chocolate mint lovers will adore these simple, quick dessert bites you can whip up in minutes.
Ingredients
Scale
1 box (9 oz or 255 g) thin mint cookies
4 oz (115 g) cream cheese
8 oz (225 g) semi-sweet or dark chocolate
¼ cup (40 g) crushed thin mint cookies or white chocolate drizzle or sprinkles (optional)
Instructions
Pulverize Cookies: Transform Thin Mint cookies into a fine, uniform powder using a food processor, ensuring a consistent texture throughout.
Blend Mixture: Combine cookie crumbs with cream cheese, mixing thoroughly until a cohesive, moldable consistency forms that holds together effortlessly.
Shape Truffles: Craft compact, smooth spherical truffles by gently rolling the mixture between palms, creating uniform bite-sized treats.
Prepare Chocolate Coating: Melt chocolate using a double boiler or microwave, stirring until achieving a silky, glossy liquid that flows smoothly.
Dip and Decorate: Immerse each chilled truffle into melted chocolate, using a fork to lift and drain excess coating, then immediately sprinkle reserved cookie crumbs on top for added texture and visual appeal.
Chill and Set: Transfer chocolate-coated truffles to a parchment-lined tray, refrigerate for 15-20 minutes until chocolate hardens completely and creates a crisp, glossy exterior.
Notes
Crumb Consistency: Pulse cookies finely to avoid large chunks, ensuring smooth texture and even coating.
Chill Strategically: Refrigerate truffles before and after chocolate dipping to maintain structural integrity and prevent crumbling.
Chocolate Coating Technique: Use a fork for clean, smooth chocolate coverage and minimal dripping for professional-looking truffles.
Dietary Adaptation: Substitute dairy-free cream cheese and vegan chocolate for gluten-free and plant-based alternatives, preserving original flavor profile.
Oregon Culinary Institute Diploma in Culinary Arts Focus: Emphasis on farm-to-table cooking, sustainable practices, and the fusion of global flavors with traditional grilling methods.
Emily Lawson is the content creator at Daves Grill, turning tasty ideas into clear, easy recipes. Based in Portland, she trained at the Oregon Culinary Institute and loves cooking with fresh, seasonal ingredients, especially grilled veggies and global flavors.
Emily mixes food writing with hands-on cooking to bring you recipes that feel fun, not stressful. Her goal is to make every dish simple, flavorful, and worth coming back to. Together, she and Dave serve up real food, one recipe at a time.


Emily Lawson
Content Creator & Culinary Specialist
Expertise
Education
Oregon Culinary Institute
Diploma in Culinary Arts
Focus: Emphasis on farm-to-table cooking, sustainable practices, and the fusion of global flavors with traditional grilling methods.
Emily Lawson is the content creator at Daves Grill, turning tasty ideas into clear, easy recipes. Based in Portland, she trained at the Oregon Culinary Institute and loves cooking with fresh, seasonal ingredients, especially grilled veggies and global flavors.
Emily mixes food writing with hands-on cooking to bring you recipes that feel fun, not stressful. Her goal is to make every dish simple, flavorful, and worth coming back to. Together, she and Dave serve up real food, one recipe at a time.