Heavenly Red Velvet White Chocolate Cheesecake Recipe
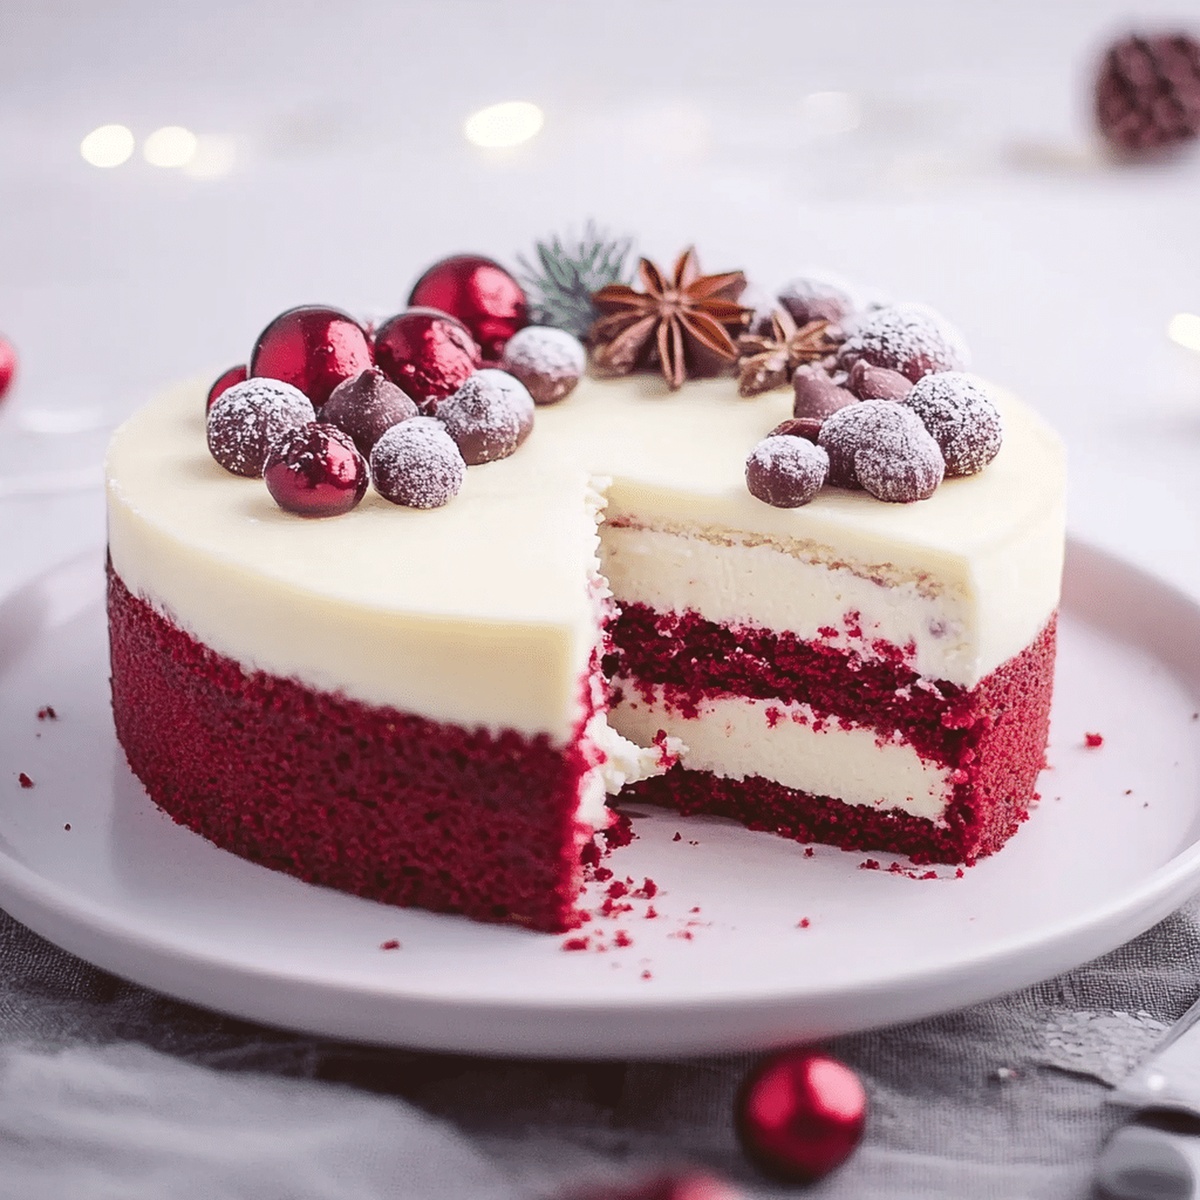
Decadent desserts have a special way of stealing hearts, and this red velvet white chocolate cheesecake recipe will absolutely melt yours.
Rich crimson layers blend seamlessly with creamy white chocolate essence.
The striking color creates an immediate visual feast for hungry eyes.
Each slice promises a luxurious experience that dances between velvety smoothness and intense flavor.
Carefully crafted textures promise a dessert that feels like a culinary masterpiece.
Soft, luscious, and elegantly presented, this cheesecake transforms an ordinary moment into something extraordinary.
You’ll want to savor every single bite of this irresistible treat.
Quick Recipe Overview
Red Velvet Cheesecake Ingredients to Grab
For Crust:For Cheesecake Filling:For Garnish and Finishing:Tools for Baking Red Velvet Cheesecake Smoothly
How to Make Red Velvet Cheesecake Shine
Crush red velvet cake into fine crumbs and blend with melted butter. Press the mixture firmly into a springform pan, creating a smooth, even foundation for your decadent dessert.
Warm your kitchen companion to a cozy 325F. This gentle heat will help transform your cheesecake into a creamy dream.
Whip cream cheese until silky smooth, folding in white chocolate for luxurious richness. Mix in eggs and vanilla, ensuring a velvety texture that will melt in your mouth.
Pour the luscious filling over the cooled crust. Slide the pan into the preheated oven and let happen. Bake until the edges are set but the center still has a gentle wobble.
After baking, let the cheesecake cool completely at room temperature. Refrigerate for several hours, allowing the flavors to mingle and the texture to become perfectly dense and dreamy.
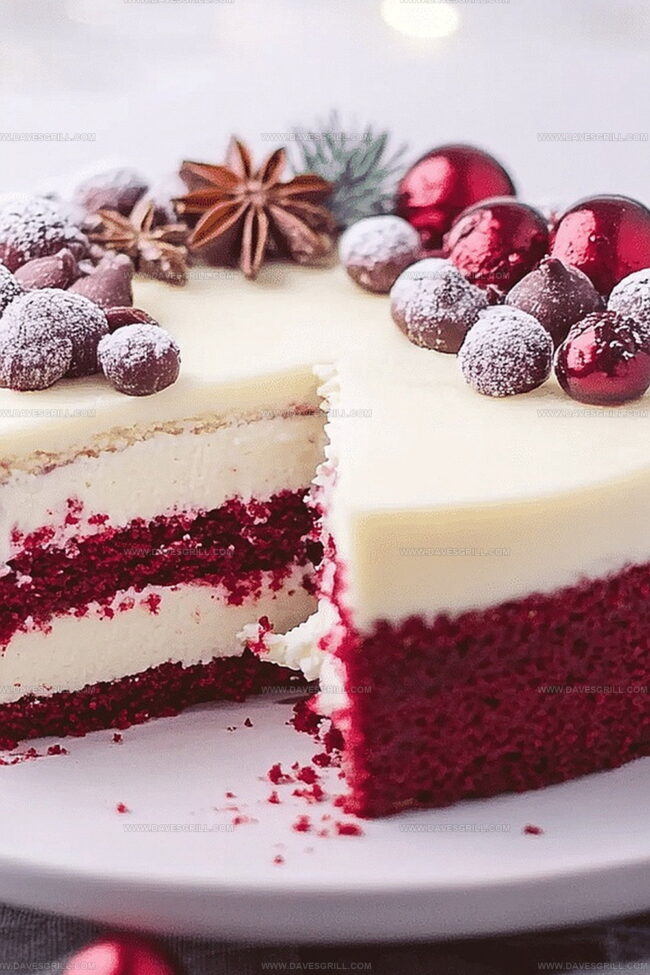
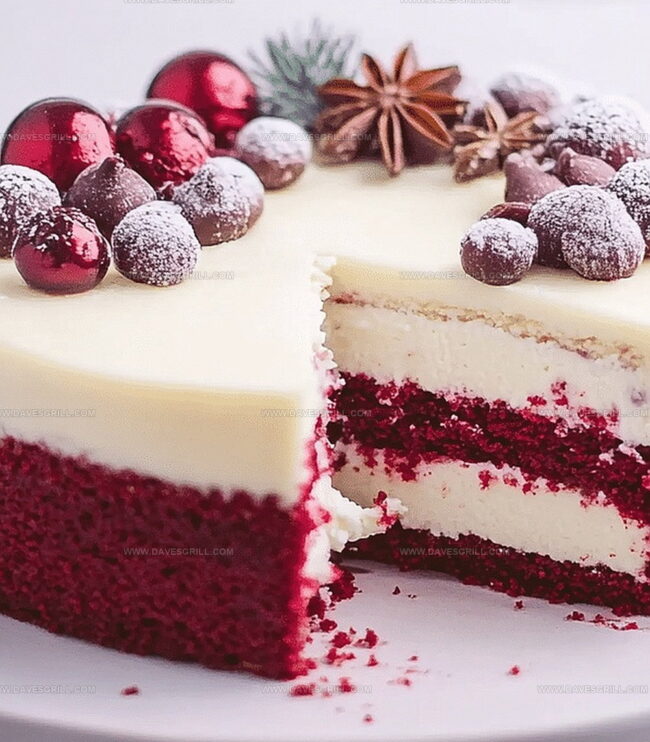
Release the springform pan, slice with a warm knife, and watch your guests swoon over this elegant dessert that marries the classic charm of red velvet with the indulgence of white chocolate cheesecake.
Tips That Add Flavor and Creaminess
Serve Red Velvet Cheesecake With Finesse
Store Cheesecake the Smart Way
FAQs
Cocoa powder combined with red food coloring creates the signature vibrant red color in red velvet recipes, providing both flavor and dramatic visual appeal.
A springform pan allows you to easily remove the entire cheesecake without damaging its delicate structure, ensuring clean slices and perfect presentation.
You can create crumbs by baking a red velvet cake and crumbling it, or use leftover cake. If making from scratch, ensure the cake is completely cooled before crumbling for the crust.
The crust should look compact and hold together when pressed, with a texture similar to wet sand. After baking for 10 minutes, it should feel slightly firm to the touch.
Print
Dreamy Red Velvet White Chocolate Cheesecake Recipe
- Total Time: 1 hour 20 minutes
- Yield: 13 1x
Description
Red Velvet White Chocolate Cheesecake blends luxurious Southern dessert traditions with creamy New York-style indulgence. Rich chocolate layers and tangy cream cheese create a perfect balance of flavors for ultimate dessert enjoyment.
Ingredients
- 3 packages (8 oz/225 g each) cream cheese, softened
- 1 cup (200 g) granulated sugar
- 3 large eggs
- 8 oz (225 g) white chocolate, melted and slightly cooled
- ½ cup (120 ml) sour cream
- 1 tsp vanilla extract
- 1 ½ cups (150 g) red velvet cake crumbs
- ¼ cup (60 g) unsalted butter, melted
- Whipped cream
- Red velvet crumbs or sprinkles
- Shaved white chocolate
Instructions
- Preparation: Preheat the oven to 325F (160C) with the rack centered, ensuring uniform heat circulation. Line a 9-inch springform pan with parchment paper and lightly grease the sides with butter or cooking spray.
- Crust Formation: Blend red velvet cake crumbs with melted butter until the mixture resembles moist, fine sand. Firmly press the crumb mixture into the pan’s bottom, creating a uniform, compact base layer. Bake the crust for 10 minutes until it sets and develops a subtle golden tone.
- Cooling Phase: Remove the crust from the oven and allow it to cool completely at room temperature, creating a stable foundation for the cheesecake filling.
- Filling Preparation: In a large mixing bowl, blend cream cheese until smooth and creamy. Gradually incorporate sugar, ensuring no lumps remain. Gently fold in white chocolate, eggs, and vanilla extract, mixing until the ingredients are fully integrated and the texture is silky.
- Assembly and Baking: Pour the cheesecake filling over the cooled crust, spreading it evenly. Place the springform pan in a water bath to prevent cracking and promote even baking. Bake for 60-70 minutes, or until the center is slightly jiggly but set.
- Chilling and Serving: Once baked, turn off the oven and leave the cheesecake inside with the door slightly ajar for 1 hour. Remove and cool completely at room temperature, then refrigerate for at least 4 hours or overnight before serving. Garnish with white chocolate shavings or fresh berries if desired.
Notes
- Optimize Oven Placement: Center the rack precisely for uniform heat circulation, preventing uneven baking and potential hot spots that could compromise the cheesecake’s texture.
- Prevent Crust Crumbling: Press cake crumbs firmly and evenly, ensuring a compact base that holds together when slicing and doesn’t fall apart during serving.
- Control Moisture Balance: Allow crust to cool completely before adding filling, preventing soggy bottom and maintaining a crisp, clean texture that supports the creamy cheesecake layer.
- Master Crumb Consistency: Mix cake crumbs with melted butter until they resemble damp sand, creating a binding effect that helps the crust hold its shape without becoming too dense or dry.
- Prep Time: 20 minutes
- Cook Time: 1 hour
- Category: Desserts
- Method: Baking
- Cuisine: American
Nutrition
- Serving Size: 13
- Calories: 432
- Sugar: 31 g
- Sodium: 300 mg
- Fat: 30 g
- Saturated Fat: 18 g
- Unsaturated Fat: 10 g
- Trans Fat: 0 g
- Carbohydrates: 34 g
- Fiber: 1 g
- Protein: 6 g
- Cholesterol: 95 mg
Emily Lawson
Content Creator & Culinary Specialist
Expertise
Education
Oregon Culinary Institute
Diploma in Culinary Arts
Focus: Emphasis on farm-to-table cooking, sustainable practices, and the fusion of global flavors with traditional grilling methods.
Emily Lawson is the content creator at Daves Grill, turning tasty ideas into clear, easy recipes. Based in Portland, she trained at the Oregon Culinary Institute and loves cooking with fresh, seasonal ingredients, especially grilled veggies and global flavors.
Emily mixes food writing with hands-on cooking to bring you recipes that feel fun, not stressful. Her goal is to make every dish simple, flavorful, and worth coming back to. Together, she and Dave serve up real food, one recipe at a time.