
Dreamy Gooey Chocolate Peanut Butter Rice Krispies Roll Recipe
Delight awaits with this irresistible chocolate peanut butter rice krispies roll that combines classic comfort with decadent flavor.
Sweet and salty notes dance together in a treat that promises pure indulgence.
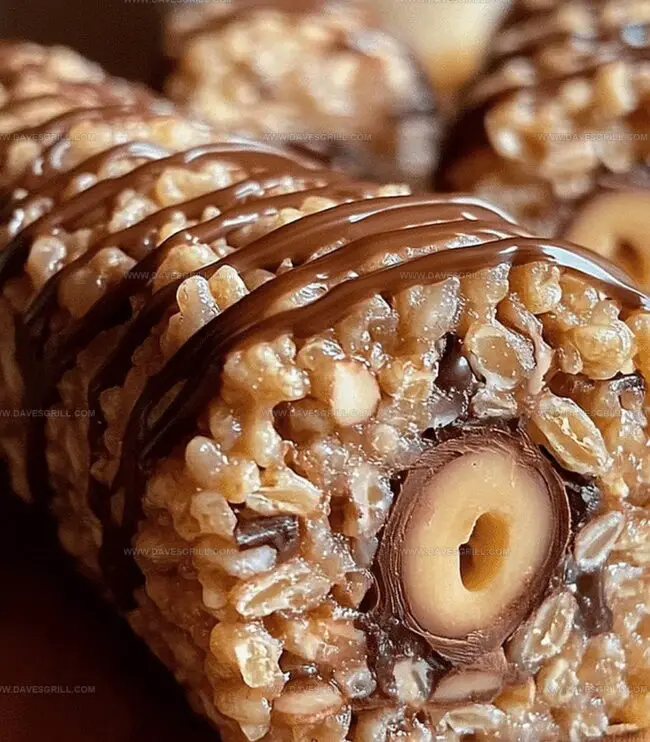
Crispy rice cereal provides the perfect crunch, while melted chocolate and creamy peanut butter create an irresistible coating.
Every bite delivers a symphony of textures that melt smoothly on your tongue.
The no-bake recipe comes together quickly, making it an ideal dessert for spontaneous cravings.
Simple ingredients transform into a spectacular confection that’ll have everyone asking for seconds.
Prepare to savor a dessert that’s sure to become your new favorite sweet obsession.
Quick Recipe Overview

Rice Krispies Roll Ingredient Guide
For Peanut Butter Base:For Chocolate Layer:For Rolling and Presentation:Tools to Shape and Slice That Sweet Roll
Make Chocolate PB Krispie Rolls Without a Hitch
Mix peanut butter, butter, sugar, and corn syrup in a saucepan over medium heat. Stir until everything melts together smoothly. Remove from heat and fold in Rice Krispies, coating each piece completely.
Lay out parchment paper on a clean surface. Spread the Rice Krispies mixture into an even rectangular shape. Use your hands or a rolling pin to flatten and smooth the surface.
Melt chocolate chips and butter in a microwave, stirring between short intervals until glossy and completely liquid. Work carefully to prevent burning.
Pour melted chocolate over the Rice Krispies rectangle. Allow it to cool slightly but remain flexible. Use the parchment paper as a guide to help roll the mixture into a tight log, starting from the shorter side.
Wrap the rolled dessert in parchment paper. Refrigerate for one hour until firm and set. Once chilled, cut into bite-sized rounds ready for enjoying.
Tips That Make the Texture Spot-On
Serve These Sweet Rolls Like a Dessert Pro
Store Your Krispie Rolls to Keep Them Crunchy
FAQs
Lightly grease the parchment paper with cooking spray or butter before spreading the Rice Krispies mixture to ensure easy removal and clean cutting.
Yes, you can substitute peanut butter with almond butter or cashew butter for a similar texture and flavor profile.
Use a double boiler or microwave in short 15-20 second intervals, stirring between each interval to prevent burning and ensure a smooth chocolate layer.
Aim for an even layer about 1/4 to 1/2 inch thick, which allows for easy rolling and a balanced texture between the Rice Krispies and chocolate.
Print
Gooey Chocolate Peanut Butter Rice Krispies Roll Recipe
- Total Time: 1 hour 15 minutes
- Yield: 13 1x
Description
Chocolate peanut butter rice krispies roll brings nostalgic dessert memories from childhood kitchens. Sweet chocolate and creamy peanut butter combine in a delightful treat you’ll savor with pure joy.
Ingredients
- 3 cups (90 g/3.2 oz) rice krispies cereal
- ½ cup (120 g/4.2 oz) creamy peanut butter
- 1 cup (175 g/6.2 oz) semi-sweet chocolate chips
- ¼ cup (60 g/2.1 oz) unsalted butter
- 2 tbsps (30 g/1 oz) unsalted butter
- ½ cup (100 g/3.5 oz) granulated sugar
- ¼ cup (60 ml/2 fl oz) light corn syrup or honey
Instructions
- Melt Base: Combine peanut butter, butter, sugar, and corn syrup in a saucepan over medium heat, stirring until the mixture becomes smooth and uniform.
- Incorporate Cereal: Remove from heat and gently fold Rice Krispies into the warm liquid, ensuring complete and even coating of each cereal piece.
- Shape Mixture: Spread the coated cereal onto parchment paper, pressing and smoothing into a precise rectangular shape using hand pressure or a rolling pin.
- Chocolate Layer: Microwave chocolate chips and butter in short intervals, stirring between each to create a glossy, smooth chocolate mixture.
- Layer and Roll: Spread melted chocolate over the Rice Krispies rectangle, then carefully roll from the shorter edge into a tight cylindrical form using the parchment paper as a guide.
- Chill and Set: Wrap the rolled log completely in parchment paper and refrigerate for at least one hour to firm and stabilize the dessert.
- Serve: Remove from refrigerator and slice into half-inch rounds, revealing the beautiful layered interior ready to be enjoyed.
Notes
Melt Ingredients Carefully: Control heat to prevent burning or separating peanut butter mixture, ensuring smooth, even consistency without scorching.
Maintain Consistent Pressure: Use even, gentle pressure when rolling to create tight, uniform cylindrical shape without cracking or breaking the delicate layers.
Chill Thoroughly: Refrigerate at least one hour to allow chocolate and peanut butter layers to set completely, enhancing structural integrity and flavor melding.
Customize Dietary Options: Swap traditional ingredients with gluten-free Rice Krispies, dairy-free chocolate, or natural peanut butter for alternative dietary needs without compromising texture or taste.
- Prep Time: 15 minutes
- Cook Time: 1 hour
- Category: Snacks, Desserts
- Method: Blending
- Cuisine: American
Nutrition
- Serving Size: 13
- Calories: 186
- Sugar: 10 g
- Sodium: 60 mg
- Fat: 9 g
- Saturated Fat: 4 g
- Unsaturated Fat: 5 g
- Trans Fat: 0 g
- Carbohydrates: 24 g
- Fiber: 1 g
- Protein: 3 g
- Cholesterol: 8 mg
Emily Lawson
Content Creator & Culinary Specialist
Expertise
Education
Oregon Culinary Institute
Diploma in Culinary Arts
Focus: Emphasis on farm-to-table cooking, sustainable practices, and the fusion of global flavors with traditional grilling methods.
Emily Lawson is the content creator at Daves Grill, turning tasty ideas into clear, easy recipes. Based in Portland, she trained at the Oregon Culinary Institute and loves cooking with fresh, seasonal ingredients, especially grilled veggies and global flavors.
Emily mixes food writing with hands-on cooking to bring you recipes that feel fun, not stressful. Her goal is to make every dish simple, flavorful, and worth coming back to. Together, she and Dave serve up real food, one recipe at a time.