Dreamy Cloud-Like Heavenly Cream Puff Cake Recipe
Baking a delectable cream puff cake sparks joy in every home baker’s heart.
This irresistible cream puff cake recipe promises a delightful blend of light, airy pastry and rich, smooth cream.
Layers of delicate choux pastry create a stunning dessert that looks as incredible as it tastes.
Professional pastry chefs would marvel at its elegant simplicity and mouthwatering texture.
Each bite offers a perfect balance of crisp pastry and velvety cream filling.
The magic happens when simple ingredients transform into a show-stopping dessert that will impress everyone at the table.
Prepare to fall in love with this classic French-inspired treat that turns an ordinary day into a sweet celebration.
Quick Recipe Overview
Cream Puff Cake Ingredient Rundown
For The Base:For The Creamy Filling:For The Finishing Touches:Tools for a Light Yet Rich Cream-Filled Cake
Layer Choux, Cream, and Chocolate to Perfection
Crank your oven to a toasty 400F and give your baking dish a quick grease coating.
Melt butter and water together in a saucepan, bringing it to a rolling boil. Yank it off the heat and whisk in flour until a gorgeous dough ball forms.
Let the mixture cool down a bit. Crack eggs in one at a time, whisking thoroughly after each addition until your dough looks silky and glossy.
Spread the dough smoothly across your prepared pan. Slide into the oven and bake for 25-30 minutes until it transforms into a puffy, golden masterpiece. Let it cool completely.
Whip the cream cheese until it’s super smooth and creamy in a large mixing bowl.
Slowly blend milk and pudding mix into the cream cheese, beating until the mixture becomes luxuriously thick.
Gently fold in whipped topping to create an airy, delightful filling.
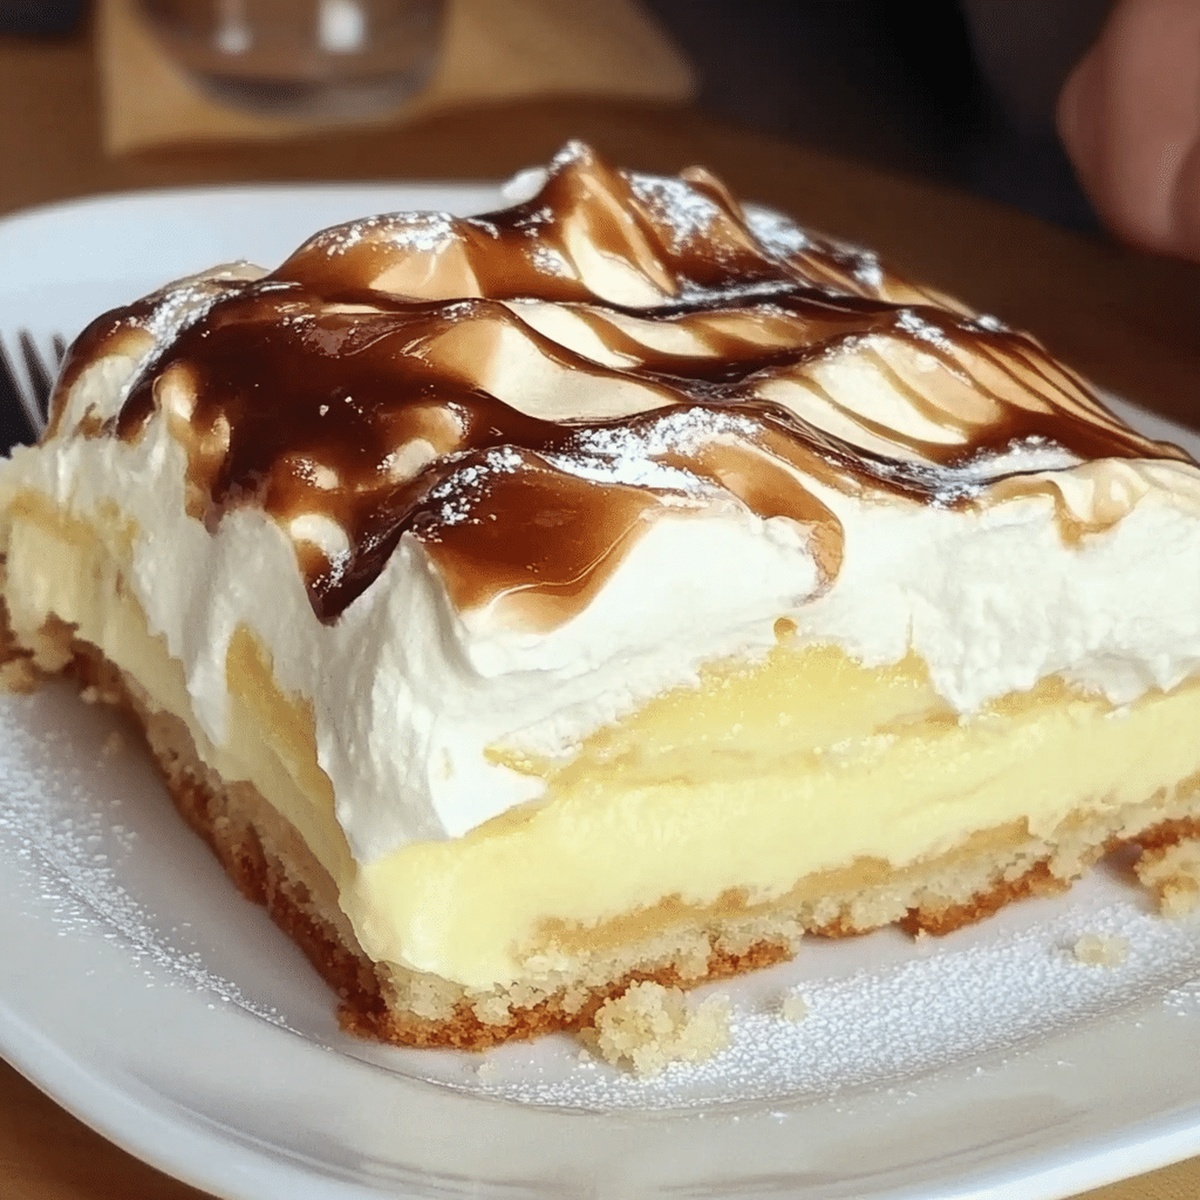
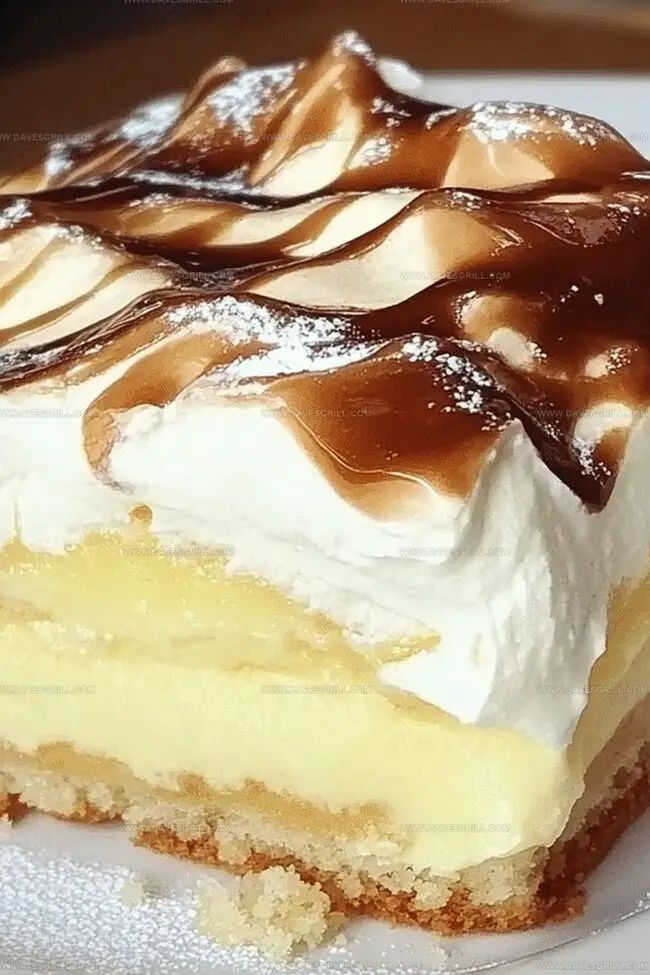
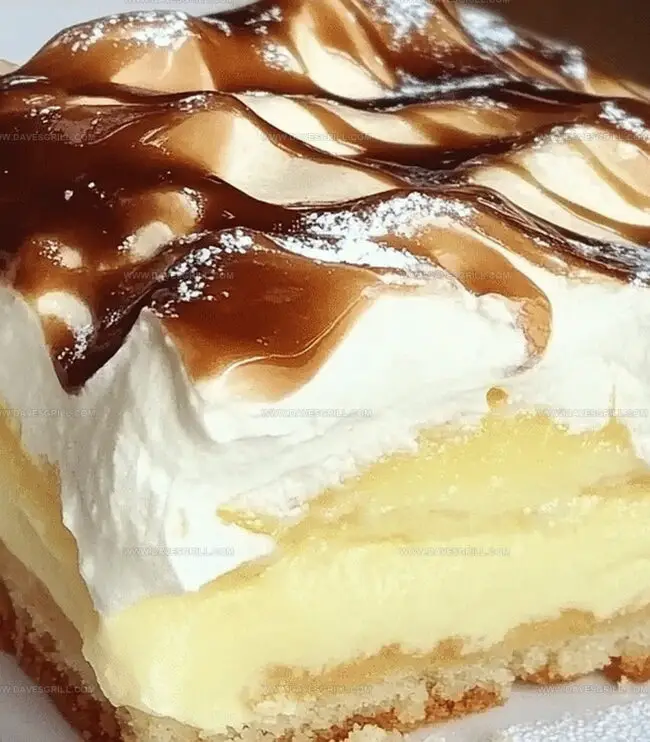
Spread the creamy mixture evenly over your cooled crust. Drizzle chocolate syrup across the top for extra decadence.
Refrigerate for at least 2 hours. Slice into squares and serve cold. Optional: Dust with a snowfall of powdered sugar.
Tips for Puffs That Don’t Collapse
Serve Cold and Sliced for Dessert
Store in the Fridge to Keep It Set
FAQs
The cake has a unique texture with a crispy, golden-brown base that’s similar to a cream puff pastry, topped with a smooth, creamy filling that’s light and fluffy.
You can substitute the all-purpose flour with a gluten-free flour blend, but the texture might slightly change from the original recipe.
This cream puff cake is moderately easy to make. The dough requires careful mixing, but the steps are straightforward, making it a good recipe for intermediate home bakers.
You can experiment with different pudding flavors like vanilla, chocolate, or pistachio, and use matching chocolate drizzles to complement the pudding flavor.
Print
Heavenly Cream Puff Cake Recipe
- Total Time: 1 hour
- Yield: 13 1x
Description
Classic cream puff cake combines delicate French pastry with rich custard layers, creating a symphony of textures and flavors. Elegant dessert perfection awaits you with each sublime, creamy bite.
Ingredients
- 1 cup (125 g) all-purpose flour
- 4 large eggs
- ½ cup (115 g) unsalted butter
- 1 cup (240 ml) water
- 2 packages (3.4 oz or 96 g) instant vanilla pudding mix
- 2 cups (480 ml) cold milk
- 8 oz (225 g) cream cheese (softened)
- 1 cup (240 ml) whipped topping (or homemade whipped cream)
- ½ cup (120 ml) chocolate syrup or melted chocolate
- Powdered sugar for dusting (optional)
Instructions
- Prepare Oven: Preheat to 400F (200C) and grease a 9×13-inch baking dish with a thin layer of butter or cooking spray.
- Create Pastry Base: In a saucepan, combine butter and water, bringing to a rolling boil. Remove from heat and vigorously mix in flour until a unified dough forms. Allow slight cooling, then integrate eggs one at a time, mixing thoroughly to create a glossy, smooth pastry foundation.
- Bake Pastry: Spread the dough evenly across the prepared baking dish, ensuring uniform thickness. Bake for 25-30 minutes until puffy and golden-brown. Remove and cool completely.
- Prepare Cream Filling: In a mixing bowl, whip cream cheese until smooth. Gradually blend in milk and pudding mix, creating a thick, lump-free cream. Fold in whipped topping gently to maintain a light, airy texture.
- Assemble Dessert: Once pastry base is completely cooled, spread cream filling evenly across the surface. Drizzle with chocolate syrup or melted chocolate in an artistic pattern.
- Chill and Serve: Refrigerate for at least 2 hours to set and meld flavors. Before serving, slice into neat squares and optionally dust with a light sprinkle of powdered sugar for an elegant presentation.
Notes
- Flour Power: Add flour swiftly and mix vigorously to prevent lumps and achieve a smooth, cohesive dough base.
- Egg Integration: Add eggs one at a time, mixing thoroughly to create a glossy, stable pastry foundation that ensures structural integrity.
- Temperature Timing: Watch the baking process closely; golden-brown color indicates perfect doneness without overcooking.
- Cream Consistency: Blend cream cheese and pudding mixture until completely smooth, eliminating any potential lumps for a silky texture.
- Prep Time: 30 minutes
- Cook Time: 30 minutes
- Category: Desserts
- Method: Baking
- Cuisine: French
Nutrition
- Serving Size: 13
- Calories: 250
- Sugar: 12 g
- Sodium: 150 mg
- Fat: 15 g
- Saturated Fat: 9 g
- Unsaturated Fat: 5 g
- Trans Fat: 0 g
- Carbohydrates: 25 g
- Fiber: 1 g
- Protein: 4 g
- Cholesterol: 70 mg
Emily Lawson
Content Creator & Culinary Specialist
Expertise
Education
Oregon Culinary Institute
Diploma in Culinary Arts
Focus: Emphasis on farm-to-table cooking, sustainable practices, and the fusion of global flavors with traditional grilling methods.
Emily Lawson is the content creator at Daves Grill, turning tasty ideas into clear, easy recipes. Based in Portland, she trained at the Oregon Culinary Institute and loves cooking with fresh, seasonal ingredients, especially grilled veggies and global flavors.
Emily mixes food writing with hands-on cooking to bring you recipes that feel fun, not stressful. Her goal is to make every dish simple, flavorful, and worth coming back to. Together, she and Dave serve up real food, one recipe at a time.