
Jolly Little Debbie Christmas Cake Balls Recipe: Festive Sweet Bites
Sweet memories of little debbie christmas cake balls often spark joy during holiday gatherings.
Nostalgia drives us toward recreating classic treats with personal twists.
Childhood favorites can become magical when reimagined through creative baking techniques.
Holiday desserts connect generations through shared culinary experiences.
Festive treats like these bring warmth and cheer to winter celebrations.
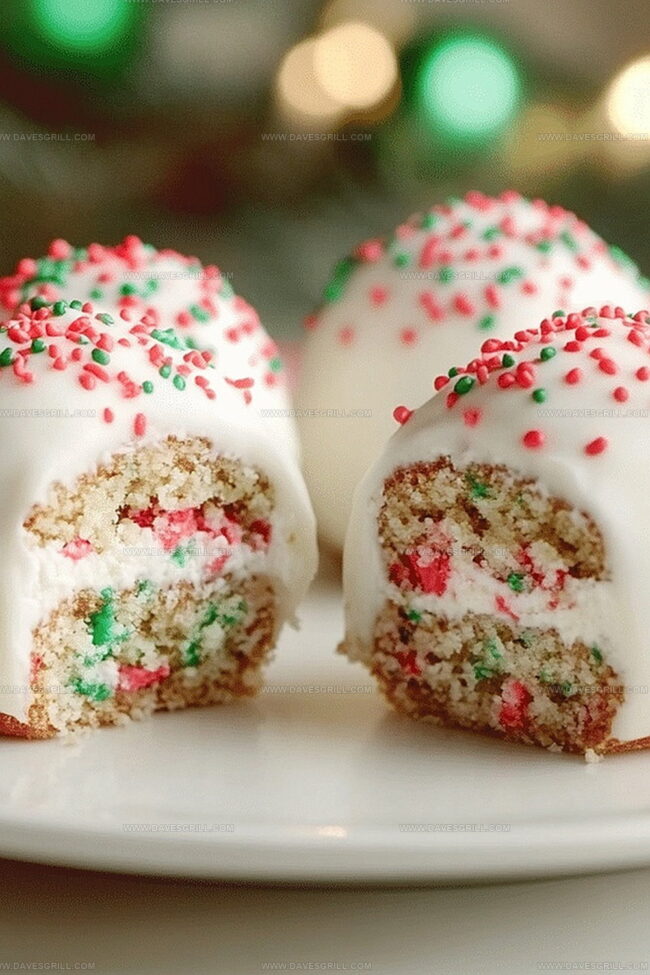
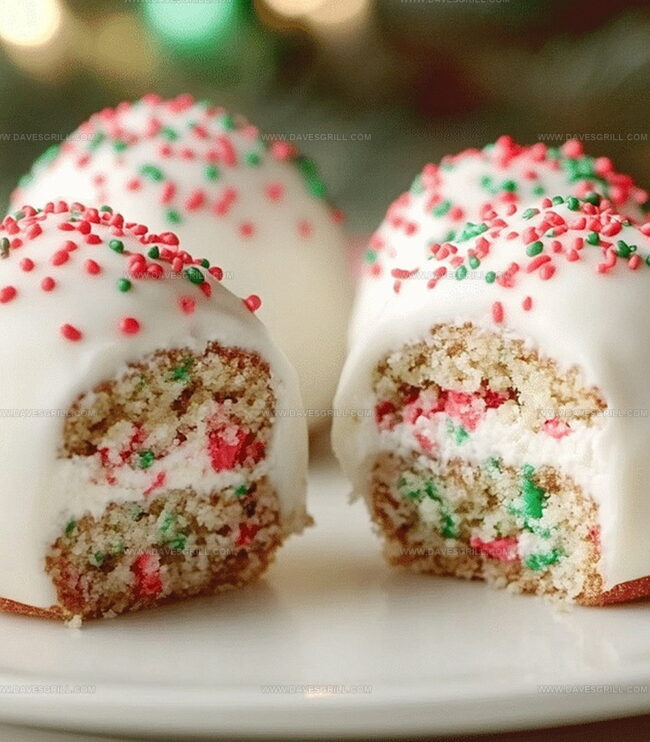
Soft cake crumbles mixed with creamy frosting create irresistible bite-sized delights.
The combination of classic flavors and playful presentation makes these cake balls a perfect seasonal indulgence.
Gather your ingredients and let the festive baking adventure begin!
Most Loved Things About Little Debbie Cake Balls
Key Ingredients for Cake Ball Success
Base Ingredients:Coating and Decoration:Optional Equipment:Assembly Guide for Cake Balls
Step 1: Crush the Cakes
Grab the Little Debbie Christmas Tree Cakes and pulverize them into fine crumbs. Use your hands or a food processor to break down the cakes completely. You want a sandy-like texture that will hold together easily.
Step 2: Blend with Creamy Goodness
Toss the cake crumbs into a mixing bowl and add softened cream cheese. Work the ingredients together using your hands or a spatula until they form a cohesive, moldable mixture. The texture should be sticky enough to hold a ball shape.
Step 3: Shape Into Delightful Spheres
Roll the cake and cream cheese mixture into small, uniform balls. Each ball should be about the size of a golf ball. Arrange the formed balls on a parchment-lined baking sheet, then pop them in the refrigerator to chill and firm up for about 30 minutes.
Step 4: Chocolate Dipping Extravaganza
Melt your chosen chocolate using these methods:Dip each chilled cake ball completely into the melted chocolate. Use a fork or dipping tool to ensure even coverage and allow excess chocolate to drip off.
Step 5: Sprinkle Some Holiday Magic
While the chocolate coating is still wet, shower the cake balls with festive sprinkles. Choose holiday-themed or colorful options to make them extra special.
Step 6: Let the Chocolate Set
Place the decorated cake balls on a clean parchment sheet. Allow them to sit at room temperature or refrigerate until the chocolate hardens completely. Once set, theyre ready to devour and share!
Finishing Tips for Cake Balls
Tips to Store Christmas Cake Balls Easily
Snack Matches for Cake Balls
Other Twists for These Christmas Cake Balls
Print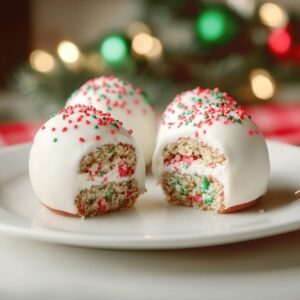
Little Debbie Christmas Cake Balls Recipe
- Total Time: 45 minutes
- Yield: 12 1x
Description
Holiday magic meets nostalgic sweetness in these little Debbie Christmas cake balls, blending childhood memories with festive cheer. Creamy cake crumbles, rich frosting, and festive sprinkles create a delightful treat you cannot resist.
Ingredients
Main Ingredients:
- 6 Little Debbie Christmas Tree Cakes
- 4 ounces (113 grams) cream cheese, softened
Coating Ingredients:
- 1 cup white chocolate chips or candy melts
Optional Ingredients:
- 1 tablespoon (15 milliliters) coconut oil or vegetable shortening
Decoration:
- Holiday sprinkles
Instructions
- Deconstruct the festive Little Debbie Christmas Tree Cakes into fine, uniform crumbs using gentle hand crushing or a pulse setting on a food processor, ensuring a consistent texture throughout.
- Transfer the cake crumbles into a spacious mixing vessel and incorporate softened cream cheese, thoroughly blending with fingertips or a sturdy utensil until the mixture achieves a cohesive, moldable consistency.
- Gently shape the consolidated mixture into compact, uniform spheres approximately one inch in diameter, applying consistent pressure to maintain structural integrity.
- Arrange the freshly formed orbs on a parchment-lined tray, creating a neat grid, then refrigerate for approximately half an hour to stabilize their structure and enhance handling capabilities.
- Carefully melt chocolate chips using a microwave-safe container, employing intermittent heating and frequent stirring to prevent scorching and achieve a smooth, glossy liquid.
- Submerge each chilled cake sphere into the molten chocolate, utilizing a fork to ensure complete coverage and elegant drainage of excess coating.
- Immediately embellish the chocolate-enrobed balls with festive holiday sprinkles while the coating remains liquid, allowing decorative elements to adhere seamlessly.
- Position the adorned confections in a cool environment, permitting the chocolate shell to solidify completely, transforming them into delectable, celebration-ready treats.
Notes
- Crumb Consistency Matters: Ensure the Little Debbie cakes are finely crumbled for a smooth, uniform texture that helps the cake balls hold together perfectly.
- Cream Cheese Temperature: Use room temperature cream cheese to blend seamlessly with the cake crumbs, creating a creamy, cohesive mixture that’s easy to shape.
- Chill for Success: Refrigerating the cake balls before coating helps them maintain their shape and prevents crumbling during the chocolate dipping process.
- Chocolate Coating Hack: Keep the melted chocolate smooth by adding a tablespoon of coconut oil or vegetable shortening, which prevents clumping and creates a glossy finish.
- Dietary Modifications: Swap regular chocolate for dairy-free alternatives to make these treats suitable for vegan or lactose-intolerant guests.
- Storage Tip: Store cake balls in an airtight container in the refrigerator for up to 5 days, allowing the flavors to meld and the texture to remain perfect.
- Prep Time: 15 minutes
- Cook Time: 30 minutes
- Category: Desserts, Snacks
- Method: Blending
- Cuisine: American
Nutrition
- Serving Size: 12
- Calories: 140
- Sugar: 12 g
- Sodium: 50 mg
- Fat: 7 g
- Saturated Fat: 4 g
- Unsaturated Fat: 3 g
- Trans Fat: 0 g
- Carbohydrates: 18 g
- Fiber: 0 g
- Protein: 1 g
- Cholesterol: 10 mg
Dave Mitchell
Founder & Chief Recipe Developer
Expertise
Education
Asheville-Buncombe Technical Community College
Associate of Applied Science in Culinary Arts
Focus: Comprehensive training in culinary techniques, kitchen management, and menu planning, with a special emphasis on grilling and outdoor cooking.
Dave Mitchell is the heart behind Daves Grill, a cook, writer, and lover of all things grilled. He studied Culinary Arts at Asheville-Buncombe Technical Community College and spent years cooking, testing, and sharing recipes that actually work.
Dave started Daves Grill to keep things simple: one great recipe at a time. His food is bold, easy to follow, and made for real people with regular kitchens. From juicy steaks to quick sides, Dave’s recipes bring the heat without the hassle.